
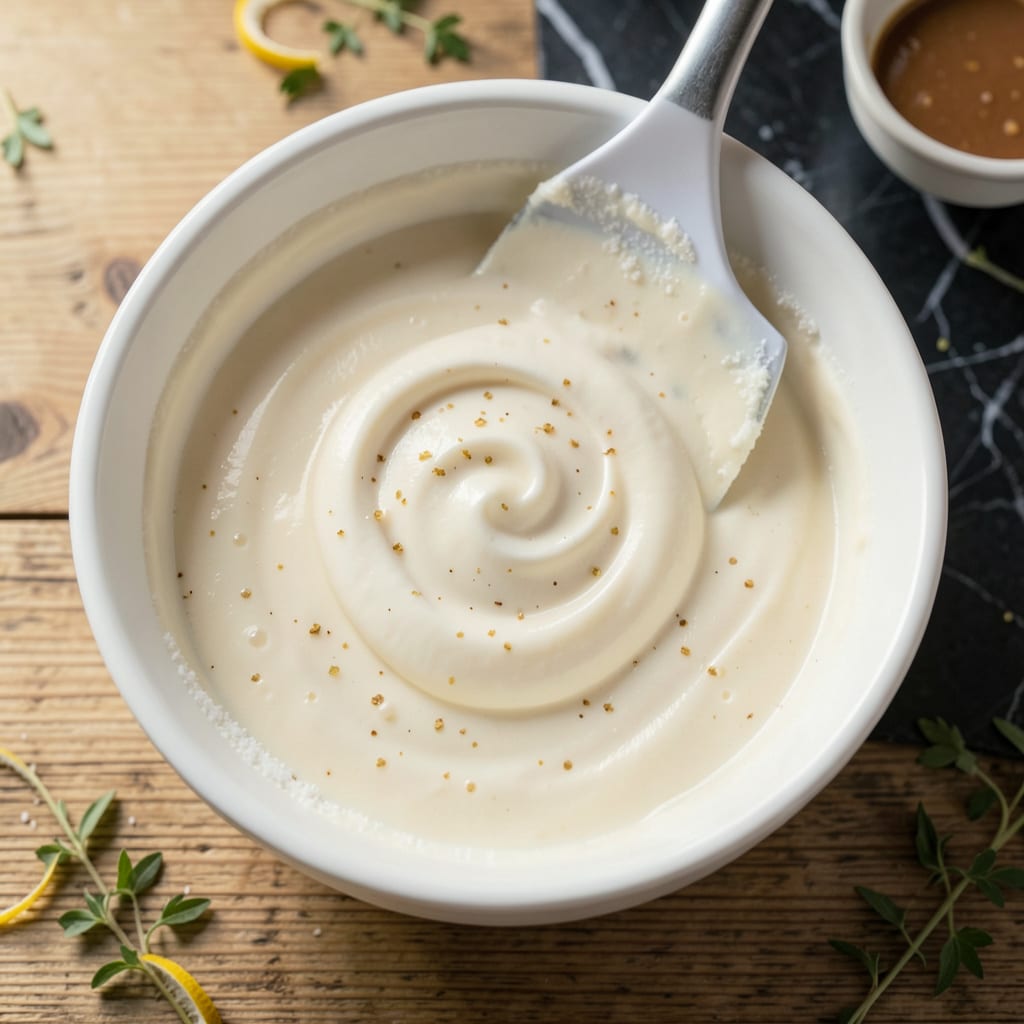
The foundation of any exceptional cheesecake lies in its filling, and this ultra-creamy Philadelphia-style version delivers professional results every time. Using the perfect ratio of full-fat cream cheese to sugar and eggs, this recipe creates a velvety smooth base that’s rich without being overly dense. The secret is ensuring all ingredients are at room temperature before mixing—this prevents lumps and guarantees that signature silky texture.
What makes this filling truly versatile is its adaptability. Use it as-is for classic baked cheesecakes, or adjust the consistency slightly for no-bake versions. It holds up beautifully when piped into tarts, layered in parfaits, or even swirled into other desserts. With a shelf life of up to 5 days refrigerated, you can prepare this filling in advance for effortless dessert assembly when needed.
Ingredients for Philadelphia Cheesecake Filling
Eight professional-grade ingredients combine to create this ultra-creamy, velvety smooth Philadelphia-style cheesecake filling base.
| Ingredient | Amount | Notes |
|---|---|---|
| Full-Fat Philadelphia Cream Cheese 🧀 | 32 oz | Four 8-ounce blocks, room temperature |
| Granulated Sugar 🍚 | 1 ¼ cups | Ultra-fine for smoothest texture |
| Large Eggs 🥚 | 4 whole | Room temperature, grade AA preferred |
| Heavy Whipping Cream 🥛 | ½ cup | Cold, 36-40% butterfat content |
| Pure Vanilla Extract 🌿 | 1 tbsp | Madagascar bourbon variety recommended |
| Fresh Lemon Juice 🍋 | 1 tbsp | Newly squeezed for brightness |
| Sea Salt 🧂 | ¼ tsp | Fine grain, Diamond Crystal preferred |
| Unsalted Butter 🧈 | 2 tbsp | Melted and cooled to room temperature |
The cream cheese quality is non-negotiable for professional results. Philadelphia brand full-fat blocks (not tubs) yield the optimal texture and stability. Ensure all dairy products are room temperature (68-72°F) before mixing—this prevents graininess. For the heavy cream, seek out organic or ultra-pasteurized varieties with at least 36% butterfat content, available at Whole Foods or specialty grocers. The vanilla extract should be pure, not imitation; Nielsen-Massey or Rodelle brands deliver superior flavor complexity.
For dietary adaptations, Kite Hill almond cream cheese provides the closest vegan alternative, though texture may vary slightly. Superfine sugar can be substituted with regular granulated processed in a food processor for 30 seconds. In a pinch, sour cream replaces heavy cream at equal volume, though the filling will be slightly tangier. Always use fresh lemon juice—bottled lacks the necessary acidity to balance the richness. For no-bake applications, increase cream cheese by 4 oz and reduce eggs to 2 for proper setting.
The prepared filling maintains optimal quality refrigerated in an airtight container for 5 days. For longer storage, portion into 8-ounce containers and freeze for up to 3 months—thaw overnight in the refrigerator before use. Avoid plastic wrap directly on the surface; instead, use parchment paper pressed against the filling to prevent skin formation. When scaling the recipe, maintain the precise 4:1 cream cheese-to-egg ratio for structural integrity.
Why You’ll Love This Recipe
- Five-Ingredient Magic: Honestly, this is the kind of recipe that makes me look like a pro with almost no effort. Full-fat Philadelphia cream cheese, eggs, sugar, vanilla, and heavy cream—no fancy techniques, just mix, pour, and bake.
- That Creamy Luxe Texture: Here’s what sold me—the whipping cream makes the filling impossibly smooth, like silk on a spoon. The vanilla adds warmth, but it’s the cream cheese that gives it that classic tangy richness.
- Dessert for Any Day: I’ve used this filling for everything from holiday cheesecakes to Tuesday night parfaits with crushed graham crackers. (Yes, even on a Tuesday night.) It’s just as happy in a pie crust as it is layered with fruit.
- Makes Extra—Thank Goodness: Between us, I always double the batch because leftovers keep beautifully for days. A slice with coffee, a spoonful straight from the fridge—no judgment here. It’s my secret weapon for unexpected guests.
Step-by-Step Instructions for Philadelphia Cheesecake Filling
Mastering this ultra-creamy base requires precision and proper technique—follow these steps for perfect results every time.
Step 1: Prepare the Cream Cheese Base
Begin with the 32 oz Full-Fat Philadelphia Cream Cheese at room temperature. Using a stand mixer fitted with the paddle attachment, beat the cream cheese on medium speed for 2-3 minutes until completely smooth and free of lumps. Scrape down the sides and bottom of the bowl with a silicone spatula to ensure even mixing.
This step is critical for achieving that signature velvety texture. Cold cream cheese won’t blend properly, leaving you with undesirable lumps in your final filling. The mixture should appear light and fluffy, with no visible graininess when you pause the mixer.
Step 2: Incorporate the Sugar Gradually
With the mixer running on low speed, gradually add the 1.25 cups Granulated Sugar over the course of 30 seconds. Once all the sugar is incorporated, increase the speed to medium-high and beat for an additional 2-3 minutes until the mixture becomes light and airy.
The sugar should fully dissolve into the cream cheese, creating a smooth, glossy base. Stop the mixer periodically to scrape the bowl and check for undissolved sugar granules. The proper incorporation at this stage ensures a uniformly sweet filling without any gritty texture.
Step 3: Add the Wet Ingredients in Stages
Reduce the mixer speed to low and add the 4 whole Large Eggs one at a time, allowing each to fully incorporate before adding the next. After the eggs, add the 0.5 cup Heavy Whipping Cream, 1 tbsp Pure Vanilla Extract, 1 tbsp Fresh Lemon Juice, and 0.25 tsp Sea Salt. Mix just until combined, about 30-45 seconds.
Overmixing at this stage can incorporate too much air, which may cause cracking during baking. The filling should be perfectly smooth but not aerated. The lemon juice adds subtle brightness that balances the richness, while the vanilla provides depth of flavor.
Step 4: Finish with Melted Butter
With the mixer running on low speed, slowly drizzle in the 2 tbsp Unsalted Butter that has been melted and cooled to room temperature. Mix for an additional 15-20 seconds until fully incorporated. The butter should be completely emulsified into the filling, with no visible separation.
This final addition enhances the richness and creates an even smoother texture. The filling is now ready for use in your cheesecake recipe. It should have a thick, pourable consistency that coats the back of a spoon but still flows easily when poured.
Step 5: Check for Proper Consistency
Before using the filling, perform a visual and textural check. The mixture should be completely smooth with no visible lumps or graininess. When you run a spatula through it, the filling should leave a clean path that slowly fills in, indicating the proper viscosity.
If the filling appears too thick, it may have been overmixed. If it seems too thin, the cream cheese may not have been at proper room temperature. In either case, gently fold the filling by hand for 30 seconds to correct the texture before proceeding with your recipe.
Serving Suggestions for This philadelphia cheesecake filling
Classic Cheesecake Presentation
For a traditional approach, pour this filling into a pre-baked graham cracker crust and bake at 325°F for 50-60 minutes until the edges are set but the center still jiggles slightly. Let it cool completely before chilling for at least 4 hours. I love serving this with a simple dusting of powdered sugar and fresh berries. 🍓
No-Bake Dessert Parfaits
Layer this filling with crushed cookies and whipped cream in individual glasses for elegant no-bake parfaits. I recommend using Oreo crumbs or gingersnaps for contrast. Chill for 2 hours before serving to let the flavors meld. The creamy layers look stunning in clear glassware.
Fruit-Topped Tartlets
Pipe the filling into pre-baked mini tart shells and top with seasonal fruit. My favorites are raspberries in summer or candied cranberries for winter. A drizzle of warmed apricot jam adds beautiful shine. These make perfect individual servings for parties.
Dip for Fruit Platter
For a fun twist, serve this filling as a dip with fresh fruit and cookies. I thin it slightly with 2 tbsp heavy cream for easier dipping. Arrange with apple slices, strawberries, and shortbread cookies on a platter. Kids and adults alike love this interactive dessert option. 🥣
Swirled Brownies
Create marbled cheesecake brownies by dropping spoonfuls of this filling onto prepared brownie batter. Use a butter knife to gently swirl before baking. The contrast between rich chocolate and creamy filling is divine. I bake these at 350°F for 30-35 minutes until set.
Breakfast Crepes
Spread a thin layer of this filling onto warm crepes, then roll up and top with maple syrup or fruit compote. The slight tang of the cream cheese pairs beautifully with sweet breakfast toppings. I make these for special weekend brunches—they feel decadent but are surprisingly easy.
Nutrition Facts

- 6 Egg Cake Recipe with Oil: Light as Air With Buttery Moisture - October 4, 2026
- 4 Bean Casserole Recipe: One-Pan Heartiness With Smoky Paprika Depth - October 4, 2026
- 3-Ingredient Keto Mug Cake Recipe: Microwave Magic in 2 Minutes - October 4, 2026