
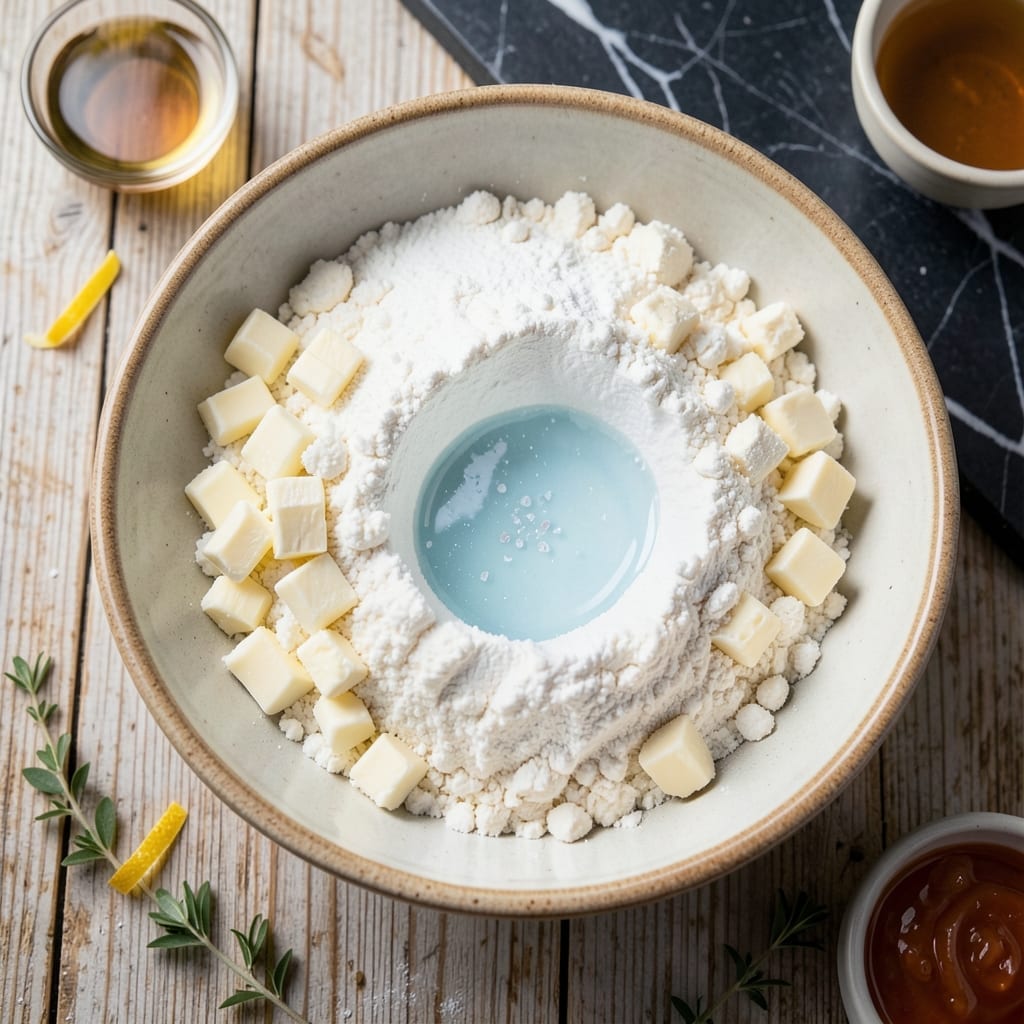
Achieving flaky layers in pie crust comes down to technique, not luck. This all-butter version delivers the perfect balance of tenderness and structure that every baker strives for.
The secret lies in keeping the butter cold throughout the process, which creates those coveted layers as it melts during baking. I use a simple ratio of flour to butter that guarantees consistent results every time.
With just a few basic ingredients and the right method, you’ll produce a crust that’s golden, crisp, and flaky—exactly what you need for pies that impress. The process takes about 30 minutes of active time.
This foundation works for any pie filling you choose. Here’s how to make it right.
Ingredients for Pie Crust Recipe Butter
Six simple ingredients, one flaky masterpiece. Nothing fancy, just perfect layers.
| Ingredient | Amount | Notes |
|---|---|---|
| All-Purpose Flour 🌾 | 2 ½ cups | Spoon and level, not packed |
| Unsalted Butter 🧈 | 1 cup | Very cold, cut into cubes |
| Ice Water 💧 | ½ cup | Plus 1-2 tbsp as needed |
| Salt 🧂 | 1 tsp | Fine sea salt preferred |
| Granulated Sugar 🍚 | 1 tbsp | Optional, for sweet pies |
| Apple Cider Vinegar 🍎 | 1 tbsp | Helps tenderize gluten |
The butter is non-negotiable here. European-style butter (like Plugrá or Kerrygold) has higher fat content, which means flakier layers, but standard supermarket butter works fine if it’s cold enough. I grab mine from Whole Foods when I’m stocking up. The flour? King Arthur all-purpose is my go-to—consistent protein content every time. Don’t even think about using warm butter (the cold is what creates those layers).
No apple cider vinegar? White vinegar or lemon juice works in a pinch. Out of all-purpose flour? Pastry flour gives a slightly more tender crust (swap 1:1), but avoid bread flour—too much protein makes it tough. If you’re making a sweet pie, the sugar can be increased to 2 tbsp. For savory, skip it entirely. And yes, the vinegar is subtle—you won’t taste it, but it does its job.
The dough keeps in the fridge for 2 days or freezes for 3 months (wrap tightly). Let it sit at room temp for 10 minutes before rolling—cold dough cracks. Baked crust? Cool completely before storing. Keeps 3 days at room temp or 1 week frozen.
Why You’ll Love This Recipe
- 5-Minute Mix: I just dump flour, cold butter, and ice water in a bowl—no fancy tools, no fuss.
- Buttery Heaven: That flaky, rich crust from real butter? It’s the reason my pies disappear first at potlucks.
- Freezer Friendly: I make double batches and freeze the dough—pie on demand, even on a random Tuesday.
- Pennywise Perfection: All-purpose flour and butter keep it cheap, but it tastes like a bakery splurge. Honestly, my wallet thanks me.
Step-by-Step Instructions for Butter Pie Crust
This method delivers the flakiest, most reliable crust with layers you can actually see.
Step 1: Cut Cold Butter Into Flour
In a large bowl, combine the 2.5 cups All-Purpose Flour, 1 tsp Salt, and 1 tbsp Granulated Sugar. I always use fine sea salt for even distribution. Add the 1 cup Unsalted Butter (cold and cubed) and work it into the flour with your fingers or a pastry cutter.
You want pea-sized butter pieces coated in flour—this creates those flaky layers. Don’t overwork it; visible butter chunks are good. The key is keeping everything cold so the butter doesn’t melt. If your hands get warm, take a break and chill the bowl for 5 minutes.
Step 2: Add Liquid and Form Dough
Make a well in the center and add the 1 tbsp Apple Cider Vinegar and 0.5 cup Ice Water. Use a fork to gently mix, starting from the center and working outward. The vinegar tenderizes the gluten, which keeps the crust from getting tough.
Add just enough water so the dough starts to come together but still looks shaggy. It should hold when pressed but not be sticky. If it’s too dry, add more water 1 tablespoon at a time. Turn the dough onto a floured surface and gently shape it into a disk—don’t knead it.
Step 3: Chill the Dough Thoroughly
Wrap the dough disk tightly in plastic wrap and refrigerate for at least 1 hour (I prefer 2 hours or overnight). Chilling relaxes the gluten and rechills the butter, which is essential for flakiness. If you rush this step, the crust will shrink and lose its layers when baked.
For extra insurance against sticking, I like to chill the dough between two sheets of parchment paper. This also makes it easier to roll out later. The dough is ready when it feels firm but still pliable.
Step 4: Roll and Shape the Crust
On a lightly floured surface, roll the chilled dough into a 12-inch circle about ⅛-inch thick. Start from the center and roll outward in one direction, then turn the dough 45 degrees and repeat. This prevents sticking and ensures even thickness.
Check frequently for cracks or tears—if the dough starts to break, patch it with a little extra flour and water. Transfer the rolled dough to a 9-inch pie dish, gently pressing it into the bottom and up the sides. Trim any excess, leaving a ½-inch overhang for crimping.
Step 5: Blind-Bake for a Perfect Finish
For a pre-baked crust, freeze the lined pie dish for 15 minutes to set the shape. Prick the bottom all over with a fork (this prevents bubbles), line with parchment paper, and fill with pie weights or dried beans. Bake at 375°F for 15 minutes, then remove the weights and bake for another 10-12 minutes until the edges are light golden brown.
If baking with a filling, skip the weights and proceed directly to filling and baking as your recipe directs. The crust will finish cooking as the filling sets.
Pro Tips For Making Pie Crust Recipe Butter
- Chill the Butter: Cut the butter into small cubes and refrigerate for 15 minutes before mixing—I learned this the hard way after ending up with a greasy, flat crust.
- Use Ice Water: Fill a glass with water and ice cubes, then measure from that. Cold water prevents the butter from melting, which guarantees a flaky texture.
- Don’t Overwork Dough: Mix just until the dough comes together. After burning three batches, I finally figured out that overworking makes the crust tough.
- Rest Before Rolling: Wrap the dough and refrigerate for at least 30 minutes. My grandmother swore by this, and she was right—it prevents shrinking when baked.
Health Benefits of This Recipe
Butter Benefits
Butter in pie crust isn’t just about flavor—it provides vitamin A, which supports eye health and immune function. A 1-tbsp serving of butter contains about 11% of your daily vitamin A needs. It’s a small but meaningful nutritional boost. 💪
Energy Source
Butter is a rich source of saturated fats, which provide concentrated energy. While you should consume in moderation, these fats help your body absorb fat-soluble vitamins like A, D, E, and K from other ingredients in your meal.
Minimal Processing
When you make crust from scratch with unsalted butter, you avoid the trans fats and preservatives often found in store-bought versions. This gives you more control over what goes into your food and your body.
Flour Nutrition
All-purpose flour provides small amounts of iron and B vitamins, including folate and thiamine. These nutrients support energy metabolism and red blood cell production. Enriched flour offers more of these micronutrients than unenriched varieties.
Balanced Approach
While this crust isn’t a health food, it fits into a balanced diet when enjoyed occasionally. The combination of butter and flour creates a satisfying base that can make pies more filling, potentially helping with portion control.
Nutrition Facts
Frequently Asked Questions
Why does the butter need to stay cold?
Cold butter creates flaky layers by melting during baking, releasing steam that separates the dough. If it warms up, the layers won’t form properly, resulting in a dense crust. Keep everything chilled until it hits the oven.
Can I use salted butter instead?
It’s best to avoid it. Salted butter can make the crust too salty, especially since you’re adding salt separately. If it’s all you have, reduce the added salt to ½ tsp.
What if my dough cracks while rolling?
Don’t panic! Patch cracks with a bit of flour and water, or press the edges together. Chilling the dough for 10 minutes before rolling can prevent this.
How do I prevent a soggy bottom crust?
Blind-bake the crust first, or sprinkle a thin layer of breadcrumbs or crushed cornflakes before adding the filling. This creates a barrier against moisture.

- 6 Egg Cake Recipe with Oil: Light as Air With Buttery Moisture - October 4, 2026
- 4 Bean Casserole Recipe: One-Pan Heartiness With Smoky Paprika Depth - October 4, 2026
- 3-Ingredient Keto Mug Cake Recipe: Microwave Magic in 2 Minutes - October 4, 2026