
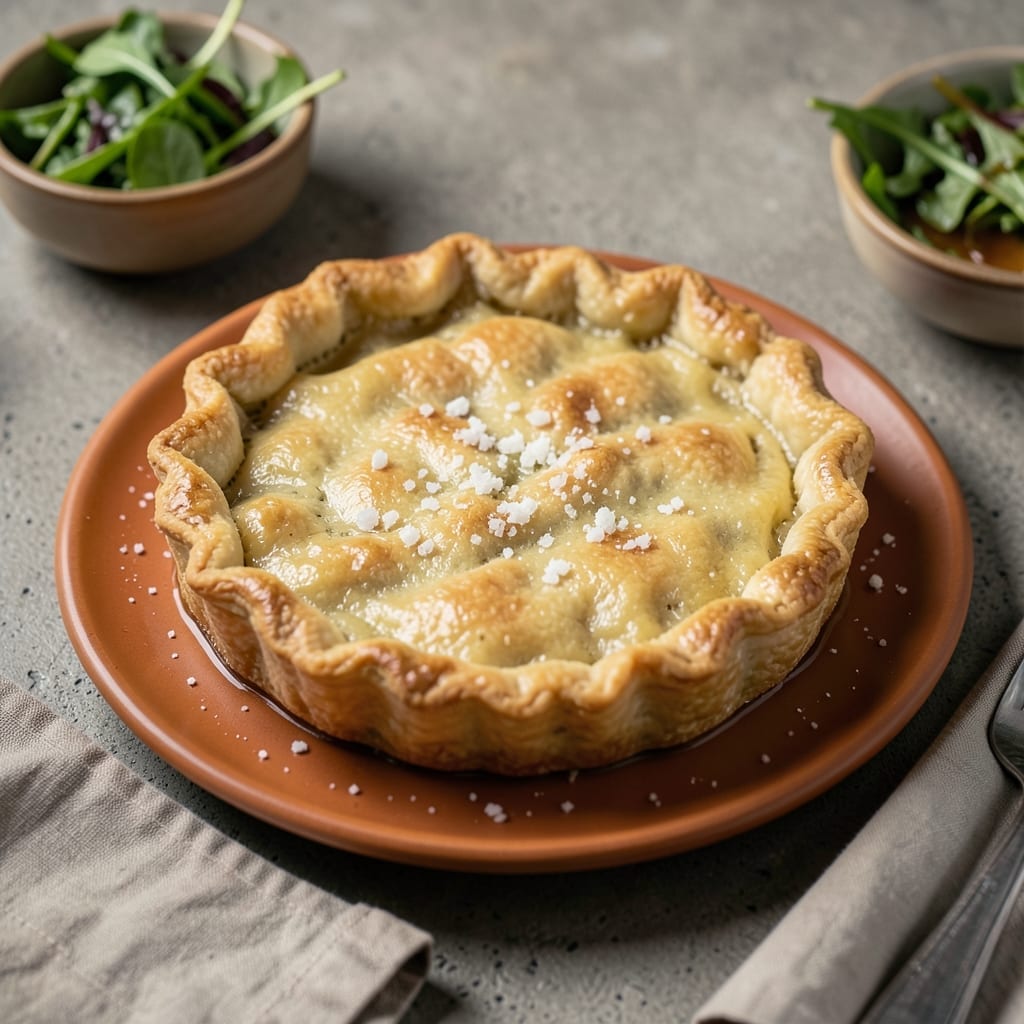
Achieving a flaky, tender pie crust without shortening is absolutely possible with the right technique. This recipe relies on cold butter and a gentle touch to create those coveted layers.
The secret is keeping everything cold and working quickly. You’ll end up with a golden, buttery crust that holds its shape and melts in your mouth.
Ingredients for Pie Crust Recipe No Shortening
Cold butter and basic pantry staples create a golden, flaky pie crust with perfect layers.
| Ingredient | Amount | Notes |
|---|---|---|
| All-Purpose Flour 🌾 | 2 ½ cups | Spoon and level for accuracy |
| Unsalted Butter 🧈 | 1 cup | Cold, cut into small cubes |
| Ice Water 💧 | ¼ cup | Plus 1 tbsp as needed |
| Granulated Sugar 🍚 | 1 tsp | Optional, for sweet crusts |
| Salt 🧂 | ½ tsp | Fine sea salt preferred |
| Apple Cider Vinegar 🍏 | 1 tsp | Enhances flakiness |
| Baking Powder 🧂 | ¼ tsp | Optional, for extra lift |
The butter is crucial here. Use high-fat European-style butter if available—it has less water, which means flakier layers. Keep it ice-cold until you’re ready to use it. King Arthur Flour is my go-to for all-purpose, but any unbleached variety works. The vinegar might seem odd, but it tenderizes the gluten just enough without affecting flavor.
No unsalted butter? Salted butter works too—just omit the added salt. Apple cider vinegar can be swapped for white vinegar or lemon juice. If you’re out of ice, chill regular water in the freezer for 10 minutes. For a richer flavor, replace 2 tablespoons of water with cold buttermilk.
This dough keeps in the fridge for 2-3 days or can be frozen for up to 3 months. Wrap it tightly in plastic wrap to prevent drying. Let it rest at room temperature for 10-15 minutes before rolling for the best texture.
Why You’ll Love This Recipe
- Five Ingredients Only: I love that it comes together with just flour, butter, ice water, sugar, and salt—no fancy pantry items.
- Buttery Richness: The cold unsalted butter makes it flaky and rich, with that melt-in-your-mouth texture we all crave.
- Endless Possibilities: Sweet pies, savory tarts, even hand pies—I’ve used this crust for all of them with zero complaints.
Step-by-Step Instructions for Pie Crust Without Shortening
This method delivers flaky, golden layers using only butter and careful technique.
Step 1: Combine Dry Ingredients
In a large mixing bowl, whisk together the 2.5 cups All-Purpose Flour, 0.5 tsp Salt, 1 tsp Granulated Sugar, and 0.25 tsp Baking Powder. The whisking aerates the flour and distributes the leavening evenly, which creates a more consistent texture in your final crust.
Make sure there are no visible streaks of flour or baking powder left. I always sift my flour first to prevent lumps, but if you skipped that step, whisk vigorously for at least 30 seconds to break up any clumps. This foundation ensures your crust rises properly and has that tender, flaky quality we’re after.
Step 2: Cut in Cold Butter
Add the 1 cup Unsalted Butter (cold and cut into small cubes) to the dry ingredients. Using a pastry cutter or your fingers, work the butter into the flour until the mixture resembles coarse crumbs with some pea-sized butter pieces remaining. I prefer using my fingers for this step—it gives me better control over the texture.
Keep your hands cold by dipping them in ice water occasionally. You want to see visible flakes of butter throughout the mixture—these create the flaky layers in your crust. If the butter starts to melt or the mixture looks greasy, stop and chill the bowl in the freezer for 5 minutes before continuing.
Step 3: Add Liquid and Form Dough
Create a well in the center of your flour-butter mixture. Pour in the 0.25 cup Ice Water and 1 tsp Apple Cider Vinegar. Using a fork, gently mix the liquid into the dry ingredients, starting from the center and working outward. The vinegar helps tenderize the gluten, resulting in a more flaky crust.
Stop mixing as soon as the dough starts to come together—it will look shaggy and slightly dry in spots. Overworking the dough develops gluten, which makes for a tough crust. If the dough seems too dry, add ice water 1 tablespoon at a time until it just holds together when pressed. I usually need that extra 1 tablespoon mentioned in the ingredients list.
Step 4: Chill and Rest the Dough
Turn the dough out onto a lightly floured surface and gently shape it into a disk about 1 inch thick. Don’t knead or press too firmly—just bring it together enough to form a cohesive shape. Wrap the disk tightly in plastic wrap and refrigerate for at least 1 hour, or up to 2 days.
This resting period allows the gluten to relax and the butter to firm up again. It also gives the flour time to fully hydrate, which makes the dough easier to roll out. I’ve found that dough rested overnight produces the flakiest results, but even 1 hour makes a significant difference in texture and workability.
Step 5: Roll and Fit the Crust
On a lightly floured surface, roll the chilled dough into a circle about 12 inches in diameter and ⅛ inch thick. Start from the center and roll outward, turning the dough occasionally to ensure even thickness. If the dough starts to stick, sprinkle a little more flour underneath.
To transfer to your pie dish, loosely roll the dough around your rolling pin, then unroll it over the dish. Gently press the dough into the bottom and sides, being careful not to stretch it. Trim the edges to leave a ½-inch overhang, then fold the overhang under and flute the edges with your fingers or a fork. Chill the fitted crust for 30 minutes before blind baking or filling to prevent shrinking.
Pro Tips For Making Pie Crust Recipe No Shortening
- Keep Butter Ice-Cold: Cut your unsalted butter into small cubes and chill it for 15 minutes before mixing—this prevents it from melting into the flour, which is what creates that perfect flaky texture.
- Measure Water Precisely: Use 1 tablespoon of ice water at a time and stop as soon as the dough just comes together. Too much water makes the crust tough, and I learned this the hard way.
- Skip Warm Hands: Handle the dough as little as possible and use cold hands to prevent the butter from softening. Sounds weird, but it works.
- Rest Before Rolling: Let the dough rest in the fridge for at least 30 minutes before rolling it out. This relaxes the gluten and makes it easier to work with—I was skeptical until I tried it.
Wine and Beer Pairings for These Flavors
Beer Pairings
A flaky, buttery pie crust made without shortening deserves a beer that complements its rich, layered texture. Try a Belgian Tripel like Westmalle Tripel—its fruity esters and spicy notes cut through the crust’s richness while highlighting the filling’s sweetness. For a darker option, a Brown Ale such as Newcastle Brown Ale offers caramel and toffee undertones that pair beautifully with warm, spiced fruit pies like apple or pear.
Wine Pairings
Wine lovers will delight in pairing a no-shortening pie crust with a glass of Riesling. A slightly off-dry Dr. Loosen Blue Slate Riesling balances the crust’s buttery notes with its crisp acidity and hints of stone fruit. For a bolder choice, a Pinot Noir like Meiomi Pinot Noir brings out the earthy, savory side of the crust, especially when paired with berry-filled pies.
Non-Alcoholic Options
For a non-alcoholic twist, a sparkling apple cider like Martinelli’s Gold mirrors the orchard-fresh flavors of fruit pies while its effervescence cleanses the palate. Alternatively, a chamomile tea with a touch of honey offers a soothing, floral contrast to the crust’s richness, making it a cozy choice for any pie lover.
Nutrition Facts

- 6 Egg Cake Recipe with Oil: Light as Air With Buttery Moisture - October 4, 2026
- 4 Bean Casserole Recipe: One-Pan Heartiness With Smoky Paprika Depth - October 4, 2026
- 3-Ingredient Keto Mug Cake Recipe: Microwave Magic in 2 Minutes - October 4, 2026