
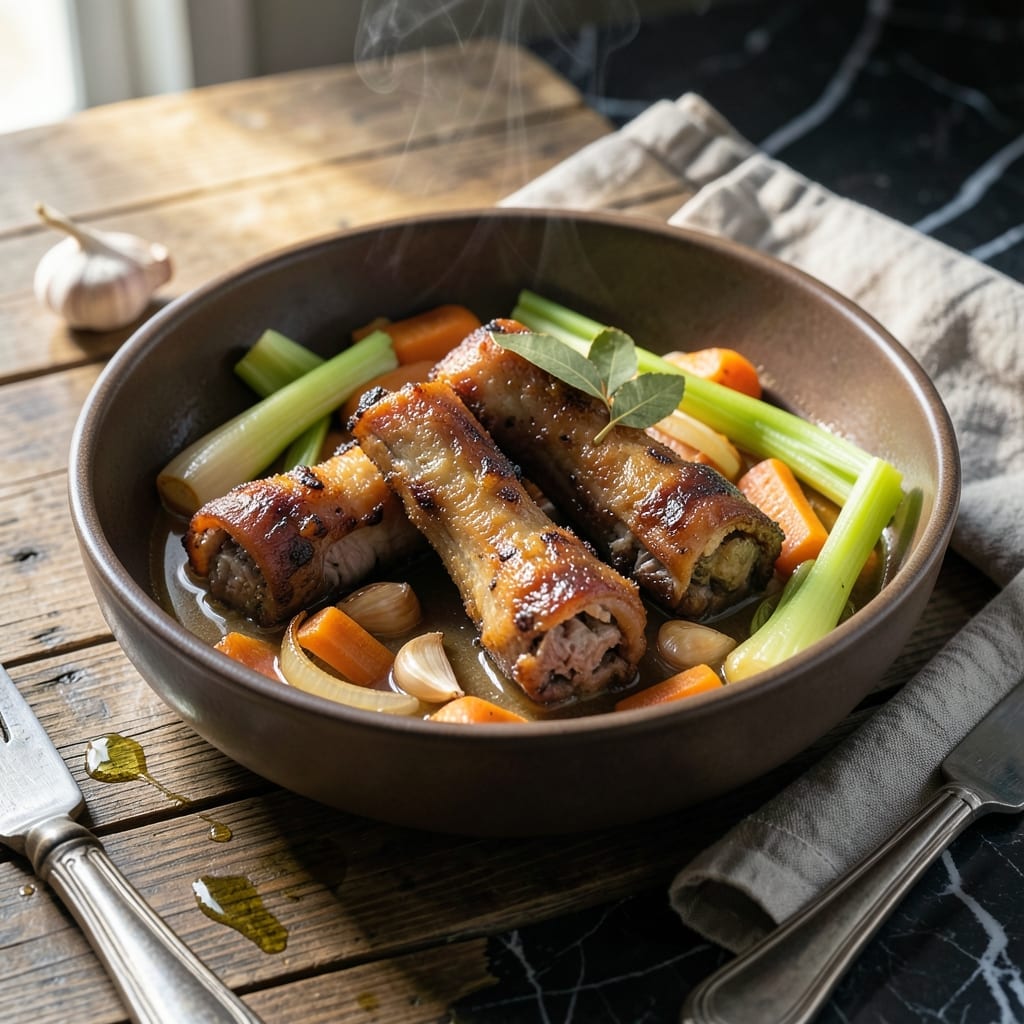
This pressure cooker method transforms tough pig feet into fall-off-the-bone tenderness in a fraction of traditional cooking time.
By harnessing the sealed environment of a pressure cooker, collagen breaks down rapidly, yielding rich, gelatinous meat that melts in your mouth. The process preserves natural flavors while infusing seasonings deeply into each piece.
What emerges is a dish with restaurant-quality texture and depth, achieving in hours what normally takes all day. The results speak for themselves—tender meat with a velvety sauce that forms naturally from the cooking process.
Perfect for those seeking authentic flavor without the long wait. Here’s how to make it right the first time.
Ingredients for Pig Feet Recipe Pressure Cooker
Transform tough cuts into restaurant-quality tenderness with these carefully selected ingredients.
| Ingredient | Amount | Notes |
|---|---|---|
| Pig Feet 🐷 | 4 whole | Split or whole, cleaned thoroughly |
| Yellow Onion 🧅 | 1 whole | Large, roughly chopped |
| Carrots 🥕 | 3 whole | Peeled, cut into chunks |
| Celery Stalks 🌿 | 3 whole | Cut into large pieces |
| Garlic Cloves 🧄 | 6 cloves | Smashed, peeled |
| Bay Leaves 🍃 | 2 whole | Dried, whole leaves |
| Black Peppercorns 🌶️ | 1 tbsp | Whole, lightly crushed |
| Kosher Salt 🧂 | 2 tbsp | Diamond Crystal preferred |
| Apple Cider Vinegar 🍏 | ½ cup | For acidity balance |
| Water or Low-Sodium Chicken Stock 💧 | 6 cups | Enough to cover pig feet |
| Dried Thyme 🍃 | 1 tsp | Crushed between fingers |
| Dried Rosemary 🌿 | 1 tsp | Crushed between fingers |
| Smoked Paprika 🌶️ | 1 tsp | For depth of flavor |
The pig feet are the foundation—source them from a trusted butcher or specialty meat market for the freshest quality. Look for feet that are plump, with smooth skin and no off odors. Asian or Latin markets often carry them at better prices than mainstream grocers. The collagen content is what creates that signature gelatinous texture, so avoid pre-cooked or frozen options when possible.
No apple cider vinegar? White wine vinegar or lemon juice works in a pinch, though the flavor profile will shift slightly. For the stock, vegetable broth can substitute for chicken if needed. Fresh herbs can replace dried—use three times the amount. If you can’t find pig feet, pork hocks offer a similar texture and richness, though the cooking time may need slight adjustment.
Pig feet keep well in the freezer for up to 6 months, so stock up when you find a good source. Once cooked, the dish holds in the fridge for 4-5 days and the flavors only deepen. The natural gelatin makes this perfect for reheating—just add a splash of water to loosen the sauce.
Why You’ll Love This Recipe
- Set It & Forget: The pressure cooker does all the work—just toss in pig feet, onions, and garlic, then walk away.
- Fall-Off-The-Bone Good: Honestly, the slow-cooked collagen from the pig feet with carrots and celery? Ridiculously tender and rich.
- Feeds My Crew: I make a big batch for Sunday dinner, and it stretches for leftovers all week.
- Budget Stretcher: Pig feet are cheap, and this recipe turns them into a hearty meal with just a few veggies.
Step-by-Step Instructions for Pig Feet Pressure Cooker
Master this technique to achieve tender, rich pig feet with minimal effort and maximum flavor.
Step 1: Prepare and Clean the Pig Feet
Begin by thoroughly cleaning the 4 whole Pig Feet under cold running water, scrubbing off any debris or hair. I use a stiff brush for stubborn spots. This step is non-negotiable—cleanliness ensures the final product is safe and enjoyable.
Trim any excess fat or disjointed pieces, then pat them completely dry with paper towels. Proper drying allows the seasoning to adhere better and promotes even cooking. Set the prepared feet aside while you prep the remaining ingredients.
Step 2: Sear and Build the Flavor Base
Set your pressure cooker to the sauté function on medium-high heat. Add the 1 whole Yellow Onion, 3 whole Carrots, and 3 whole Celery Stalks to the pot. Sauté for 5-6 minutes until the vegetables begin to soften and develop a light golden color.
Add the 6 cloves Garlic Cloves, 1 tbsp Black Peppercorns, 1 tsp Dried Thyme, 1 tsp Dried Rosemary, and 1 tsp Smoked Paprika. Stir for 1 minute until the spices become fragrant. This builds a deep, aromatic foundation for the dish.
Step 3: Deglaze and Pressure Cook
Pour in the 0.5 cup Apple Cider Vinegar to deglaze the pot, scraping up any browned bits from the bottom with a wooden spoon. These bits, known as fond, are packed with flavor and will enrich your dish.
Add the cleaned pig feet to the pot, then pour in the 6 cups Water or Low-Sodium Chicken Stock. Stir in the 2 tbsp Kosher Salt. Add the 2 whole Bay Leaves. Secure the lid and set the pressure cooker to high pressure for 60 minutes.
Step 4: Natural Release and Final Check
Once the cooking time is complete, allow the pressure to release naturally for 15 minutes. This gradual release prevents the meat from toughening and ensures it retains its tenderness.
After the natural release, carefully open the lid. The pig feet should be fork-tender, with the meat easily pulling away from the bone. If they’re not quite tender, reseal the lid and cook for an additional 10-15 minutes on high pressure.
Step 5: Serve and Enjoy
Remove the pig feet from the pot and transfer them to a serving dish. The broth left in the pot can be strained and served as a rich, flavorful accompaniment or reduced into a sauce.
Serve the pig feet hot, garnished with a bit of the cooking liquid. The meat should fall off the bone with minimal effort, delivering a rich, collagen-packed bite with every mouthful. This dish is best enjoyed fresh but can be reheated gently in the reserved broth.
Pro Tips For Making Pig Feet Recipe Pressure Cooker
- Pre-Sear the Feet: Brown the pig feet in batches on all sides before pressure cooking—about 3-4 minutes per side in a hot pot. I learned this the hard way; skipping this step leaves the meat bland and the broth pale.
- Deglaze Thoroughly: After searing, pour in a cup of broth or water and scrape the bottom of the pot to release all those browned bits. Sounds tedious, but it prevents the “burn” error on your pressure cooker and adds deep flavor.
- Skip the Skin Trimming: Resist the urge to remove all the skin and fat before cooking; it breaks down beautifully under pressure and gives the dish a rich, silky texture. My grandmother swore by this, and she was right.
- Add Vinegar Last: If your recipe calls for vinegar to soften the bones, stir it in after pressure cooking. Adding it earlier can make the meat tough—I ruined a batch before figuring this out.
Common Mistakes When Making pig feet recipe pressure cooker
Insufficient Cleaning
Skipping the thorough cleaning step is the most common mistake. I’ve seen people rush this and end up with gritty, unpleasant bits in their final dish. Use a stiff brush under cold water and trim any hair or debris carefully. This ensures a clean, enjoyable eating experience. 💡
Overfilling the Cooker
Never exceed the ⅔ maximum fill line in your pressure cooker. Pig feet expand during cooking, and overfilling risks clogging the valve or uneven cooking. I leave at least 2 inches of headspace to allow for proper pressure buildup and circulation.
Skipping the Sauté Step
Some try to dump everything in at once to save time. The sauté step develops the fond—those flavorful browned bits—that deepen the broth’s richness. I always take the extra 5-6 minutes to build this flavor foundation.
Improper Pressure Release
Releasing the pressure too quickly can make the meat tough. I always let it release naturally for the full 15 minutes before opening the lid. This gradual release keeps the meat tender and juicy.
Underseasoning the Broth
Pig feet need bold seasoning to cut through their richness. I use the full 2 tbsp Kosher Salt and all the spices listed—they’re essential for balancing the collagen-heavy meat. Taste the broth before serving and adjust as needed. 🌟
Ignoring the Natural Gelatin
The broth will thicken as it cools due to the gelatin released from the pig feet. This is normal and desirable—it’s a sign of successful collagen breakdown. I often chill the dish overnight to let the gelatin set fully before reheating.
Nutrition Facts
Frequently Asked Questions
How long does it take to pressure cook pig feet?
Set the cooker to high pressure for 60 minutes, followed by a 15-minute natural release. This ensures fall-off-the-bone tenderness without drying out the meat.
Can I use frozen pig feet in a pressure cooker?
Yes, but thaw them first in the fridge overnight. Cooking from frozen may require 10-15 extra minutes at high pressure to reach the same tenderness. Never exceed the ⅔ fill line.
Why is my broth gelatinous after cooking?
This is normal! Pig feet are rich in collagen, which breaks down into gelatin during cooking. The thicker broth is a sign of success and adds richness to the dish.
What if the meat isn’t tender enough?
Reseal the lid and cook for an additional 10-15 minutes on high pressure. Ensure the cooker has enough liquid and that the feet are fully submerged for even cooking.

- 6 Egg Cake Recipe with Oil: Light as Air With Buttery Moisture - October 4, 2026
- 4 Bean Casserole Recipe: One-Pan Heartiness With Smoky Paprika Depth - October 4, 2026
- 3-Ingredient Keto Mug Cake Recipe: Microwave Magic in 2 Minutes - October 4, 2026