
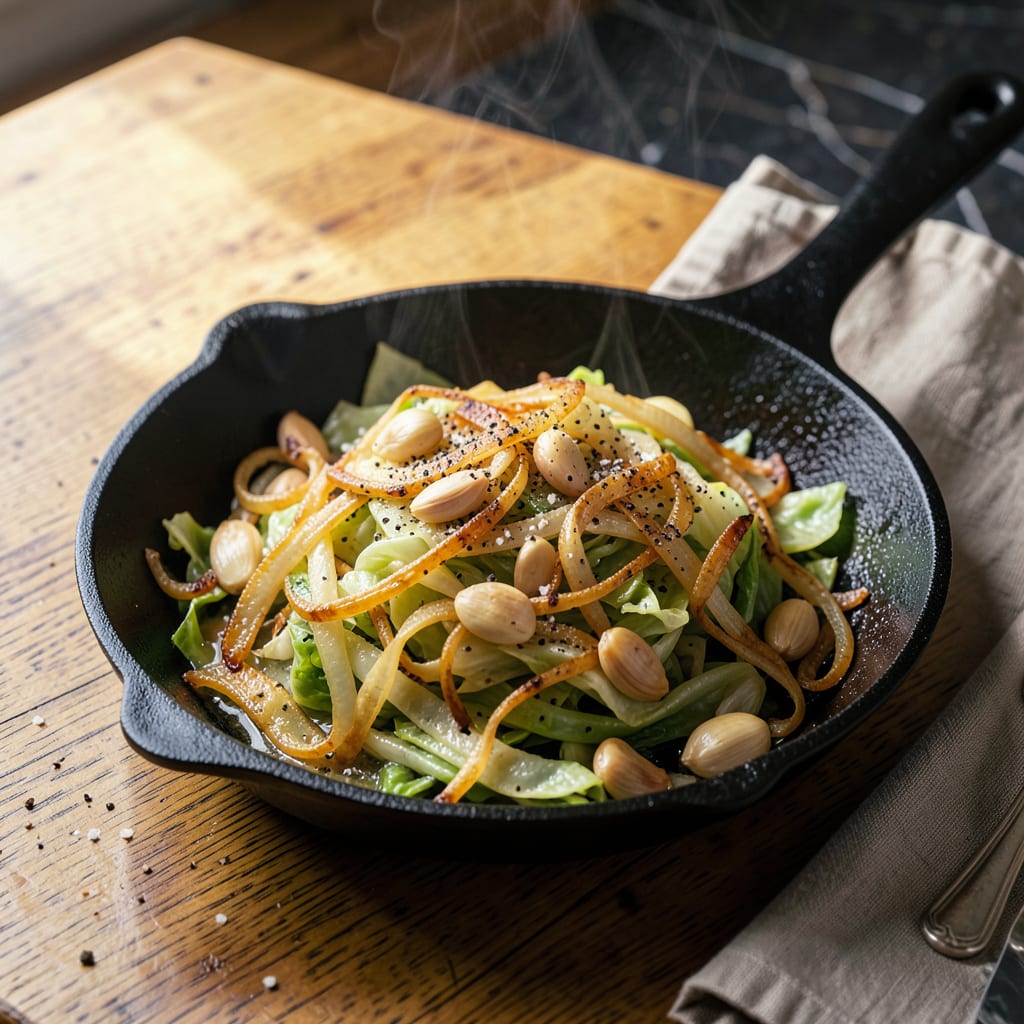
This fried cabbage delivers the perfect balance of crispy edges and tender centers, transforming a humble vegetable into something extraordinary. The technique is simple but precise: thinly sliced cabbage caramelizes in butter until golden, creating a side dish that’s both comforting and impressive.
What sets this recipe apart is its versatility—it pairs beautifully with roasted meats or stands alone as a vegetarian main. The key is patience: letting the cabbage cook undisturbed until deeply browned ensures that signature texture. Ready in under 20 minutes, it’s a foolproof way to elevate any meal.
Ingredients for Pioneer Woman Fried Cabbage
This transformative dish requires just one head of cabbage and pantry staples to achieve restaurant-quality results at home.
| Ingredient | Amount | Notes |
|---|---|---|
| Green Cabbage 🥬 | 1 whole | Medium head, about 2 lbs |
| Unsalted Butter 🧈 | 4 tbsp | Divided, European-style preferred |
| Yellow Onion 🧅 | 1 whole | Medium, thinly sliced |
| Garlic Cloves 🧄 | 4 cloves | Minced, fresh only |
| Kosher Salt 🧂 | 1 ½ tsp | Diamond Crystal brand recommended |
| Freshly Ground Black Pepper 🌶️ | 1 tsp | Coarse grind preferred |
| Granulated Sugar 🍬 | 1 tsp | Optional, enhances caramelization |
| Apple Cider Vinegar 🍏 | 1 tbsp | Balances richness |
| Fresh Flat-Leaf Parsley 🌿 | ¼ cup | Chopped, for garnish |
| Crushed Red Pepper Flakes 🔥 | ½ tsp | Adjust to heat preference |
[recipeingredientscaler]
The cabbage selection is critical for optimal texture. Green cabbage provides the ideal balance of structural integrity and sweetness when caramelized. Opt for a medium head (approximately 2 pounds) with crisp, vibrant leaves. European-style butter (such as Plugrá or Kerrygold) delivers superior browning due to its higher fat content. For the onion, select yellow varieties—their natural sugar content contributes to the caramelization process more effectively than white or red onions.
Substitutions must maintain the dish’s textural integrity. Savoy cabbage can replace green cabbage, though it requires slightly less cooking time. For a dairy-free version, refined coconut oil substitutes for butter at a 1:1 ratio. The apple cider vinegar may be replaced with white wine vinegar or lemon juice—both provide necessary acidity. Omit the sugar entirely if preferred, though it does accelerate the Maillard reaction. Smoked paprika (¼ teaspoon) can replace red pepper flakes for a milder, smoky heat profile.
Prepared cabbage maintains optimal texture for 3 days refrigerated in an airtight container. Reheat gently in a skillet with a splash of water to restore crispness. For longer storage, blanch sliced cabbage for 2 minutes before freezing (6 months maximum). The butter-onion mixture can be prepped 24 hours ahead—store covered in the refrigerator. Always bring ingredients to room temperature before cooking to ensure even caramelization.
Why You’ll Love This Recipe
- One-Pan Magic: Honestly, I love that this whole dish comes together in a single skillet. Just melt the butter, toss in the onions and cabbage, and let it caramelize while you handle everything else—no pile of dishes afterward.
- Buttery Garlic Love: That moment when the garlic hits the butter and the cabbage starts to soften? Pure comfort. The salt brings out the natural sweetness, and the golden edges get this crispy-chewy thing going that’s impossible to resist.
- Meatless Monday MVP: Between us, this is my secret weapon for vegetarian nights. It’s hearty enough to stand alone with crusty bread, but also plays nice as a side with roasted chicken or smoked sausage.
- Budget Stretch Wonder: A whole head of cabbage costs pennies and feeds my family for two meals. Leftovers? Even better the next day—toss them into scrambled eggs or wrap them in a tortilla with a fried egg on top. No waste, just flavor.
Step-by-Step Instructions for Fried Cabbage
This method delivers perfectly caramelized cabbage with crispy edges and rich, buttery flavor in every bite.
Step 1: Prepare the Cabbage and Aromatics
Begin by removing any damaged outer leaves from the green cabbage. Cut the head into quarters through the core, then remove the core from each wedge. Slice each quarter crosswise into ½-inch thick ribbons—this creates even pieces that cook uniformly. You should have about 8 cups of prepared cabbage.
Thinly slice the yellow onion into half-moons, no thicker than ⅛ inch. Mince the garlic cloves finely—this ensures they distribute evenly and cook through without burning. Keep these prepared ingredients separate until ready to use, as they’ll cook at different rates.
Step 2: Sauté the Onions and Build the Base
In a large, heavy skillet (cast iron works best for even heat distribution), melt 2 tablespoons of the unsalted butter over medium heat. When the butter stops foaming, add the sliced yellow onion and ½ teaspoon of the kosher salt. Cook for 8-10 minutes, stirring occasionally, until the onions turn translucent and begin to develop golden edges.
Add the minced garlic and crushed red pepper flakes to the skillet. Sauté for 1 minute until fragrant, being careful not to let the garlic brown. The onions should be soft but not mushy at this stage. This aromatic base creates the flavor foundation for the entire dish.
Step 3: Cook the Cabbage to Perfect Texture
Increase the heat to medium-high and add the remaining 2 tablespoons of unsalted butter to the skillet. Once melted, add the prepared cabbage in batches if necessary to avoid overcrowding. Sprinkle with the remaining 1 teaspoon of kosher salt, freshly ground black pepper, and granulated sugar.
Cook undisturbed for 3-4 minutes to allow the cabbage to develop a golden crust on the bottom. Then stir and cook for another 8-10 minutes, stirring occasionally, until the cabbage is tender with crispy, caramelized edges. The sugar helps accelerate the browning process while balancing the natural bitterness of the cabbage.
Step 4: Finish with Acid and Herbs
Once the cabbage reaches your desired texture (tender with crispy bits), remove the skillet from heat. Drizzle the apple cider vinegar evenly over the cabbage and stir to incorporate. The vinegar will sizzle slightly and release aromatic steam—this brightens the rich flavors and cuts through the butter.
Taste and adjust seasoning if needed, though the initial salting should be sufficient. Just before serving, sprinkle with the chopped fresh flat-leaf parsley. The parsley adds a fresh, herbal note that complements the deep, caramelized flavors of the cabbage.
Step 5: Serve Immediately for Optimal Texture
Transfer the fried cabbage to a serving platter while still hot. The contrast between the crispy, caramelized edges and the tender interior is best enjoyed immediately. If preparing ahead, reheat gently in a skillet over medium-low heat to preserve the crispy texture—microwaving will make it soggy.
This dish pairs exceptionally well with simply prepared proteins like grilled chicken or pan-seared pork chops. The rich, buttery cabbage also makes an excellent vegetarian main when served with crusty bread to soak up the flavorful juices.
Troubleshooting This Recipe
Cabbage Won’t Brown
If your cabbage is steaming instead of browning, your pan isn’t hot enough or it’s overcrowded. Use a large cast iron skillet and cook in batches if needed. I always wait until the butter stops foaming before adding cabbage—this ensures proper 350°F temperature for caramelization. 🔥
Soggy Texture Issues
Overstirring prevents crispy edges from forming. Let the cabbage cook undisturbed for 3-4 minutes initially to develop that golden crust. If it’s still soggy after cooking, spread it on a baking sheet and broil for 2 minutes to crisp up the edges.
Too Bitter Flavor
The natural bitterness in cabbage needs balancing. Make sure you’re using the 1 teaspoon of sugar and 1 tablespoon of apple cider vinegar as specified. These ingredients create the perfect sweet-tangy balance. I’ve found that Diamond Crystal kosher salt also helps mellow bitterness better than table salt.
Burnt Garlic Problem
Garlic burns quickly when added too early. Sauté your onions first until translucent (about 8 minutes), then add minced garlic and red pepper flakes for just 1 minute. Keep the heat at medium—never high—when cooking garlic to prevent burning while still developing flavor.
Uneven Cooking
Inconsistent slicing leads to some pieces burning while others stay raw. Use a sharp chef’s knife to cut ½-inch thick ribbons as specified. I recommend a Wüsthof 8-inch chef’s knife for clean cuts. If you notice uneven cooking, remove the tender pieces first and continue cooking the firmer ones.
Butter Separating
If your butter breaks and looks greasy, the heat was too high. Maintain medium-high heat (about 350-375°F) and stir occasionally. European-style butter like Kerrygold has higher fat content and better heat tolerance. If separation occurs, sprinkle a pinch of flour and stir to emulsify the sauce. ✨
Nutrition Facts

- 6 Egg Cake Recipe with Oil: Light as Air With Buttery Moisture - October 4, 2026
- 4 Bean Casserole Recipe: One-Pan Heartiness With Smoky Paprika Depth - October 4, 2026
- 3-Ingredient Keto Mug Cake Recipe: Microwave Magic in 2 Minutes - October 4, 2026