
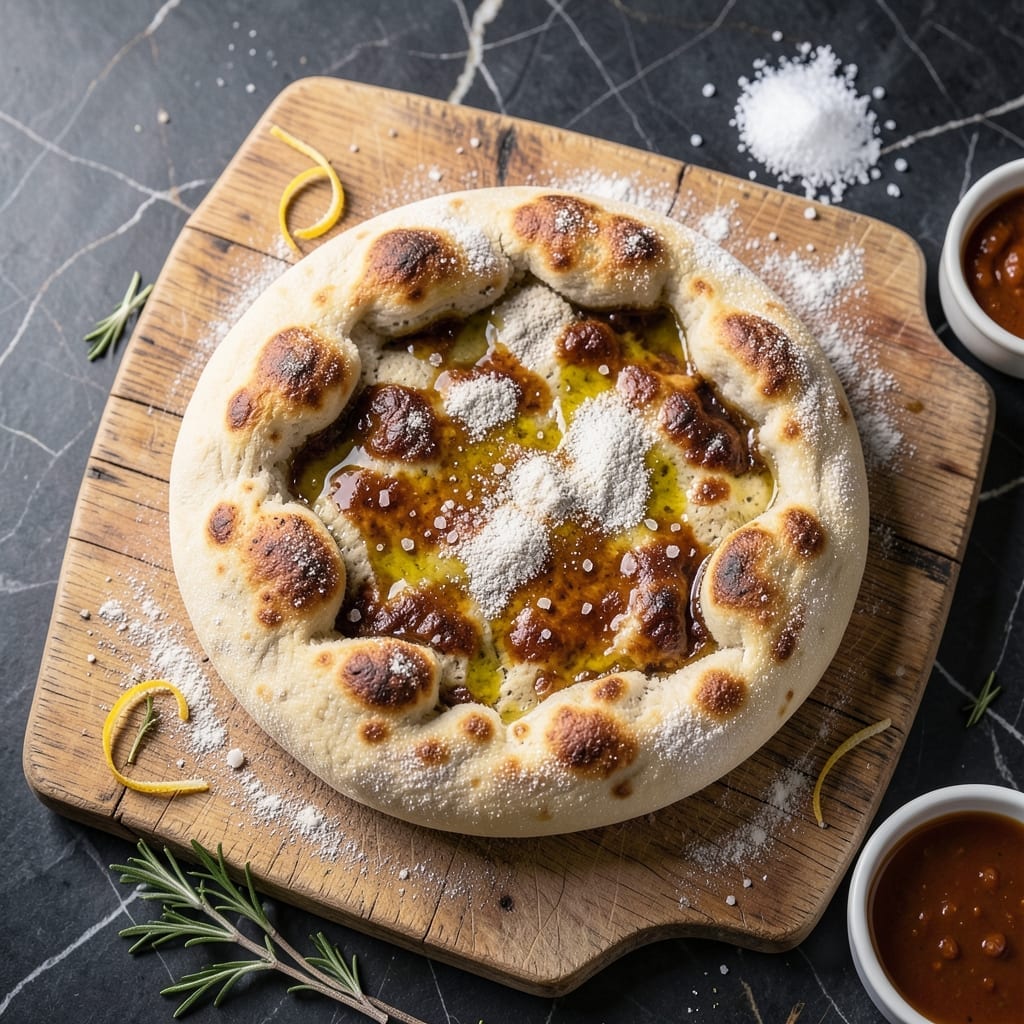
There’s something special about turning pizza dough into a rustic loaf of bread—it captures that same chewy, artisan texture without the fuss of shaping individual pies. This method proves that great bread doesn’t require complicated techniques or specialty flours.
With just one bowl and a handful of pantry staples, you’ll create a loaf with a golden, crisp crust and a soft, airy interior. The dough rests overnight in the fridge, developing deep flavor while requiring minimal effort from you.
The baking process transforms the dough into a beautiful, rounded loaf with a crackly top. It’s versatile enough for sandwiches, dipping in olive oil, or serving alongside a hearty meal.
No stand mixer or advanced skills needed—just patience and a hot oven.
Ingredients for Pizza Dough Bread
Pantry staples come together for this rustic, artisan-style loaf with no fuss.
| Ingredient | Amount | Notes |
|---|---|---|
| Bread Flour 🌾 | 3 ½ cups | All-purpose works in a pinch |
| Active Dry Yeast 🍞 | 2 ¼ tsp | One packet, proofed in warm water |
| Granulated Sugar 🧂 | 1 tsp | Feeds the yeast for activation |
| Kosher Salt 🧂 | 2 tsp | Diamond Crystal preferred |
| Extra-Virgin Olive Oil 🫒 | 3 tbsp | Plus extra for bowl and baking |
| Warm Water 💧 | 1 ½ cups | 110-115°F for yeast activation |
| Cornmeal 🌽 | ¼ cup | For dusting baking surface |
| All-Purpose Flour 🌾 | ½ cup | For dusting surface if needed |
| Honey 🍯 | 1 tbsp | Optional for subtle sweetness |
| Garlic Powder 🧄 | 1 tsp | Optional for flavor depth |
| Dried Oregano 🌿 | 1 tsp | Optional for Italian flair |
The flour is non-negotiable here. King Arthur Bread Flour gives that perfect chewy texture—all-purpose works but won’t be as stretchy. Yeast from Fleischmann’s or Red Star is reliable; just check the expiration date (old yeast = flat bread). Diamond Crystal kosher salt is my go-to for consistent seasoning. Grab it in bulk at Costco if you bake often.
No bread flour? All-purpose plus vital wheat gluten (1 tbsp per cup) mimics the protein boost. Short on olive oil? Avocado oil works in a pinch. For extra flavor, swap water for pizza sauce (reduce liquid slightly). The honey can be maple syrup or sugar—just keep the sweetness subtle. No cornmeal? Semolina or extra flour prevents sticking.
Dough keeps in the fridge for 3 days—great for making ahead. Baked loaf? Wrap tightly and store at room temp for 2 days, or freeze for 1 month. Slice before freezing for easy toast-up portions later.
Why You’ll Love This Recipe
- One-Bowl Wonder: I just dump the bread flour, yeast, sugar, salt, and olive oil in a bowl—no fancy tools, no mess.
- That Olive Oil Magic: The extra-virgin olive oil gives it a rich, slightly fruity depth that plain bread just can’t touch.
- Endless Possibilities: I’ve used this dough for garlic knots, flatbread pizzas, even cinnamon rolls—same base, totally different vibes.
- Budget Stretcher: Five simple pantry staples, and honestly, it costs less than a takeout pizza to feed my whole family.
Step-by-Step Instructions for Pizza Dough Bread
Here’s my tested method for achieving that perfect chewy crust with minimal effort.
Step 1: Activate the Yeast and Start the Dough
In a large mixing bowl, whisk together the 1.5 cups Warm Water, 1 tsp Granulated Sugar, and 2.25 tsp Active Dry Yeast. Let it sit for 5-7 minutes until the mixture becomes frothy and slightly domed—this confirms your yeast is active and ready to work.
I always check the water temperature with a kitchen thermometer to ensure it’s between 110-115°F. Too hot kills the yeast; too cold won’t activate it. Once foamy, add the 3 tbsp Extra-Virgin Olive Oil, 1 tbsp Honey, 1 tsp Garlic Powder, and 1 tsp Dried Oregano, stirring until fully combined.
Step 2: Incorporate the Dry Ingredients
Add the 2 tsp Kosher Salt to the bowl, then gradually mix in the 3.5 cups Bread Flour one cup at a time. Use a wooden spoon or dough whisk to prevent overmixing at this stage. The dough will start to pull away from the sides of the bowl and form a shaggy mass.
If the dough feels too sticky, resist the urge to add more flour just yet. Bread flour has higher protein content, which gives you that chewy texture we’re after. Let the dough rest for 5 minutes to hydrate fully before deciding if it needs adjustment.
Step 3: Knead and First Rise
Turn the dough out onto a lightly floured surface—I use about 0.25 cup of the All-Purpose Flour for dusting. Knead for 8-10 minutes until smooth and elastic. You’ll know it’s ready when you can stretch a small piece thin enough to see light through it without tearing (the windowpane test).
Shape the dough into a ball and place it in a lightly oiled bowl (use some of the Extra-Virgin Olive Oil). Cover with a damp towel and let it rise in a warm place for 1-1.5 hours or until doubled in size. I like to turn on my oven light for a gentle, consistent warmth.
Step 4: Shape, Second Rise, and Prepare for Baking
Punch down the risen dough to release air, then shape it into your desired form—round for a boule or oval for a batard. Place the shaped dough on a baking sheet dusted with the 0.25 cup Cornmeal, which adds texture and prevents sticking.
Cover loosely and let it rise again for 30-45 minutes until puffy. The cornmeal will give your bread that rustic, pizza-like crust we’re aiming for. While waiting, preheat your oven to 425°F with a baking stone or inverted baking sheet inside.
Step 5: Bake to Golden Perfection
Just before baking, use a sharp razor or serrated knife to score the top of the dough in a decorative pattern. This allows the bread to expand properly in the oven. Bake for 20-25 minutes until the crust is deep golden brown and the internal temperature reaches 190-200°F.
Transfer to a wire rack and let it cool for at least 20 minutes before slicing. The bread should have a crispy crust with a chewy, open interior. The cornmeal on the bottom adds a delightful crunch that makes this bread perfect for dipping in olive oil or serving alongside pasta.
Pro Tips For Making Pizza Dough Bread
- Proof the Yeast: Always dissolve the active dry yeast in warm water with a pinch of sugar first—if it doesn’t bubble within 5 minutes, your dough won’t rise. I learned this the hard way after wasting a batch of bread flour on dead yeast.
- Use Bread Flour: Skip all-purpose flour for this recipe; the higher protein in bread flour gives the dough the chewy, elastic texture it needs. My first few loaves were flat and dense until I made the switch.
- Don’t Rush the Rise: Let the dough double in size—this can take 1-2 hours depending on your kitchen’s warmth. After cutting corners on rise time, I ended up with bread so dense it could’ve been a doorstop.
- Oil the Bowl: Coat the rising bowl with about 1 tablespoon of extra-virgin olive oil before adding the dough. Sounds simple, but it prevents sticking and makes cleanup way easier—I skip it when I’m lazy and always regret it.
Troubleshooting This Recipe
Dough Won’t Rise
Check your yeast first—it might be expired. Test it in ½ cup warm water with 1 tsp sugar. If it doesn’t foam within 5 minutes, start over with fresh yeast. Also ensure your kitchen isn’t too cold; I keep mine near the oven with the light on. 🌡️
Dense or Heavy Loaf
Over-kneading or insufficient rising time causes this. Knead just until smooth (8-10 minutes max), and let it double in size during both rises. Using bread flour not all-purpose helps develop the right gluten structure.
Crust Too Thick
Shape your dough into a tighter ball before the second rise. When placing on the baking sheet, gently press it into a 1-inch thick round. Scoring the top with a sharp blade also helps it expand properly in the oven.
Bread is Pale
Your oven might need calibration. Use an oven thermometer to verify 425°F. Bake until internal temp hits 190-200°F. If the top browns too fast, tent with foil for the last 5-10 minutes. 🔥
Dough is Sticky
Resist adding too much flour. Instead, wet your hands with olive oil when handling. Bread flour absorbs more liquid than all-purpose, so the dough should feel slightly tacky but not stick to your fingers.
Flattened During Baking
Underproofed dough collapses. Ensure it passes the poke test: gently press a finger into the risen dough—if it springs back slowly, it’s ready. Also, preheat your baking surface for 30 minutes before baking.
Nutrition Facts
Frequently Asked Questions
Can I use all-purpose flour instead of bread flour?
Yes, but the texture will be slightly less chewy. For best results, add 1 tbsp vital wheat gluten per cup of all-purpose flour to mimic bread flour’s higher protein content.
How do I know when the dough is kneaded enough?
Perform the windowpane test: stretch a small piece thin. If light passes through without tearing, it’s ready after 8-10 minutes of kneading.
Why did my bread turn out dense?
This usually means underproofing or over-kneading. Let the dough double in size during both rises and stop kneading once smooth. Using bread flour helps too.
Can I make this without a stand mixer?
This recipe is designed for hand-kneading. Just use a wooden spoon for mixing and your hands for kneading on a floured surface.

- 6 Egg Cake Recipe with Oil: Light as Air With Buttery Moisture - October 4, 2026
- 4 Bean Casserole Recipe: One-Pan Heartiness With Smoky Paprika Depth - October 4, 2026
- 3-Ingredient Keto Mug Cake Recipe: Microwave Magic in 2 Minutes - October 4, 2026