
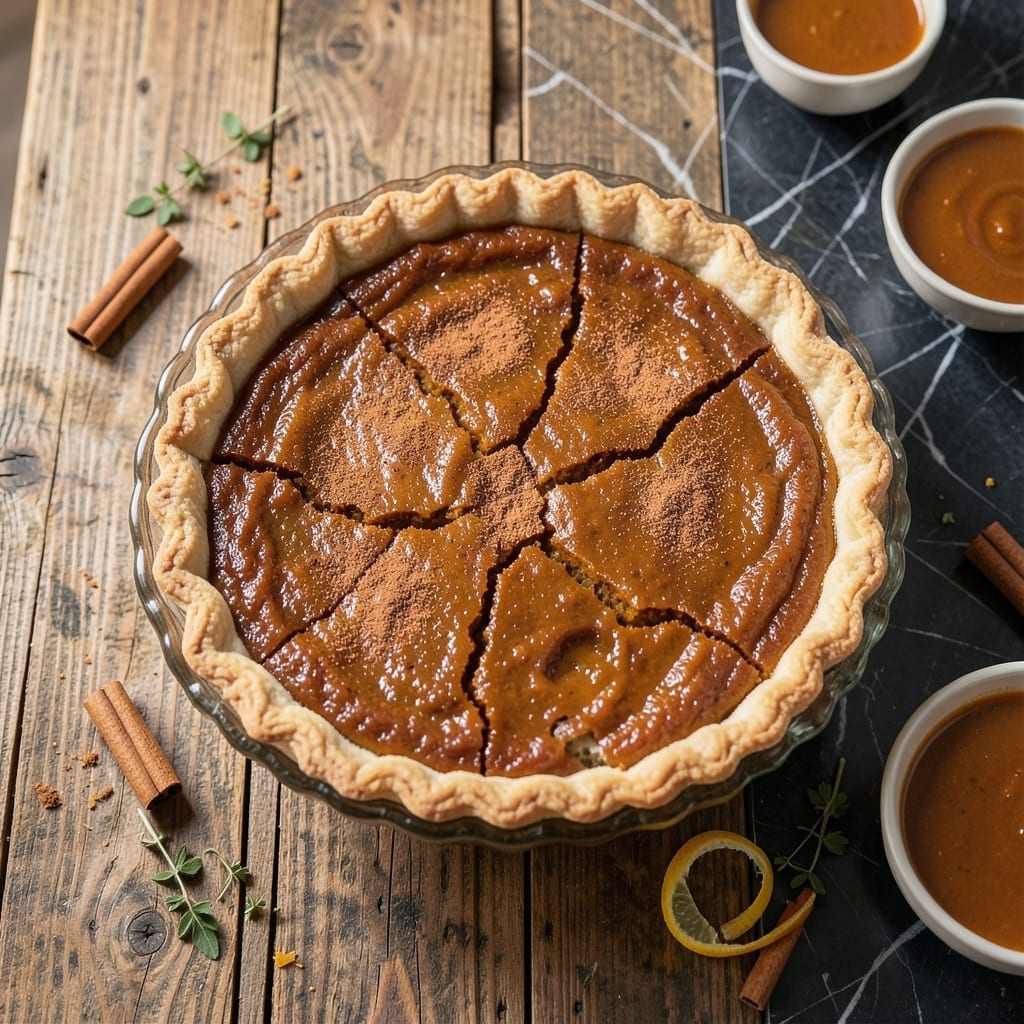
I’ve perfected a pumpkin pie that delivers silky custard without relying on canned evaporated milk. This version uses simple, pantry-friendly alternatives to achieve the same rich texture.
The result is a smooth, spiced filling with a velvety finish, all baked into a flaky crust. It’s the classic holiday dessert, reimagined for convenience.
Ingredients for Pumpkin Pie Recipe No Evaporated Milk
Rich pumpkin and warm spices create that silky custard texture you crave.
| Ingredient | Amount | Notes |
|---|---|---|
| Pumpkin Puree 🎃 | 2 cups | Canned or fresh, not pumpkin pie filling |
| Heavy Cream 🥛 | 1 ½ cups | Full-fat for richness |
| Large Eggs 🥚 | 3 whole | Room temperature preferred |
| Granulated Sugar 🍚 | ¾ cup | Fine white sugar |
| Light Brown Sugar 🟤 | ½ cup | Packed firmly |
| Ground Cinnamon 🌿 | 1 ½ tsp | Freshly ground preferred |
| Ground Ginger 🌿 | ¾ tsp | Adds warm spice depth |
| Ground Cloves 🌿 | ¼ tsp | Strong, use sparingly |
| Ground Nutmeg 🌰 | ¼ tsp | Freshly grated ideal |
| Salt 🧂 | ½ tsp | Fine sea salt |
| Vanilla Extract 🌿 | 1 tsp | Pure extract, not imitation |
| Unbaked Pie Crust 🥧 | 1 whole | 9-inch, homemade or store-bought |
The heavy cream is doing the heavy lifting here. Whole Foods or Trader Joe’s have great organic options. For pumpkin puree, Libby’s canned is my go-to—consistent, thick, and reliable. If using fresh, roast sugar pumpkins (the small, sweet kind) and puree until smooth. The brown sugar adds depth, but don’t skimp on packing it down—light vs. dark changes the flavor profile slightly.
No heavy cream? Whole milk with 2 tbsp melted butter per cup works in a pinch (though the texture won’t be quite as lush). Out of brown sugar? White sugar plus 1 tbsp molasses per half-cup. For the spices, a pre-mixed pumpkin pie spice at 2.5 tsp total can replace all the individual ground spices. The crust can be gluten-free if needed—King Arthur’s mix is foolproof.
Bake and cool completely before slicing—this helps the custard set. Leftovers keep 4-5 days in the fridge, or freeze for 2 months. Reheat slices in a toaster oven to crisp the crust (worth the extra minute).
Why You’ll Love This Recipe
- No Fuss Mixing: I just whisk the pumpkin puree, heavy cream, and eggs together—no hunting for evaporated milk at the store.
- Rich, Spiced Sweetness: The combo of granulated and light brown sugar gives it a deep caramel-like flavor that’s pure autumn.
- Holiday or Tuesday: Honestly, it’s just as welcome at Thanksgiving as it is for a random weeknight dessert craving.
- Leftovers? No Problem: It keeps beautifully, and I’ll be real: the flavor actually gets better the next day.
Step-by-Step Instructions for Pumpkin Pie Without Evaporated Milk
This method delivers a luxurious custard texture using heavy cream instead of canned milk.
Step 1: Prepare the Pie Crust
Start by rolling out the unbaked pie crust to fit a 9-inch pie dish. Press it gently into the bottom and up the sides, making sure there are no air bubbles. Trim any excess dough from the edges and crimp to create a decorative border.
Place the crust in the freezer while you prepare the filling—this prevents shrinking during baking. I’ve found that chilling the crust for 15-20 minutes gives the best results, ensuring it holds its shape when blind-baked.
Step 2: Whisk the Wet Ingredients
In a large bowl, whisk together the pumpkin puree, heavy cream, and vanilla extract until smooth. The mixture should be uniform with no streaks of pumpkin visible. Using room temperature eggs helps them incorporate more evenly into the custard base.
Add the 3 whole large eggs one at a time, whisking vigorously after each addition. This step is crucial for building structure in your custard. The mixture will lighten slightly in color as air incorporates, which is exactly what you want.
Step 3: Combine Dry Ingredients and Spices
In a separate bowl, combine the granulated sugar, light brown sugar, ground cinnamon, ground ginger, ground cloves, ground nutmeg, and salt. I like to whisk these together to break up any clumps in the brown sugar and ensure even distribution of the spices.
Gradually add the dry mixture to the wet ingredients, whisking constantly to prevent lumps. The 1.5 tsp ground cinnamon and other spices should be fully dissolved into the custard. Let the mixture rest for 5 minutes to allow the sugars to begin dissolving completely.
Step 4: Bake the Custard Filling
Pour the filling into the prepared pie crust. The crust should still be cold from the freezer. Transfer the pie to a preheated 375°F oven and bake for 45-50 minutes. You’ll know it’s done when the edges are set but the center still has a slight jiggle when gently shaken.
To prevent over-browning, I cover the crust edges with aluminum foil after 30 minutes of baking. The filling will continue to set as it cools. Resist the urge to overbake—this is the secret to avoiding cracks in your finished pie.
Step 5: Cool and Serve
Remove the pie from the oven and let it cool completely on a wire rack for at least 2 hours. This cooling time is essential as the custard finishes setting. The internal temperature should drop to room temperature before slicing.
Serve at room temperature or slightly chilled. Each slice should have a smooth, velvety texture with the warm spices perfectly balanced by the creamy pumpkin base. For best results, refrigerate leftovers and bring to room temperature before serving the next day.
Pro Tips For Making Pumpkin Pie Recipe No Evaporated Milk
- Pre-Bake the Crust: Blind-bake your crust for 10-12 minutes at 375°F to prevent a soggy bottom—I learned this the hard way after my first three pies came out with a gummy base.
- Warm the Cream: Take the heavy cream out of the fridge 20 minutes before mixing, or warm it slightly, so it blends smoothly with the eggs and avoids curdling.
- Skip Overmixing: Stir the filling just until combined—overmixing adds air bubbles that can crack the surface during baking, and yes, I’ve ruined a pie this way.
- Use Dark Brown: Swap the light brown sugar for dark brown if you want a deeper caramel flavor—sounds small, but it actually changes the outcome.
Common Mistakes When Making Perfect Results
🔥 Overmixing the Filling
Mixing the pumpkin pie filling too vigorously can incorporate excess air, leading to a puffed, cracked surface or a grainy texture. The custard needs to stay smooth and dense for that classic silky finish.
Fix: Gently fold the ingredients just until combined. Use a spatula and slow, deliberate strokes to avoid overworking the batter.
🌡️ Skipping the Pre-Bake for the Crust
A soggy bottom is a common complaint with pumpkin pie. Without pre-baking (blind baking), the crust can absorb moisture from the filling, losing its crispness and turning limp.
Fix: Pre-bake your crust for 8–10 minutes at 375°F (190°C) before adding the filling. Use pie weights or dried beans to keep it flat.
⏰ Baking at the Wrong Temperature
Too hot, and the edges burn before the center sets. Too low, and the filling never firms up. Uneven baking can also cause the pie to weep or separate as it cools.
Fix: Bake at 425°F (220°C) for 15 minutes, then reduce to 350°F (175°C) for 40–50 minutes. This ensures even cooking without over-browning.
🎯 Not Letting the Pie Cool Properly
Slicing into a warm pumpkin pie can cause the filling to collapse or ooze out. The custard needs time to fully set as it cools, or you’ll lose that perfect sliceable texture.
Fix: Let the pie cool at room temperature for 1–2 hours, then refrigerate for at least 2 more hours before serving.
Nutrition Facts

- 6 Egg Cake Recipe with Oil: Light as Air With Buttery Moisture - October 4, 2026
- 4 Bean Casserole Recipe: One-Pan Heartiness With Smoky Paprika Depth - October 4, 2026
- 3-Ingredient Keto Mug Cake Recipe: Microwave Magic in 2 Minutes - October 4, 2026