
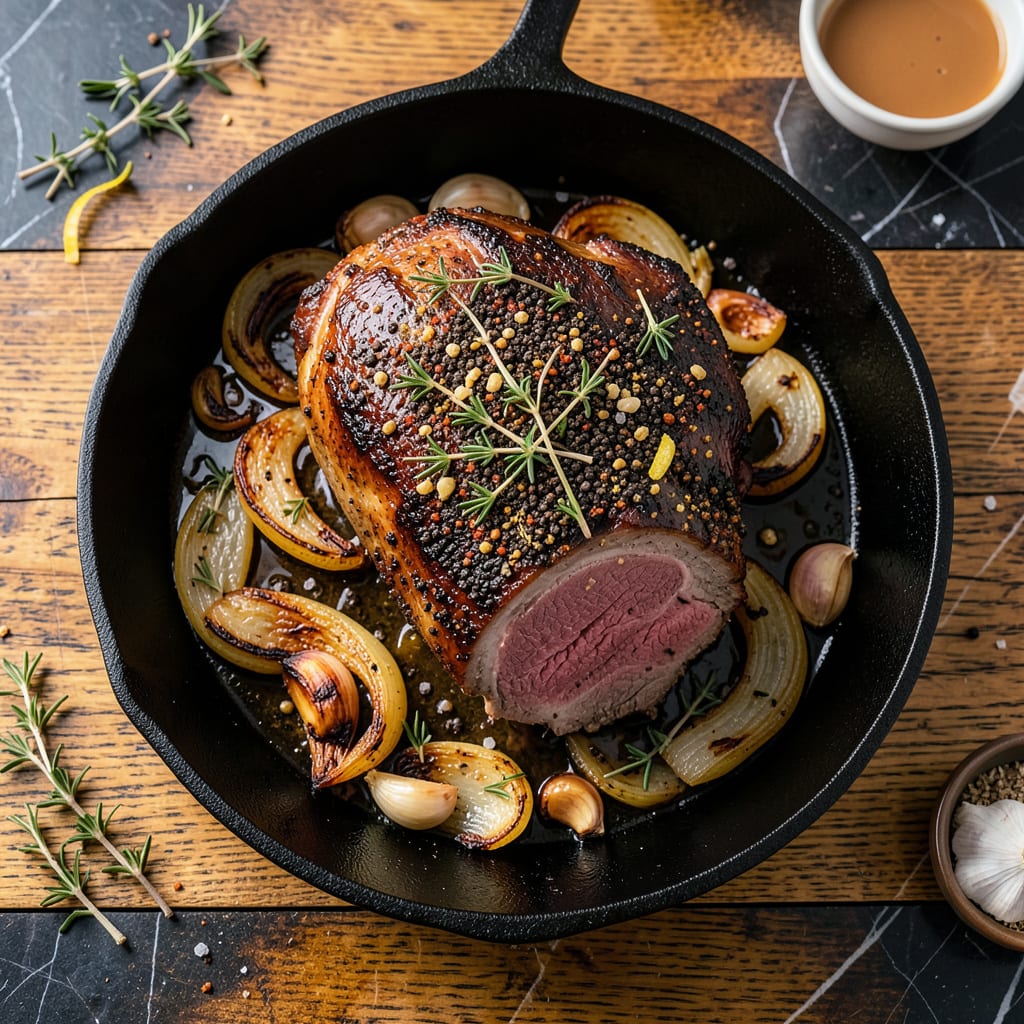
There’s something deeply satisfying about transforming a tough cut like arm roast into melt-in-your-mouth perfection through slow cooking. This recipe delivers exactly that—fall-apart tender meat with rich, developed flavors that make it worth the wait. The key lies in proper seasoning and patient cooking at low temperatures.
Using a simple dry rub and a 325°F oven (or slow cooker), this method breaks down connective tissue while keeping the meat juicy. You’ll end up with slices so tender they barely need a knife, surrounded by a flavorful broth perfect for gravy. Serve with roasted vegetables or creamy mashed potatoes for a complete meal that feels special without requiring complicated techniques.
Ingredients for Recipe for Arm Roast
Optimal flavor development begins with quality beef and a balanced spice rub for this slow-cooked specialty.
| Ingredient | Amount | Notes |
|---|---|---|
| Beef Arm Roast 🥩 | 3 ½ lb | Bone-in for maximum flavor |
| Kosher Salt 🧂 | 1 ½ tbsp | Diamond Crystal preferred for consistency |
| Freshly Ground Black Pepper 🌶️ | 1 tbsp | Coarse grind for dry rub texture |
| Garlic Powder 🧄 | 1 tbsp | Not garlic salt substitute |
| Onion Powder 🧅 | 1 tbsp | Freshly opened for potency |
| Smoked Paprika 🌶️ | 1 tsp | Spanish variety preferred |
| Dried Thyme 🌿 | 1 tsp | Rub between palms to release oils |
| Beef Broth 💧 | 2 cups | Low-sodium for controlled seasoning |
| Red Wine 🍷 | 1 cup | Dry variety like Cabernet Sauvignon |
| Tomato Paste 🍅 | 2 tbsp | Double-concentrated preferred |
| Yellow Onion 🧅 | 1 whole | Large, roughly chopped |
| Carrots 🥕 | 3 whole | Peeled, cut into 2-inch chunks |
| Celery Stalks 🌿 | 2 whole | Including leafy tops if available |
| Bay Leaves 🌿 | 2 whole | Fresh or dried |
| Olive Oil 🫒 | 2 tbsp | For searing roast |
[recipeingredientscaler]
The beef arm roast requires careful selection. Bone-in cuts from the chuck section deliver superior flavor and moisture retention. Optimal quality comes from USDA Choice grade with visible marbling throughout. For consistent results, Costco or local butchers typically offer the best selection, though many grocery chains now carry pre-portioned arm roasts. The dry rub components—particularly the Diamond Crystal kosher salt—are non-negotiable for proper osmotic balance during the long cooking process.
Substitutions must maintain the recipe’s structural integrity. Boneless chuck roast can replace arm roast, though cooking time may reduce by 20%. For the wine component, additional beef broth with 1 tbsp balsamic vinegar provides acceptable acidity. Dried rosemary can substitute for thyme at equal measurement, though flavor profile will shift slightly. The tomato paste concentration is critical—never use single-strength as it will dilute the final sauce consistency.
Proper storage of raw ingredients ensures optimal results. The roast should be used within 3-4 days of purchase or frozen for up to 6 months. Dry spices maintain potency for 12-18 months in airtight containers away from light. Prepared roast keeps refrigerated for 5 days and freezes well for 3 months, though texture may soften slightly upon reheating. Always bring to room temperature before slicing for cleanest presentation.
Why You’ll Love This Recipe
- Five-Ingredient Magic: Honestly, I love recipes where I don’t have to dig through my spice cabinet. Just beef, salt, pepper, garlic powder, and onion powder—that’s it. No fancy marinades or hard-to-find ingredients, just straightforward flavor.
- Low-and-Slow Reward: That first bite when the meat falls apart with zero effort? Worth every minute. The garlic and onion powders caramelize into this rich, savory crust while the inside stays juicy and tender.
- Sunday Supper or Tuesday Leftovers: I’ve served this for family dinners and packed it for lunch all week. It’s just as good piled on mashed potatoes as it is stuffed into a sandwich with a little horseradish mayo.
- Budget-Friendly Feast: A three-pound arm roast feeds my family for two meals (sometimes three if I stretch it with veggies). Between us, it’s cheaper than steak but tastes just as special—especially when you sear it right.
Step-by-Step Instructions for Arm Roast
This method transforms a tough cut into melt-in-your-mouth perfection through precise low-and-slow cooking.
Step 1: Prepare and Season the Beef Arm Roast
Pat the 3.5 lb Beef Arm Roast completely dry with paper towels, paying special attention to the bone-in areas where moisture accumulates. This ensures optimal browning during searing. In a small bowl, combine the 1.5 tbsp Kosher Salt, 1 tbsp Freshly Ground Black Pepper, 1 tbsp Garlic Powder, 1 tbsp Onion Powder, 1 tsp Smoked Paprika, and 1 tsp Dried Thyme.
Massage the spice blend into all surfaces of the roast, pressing firmly to create a uniform crust. The coarse texture of the black pepper and salt crystals will enhance the dry rub’s adherence. Allow the seasoned roast to rest at room temperature for 30 minutes before cooking—this promotes even cooking and better flavor penetration.
Step 2: Sear the Roast for Depth of Flavor
Heat the 2 tbsp Olive Oil in a heavy Dutch oven over medium-high heat until it shimmers but doesn’t smoke. Add the seasoned roast and sear for 4-5 minutes per side, using tongs to rotate it. You’re looking for a deep mahogany crust—this Maillard reaction creates complex flavor compounds that will permeate the finished dish.
Don’t rush this step; proper searing requires patience. The roast should release easily from the pot when sufficiently browned. Remove the roast to a plate and reduce heat to medium—this prevents the fond (browned bits) from burning when you build the braising liquid.
Step 3: Build the Braising Liquid Foundation
In the same Dutch oven, add the roughly chopped 1 whole Yellow Onion, 3 whole Carrots (cut into 2-inch chunks), and 2 whole Celery Stalks. Sauté for 5-6 minutes until the vegetables develop caramelized edges. Stir in the 2 tbsp Tomato Paste and cook for 1-2 minutes until it darkens slightly—this intensifies its umami properties.
Deglaze with the 1 cup Red Wine, scraping up all the browned bits from the bottom of the pot. Allow the wine to reduce by half, about 3-4 minutes, before adding the 2 cups Beef Broth and 2 whole Bay Leaves. The alcohol should cook off completely, leaving behind concentrated fruit flavors that balance the richness of the beef.
Step 4: Slow-Cook to Fall-Apart Tenderness
Return the seared roast to the pot along with any accumulated juices. The liquid should come about halfway up the sides of the meat—add water if needed to achieve this level. Cover tightly and transfer to a 325°F oven. Braise for 3-3.5 hours, turning the roast every 60 minutes to ensure even cooking.
The roast is done when it reaches an internal temperature of 195-200°F and a meat fork slides in and out with no resistance. At this temperature, the collagen in this tough cut breaks down completely, transforming into gelatin that gives the meat its signature unctuous texture. The meat should pull apart easily when prodded with a fork.
Step 5: Rest and Serve for Optimal Results
Carefully transfer the roast to a cutting board and tent loosely with foil. Let it rest for 20 minutes—this allows the muscle fibers to relax and reabsorb juices that would otherwise spill out when sliced. Skim excess fat from the braising liquid if desired, then strain the vegetables and reduce the liquid by half over medium-high heat for a richer sauce.
Slice the roast against the grain into ½-inch thick pieces or pull apart into large chunks using forks. Serve with the reduced braising liquid spooned over the top. The meat should be tender enough to cut with a fork but still hold its shape, with a glossy, flavorful exterior and moist, succulent interior.
Perfect Pairings for These Flavors
Wine Pairings
This rich, slow-cooked dish calls for bold red wines that can stand up to its deep flavors. I love pairing it with a Cabernet Sauvignon from Napa Valley—its dark fruit notes and firm tannins complement the beef beautifully. For something slightly lighter, try a Syrah from the Rhône Valley with its peppery undertones. 🍷
If you prefer Italian wines, a Chianti Classico with its bright acidity cuts through the richness while enhancing the tomato notes in the braising liquid. Always serve reds slightly below room temperature—about 60-65°F—to let their flavors shine without overpowering the meal.
Beer Options
For beer lovers, a robust porter or stout works wonderfully here. I particularly enjoy Guinness Foreign Extra Stout—its roasted malt flavors mirror the caramelized crust of the roast. If you want something hoppier, a black IPA offers the right balance of bitterness and chocolate notes.
Serve beer slightly cooler than you would wine—around 50-55°F—to maintain its refreshing qualities while allowing the malt complexity to emerge. The carbonation also helps cleanse your palate between bites of the rich, tender meat.
Side Dish Pairings
Creamy garlic mashed potatoes are my go-to side—they soak up the flavorful braising liquid perfectly. For something lighter, try roasted Brussels sprouts with balsamic glaze—their slight bitterness contrasts beautifully with the meat’s richness. Both options balance the meal while letting the roast remain the star.
If you want to keep it simple, crusty sourdough bread is ideal for mopping up every last bit of sauce. I like to warm it in the oven for 5 minutes at 350°F with a garlic butter brush for extra flavor.
Vegetable Complements
The braised carrots and celery from the cooking process are delicious served alongside, but I also love adding sautéed green beans with slivered almonds. Their crisp texture provides a nice contrast to the tender meat. For a heartier option, creamy polenta with Parmesan makes an excellent base for the roast and its juices.
In spring, I swap to asparagus spears roasted with lemon zest—their bright flavor cuts through the richness. Whatever you choose, keep portions generous; this roast deserves equally satisfying companions.
Sauce Enhancements
The reduced braising liquid is already flavorful, but I sometimes stir in 1 tbsp Dijon mustard or 1 tsp horseradish for extra kick. For a creamy option, whisk in 2 tbsp crème fraîche at the end—it adds richness without curdling. These small additions can transform the sauce into something truly special.
If you prefer a brighter finish, a squeeze of fresh lemon juice right before serving lifts all the flavors. I also keep flaky sea salt on the table for guests who want to enhance individual bites.
Cheese Pairings
A sprinkle of aged Parmesan over the finished dish adds umami depth that complements the beef perfectly. For a bolder option, try shaved Pecorino Romano—its saltiness cuts through the richness. I grate about ¼ cup directly over the sliced roast just before serving.
If you’re serving this as part of a cheese course, a blue cheese like Gorgonzola creates an exciting contrast. The sharp, tangy flavors play wonderfully against the meat’s deep, savory notes. Just a small wedge per person is plenty to share around the table.
Nutrition Facts
Frequently Asked Questions
What’s the best way to tell when it’s done?
Use a meat thermometer to check for 195-200°F internally. The roast should pull apart effortlessly with a fork—this indicates the collagen has fully broken down. Avoid cutting into it prematurely, as this releases precious juices.
Can I make this in a slow cooker instead?
Sear the roast first, then transfer everything to your slow cooker. Cook on low for 8-9 hours or high for 5-6 hours. The texture will be slightly softer than oven-braising, but equally delicious.
Why is my roast tough after cooking?
This usually happens if cooked below 190°F or sliced too soon. The collagen needs prolonged heat to convert to gelatin. Always let it rest 20 minutes before serving to redistribute juices.
What’s a good substitute for the red wine?
Use 1 cup beef broth + 1 tbsp balsamic vinegar for similar acidity. The vinegar mimics wine’s tang while the broth maintains depth. Avoid white wine—it lacks the boldness needed for this dish.

- 6 Egg Cake Recipe with Oil: Light as Air With Buttery Moisture - October 4, 2026
- 4 Bean Casserole Recipe: One-Pan Heartiness With Smoky Paprika Depth - October 4, 2026
- 3-Ingredient Keto Mug Cake Recipe: Microwave Magic in 2 Minutes - October 4, 2026