
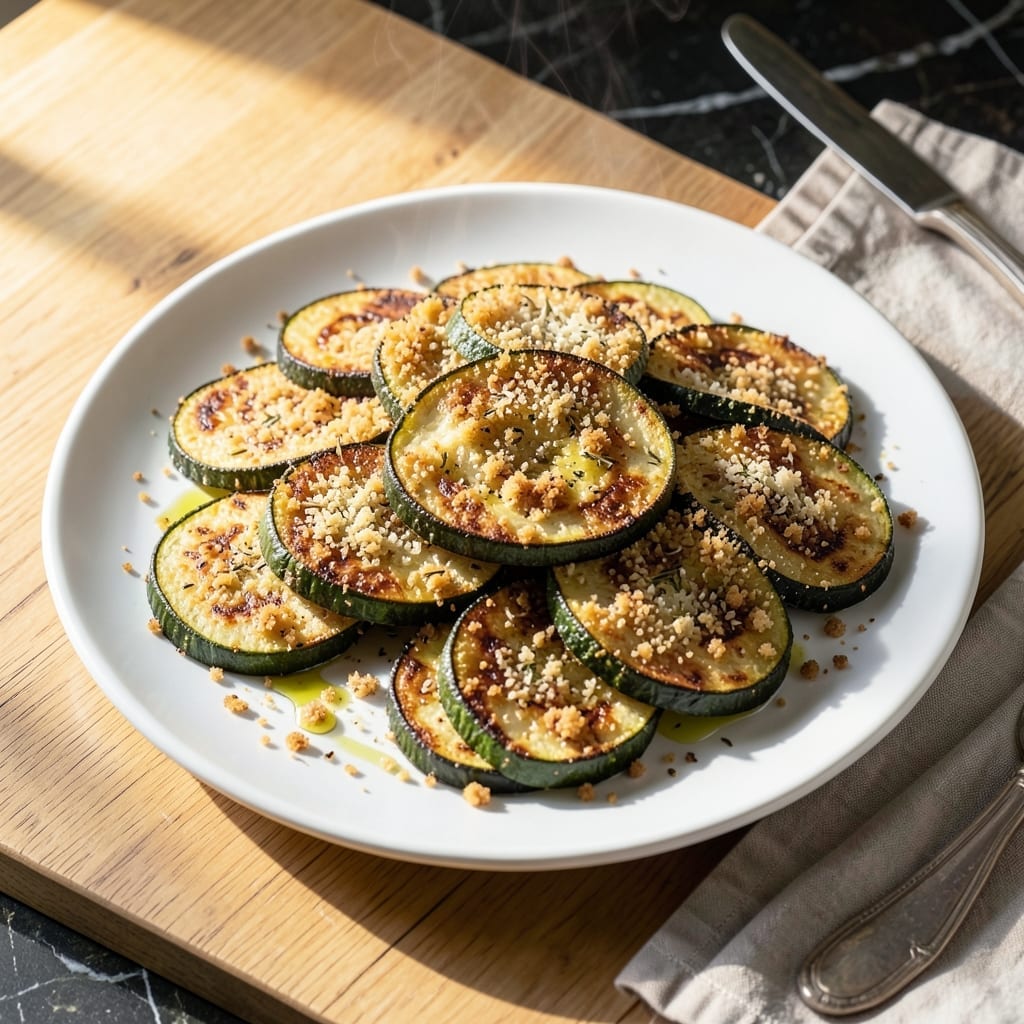
This baked zucchini recipe transforms simple summer squash into a golden-brown, Parmesan-crusted side dish that’s impossible to resist.
With just a few pantry staples and 20 minutes in the oven, you’ll achieve a crispy exterior and tender interior that pairs perfectly with any main course.
The secret lies in a light breadcrumb and Parmesan coating that bakes into a savory, crunchy topping while keeping the zucchini slices moist underneath.
Whether served as a light lunch or alongside grilled proteins, this dish proves that healthy can still be deeply satisfying.
Ingredients for Recipe for Baked Zucchini Slices
Transform summer squash with this simple yet elegant combination of fresh and pantry ingredients.
| Ingredient | Amount | Notes |
|---|---|---|
| Zucchini 🥒 | 4 whole | Medium-sized, sliced 1/4-inch thick |
| Panko Breadcrumbs 🍞 | 1 cup | Japanese-style for extra crunch |
| Parmesan Cheese 🧀 | ½ cup | Freshly grated from wedge |
| Large Eggs 🥚 | 2 whole | Beaten for binding coating |
| All-Purpose Flour 🌾 | ¼ cup | For light dredging layer |
| Olive Oil 🫒 | 2 tbsp | Extra-virgin for richness |
| Garlic Powder 🧄 | 1 tsp | For savory depth in coating |
| Dried Oregano 🌿 | 1 tsp | Mediterranean herb enhancement |
| Salt 🧂 | ½ tsp | Kosher or sea salt preferred |
| Black Pepper 🌶️ | ¼ tsp | Freshly ground for best flavor |
| Paprika 🌶️ | ¼ tsp | Sweet or smoked variety |
| Grated Lemon Zest 🍋 | 1 tsp | For bright citrus finish |
The zucchini quality is paramount. Select firm, medium-sized zucchini (about 8 inches long) with vibrant green skin—avoid the oversized ones that develop bitter seeds. Whole Foods or your local farmers market will have the freshest selection. For the Parmesan, Parmigiano-Reggiano from the specialty cheese case offers superior melting properties and authentic flavor compared to pre-grated varieties.
No Panko on hand? Regular breadcrumbs can substitute at a 1:1 ratio, though the texture will be less crisp. For a gluten-free version, use almond flour or crushed gluten-free crackers. The egg wash can be replaced with olive oil or plant-based milk for a vegan adaptation. Fresh herbs like thyme or basil can replace the dried oregano—use three times the amount if using fresh.
Prep the zucchini just before baking to prevent sogginess. Leftovers keep well in an airtight container for 3-4 days in the refrigerator, though they’re best served fresh. The baked slices can be frozen for up to 2 months, though the crispiness will soften upon reheating.
Why You’ll Love This Recipe
- One Pan Wonder: I just toss zucchini slices in flour, egg, then panko-parmesan mix and bake—no frying, no mess.
- Crispy Outside, Tender Inside: That panko gives it a satisfying crunch while the zucchini stays perfectly soft.
- Feeds a Crowd: I double the batch for potlucks and it’s always the first thing gone.
- Budget Stretcher: Zucchini’s cheap in summer, and a little parmesan goes a long way.
Step-by-Step Instructions for Parmesan-Crusted Baked Zucchini
Master these steps for consistently crispy, golden results with every batch.
Step 1: Prepare and Season the Zucchini
Slice the 4 whole Zucchini into ¼-inch thick rounds using a sharp knife. Consistency in thickness ensures even cooking and a uniform crunch. Arrange the slices in a single layer on paper towels.
Sprinkle both sides of the zucchini with ½ tsp Salt and let sit for 10 minutes. This draws out excess moisture, preventing a soggy coating. Blot thoroughly with additional paper towels until completely dry.
Step 2: Create the Breading Station
In a shallow dish, combine 1 cup Panko Breadcrumbs, ½ cup Parmesan Cheese, 1 tsp Garlic Powder, 1 tsp Dried Oregano, ¼ tsp Black Pepper, ¼ tsp Paprika, and 1 tsp Grated Lemon Zest. Stir until evenly distributed and the mixture appears uniformly flecked with herbs.
Place ¼ cup All-Purpose Flour in a separate shallow dish. In a third dish, beat the 2 whole Large Eggs until the yolks and whites are fully combined. This three-step breading process ensures maximum adhesion and crunch.
Step 3: Bread the Zucchini Slices
Dredge each zucchini slice through the flour, tapping off any excess. The flour creates a dry surface for the egg to cling to, forming the foundation of the crust. Coat both sides completely.
Dip the floured slices into the beaten eggs, allowing any excess to drip back into the dish. Immediately press both sides into the breadcrumb mixture, applying gentle pressure to ensure full coverage. The coating should appear thick and textured.
Step 4: Bake to Golden Perfection
Preheat your oven to 425°F and line two baking sheets with parchment paper. Arrange the breaded zucchini slices in a single layer on the sheets, ensuring they don’t touch. Brush or drizzle the tops with 2 tbsp Olive Oil—this promotes browning and adds richness.
Bake for 12-15 minutes, then carefully flip each slice using a thin spatula. Return to the oven for an additional 8-10 minutes, or until both sides are golden brown and the coating appears crisp. The zucchini should be tender when pierced with a fork.
Transfer to a wire rack to cool for 2-3 minutes before serving. This final step preserves the crisp texture by preventing steam from softening the crust.
Pro Tips For Making Recipe For Baked Zucchini Slices
- Pre-Salt the Zucchini: Sprinkle sliced zucchini with salt and let it sit for 10 minutes before breading—this draws out excess moisture so your coating doesn’t slide off in the oven.
- Use Cold Eggs: I learned this the hard way: cold eggs from the fridge cling better to the flour and panko, keeping that crispy crust intact.
- Skip the Overcrowding: Leave space between slices on the baking sheet, or they’ll steam instead of crisp up—yes, even if it means using two pans.
- Boost the Panko: Toss the panko with grated parmesan before dredging; it adds flavor and makes the crunch last longer than plain breadcrumbs.
Troubleshooting Perfect Results
Soggy Coating
If your coating isn’t crispy, the zucchini likely released too much moisture. Always salt and drain slices for 10 minutes, then pat completely dry before breading. I use Bounty paper towels for their absorbency. 💡
Coating Won’t Stick
This usually means the egg wash wasn’t applied properly. Dip each slice fully in beaten egg, letting excess drip off for 5 seconds before pressing into breadcrumbs. The flour layer must be thin and even for maximum adhesion.
Uneven Browning
Rotate your baking sheets halfway through cooking and flip each slice carefully. For extra crispiness, switch oven racks if using two. A 425°F oven is perfect for achieving that golden-brown color without burning.
Burnt Edges
Check your oven’s hot spots—most have one. Move the tray to a different rack if one side browns faster. Also, ensure slices aren’t touching on the baking sheet. I recommend using light-colored pans to prevent over-browning.
Bland Flavor
Boost seasoning in both the zucchini and breadcrumb mix. I add an extra pinch of garlic powder and lemon zest to my coating for brightness. Don’t forget to taste your breadcrumb mixture before dredging. 🌟
Overcooked Zucchini
Watch the clock—20-25 minutes total is ideal. The slices should be tender but still hold shape. If your oven runs hot, reduce temperature by 25°F and extend baking time slightly.
Nutrition Facts
Frequently Asked Questions
Can I make this ahead of time?
Bread the slices up to 2 hours ahead and refrigerate uncovered. Bake just before serving for maximum crispiness. Reheating in the oven at 375°F for 5-7 minutes helps restore crunch.
Why do I need to salt the zucchini first?
Salting draws out excess moisture, which prevents a soggy coating. This 10-minute step is crucial for achieving that perfect crisp texture. Skip it, and you risk a mushy result.
What can I use instead of Panko?
Regular breadcrumbs work at a 1:1 ratio, though they won’t be as crispy. For gluten-free, try crushed cornflakes or almond flour. The key is maintaining a dry, crumbly texture.
How do I keep them crispy after baking?
Place baked slices on a wire rack, not a plate. This allows air circulation underneath, preventing steam from softening the crust. Serve within 15 minutes for best texture.

- 6 Egg Cake Recipe with Oil: Light as Air With Buttery Moisture - October 4, 2026
- 4 Bean Casserole Recipe: One-Pan Heartiness With Smoky Paprika Depth - October 4, 2026
- 3-Ingredient Keto Mug Cake Recipe: Microwave Magic in 2 Minutes - October 4, 2026