
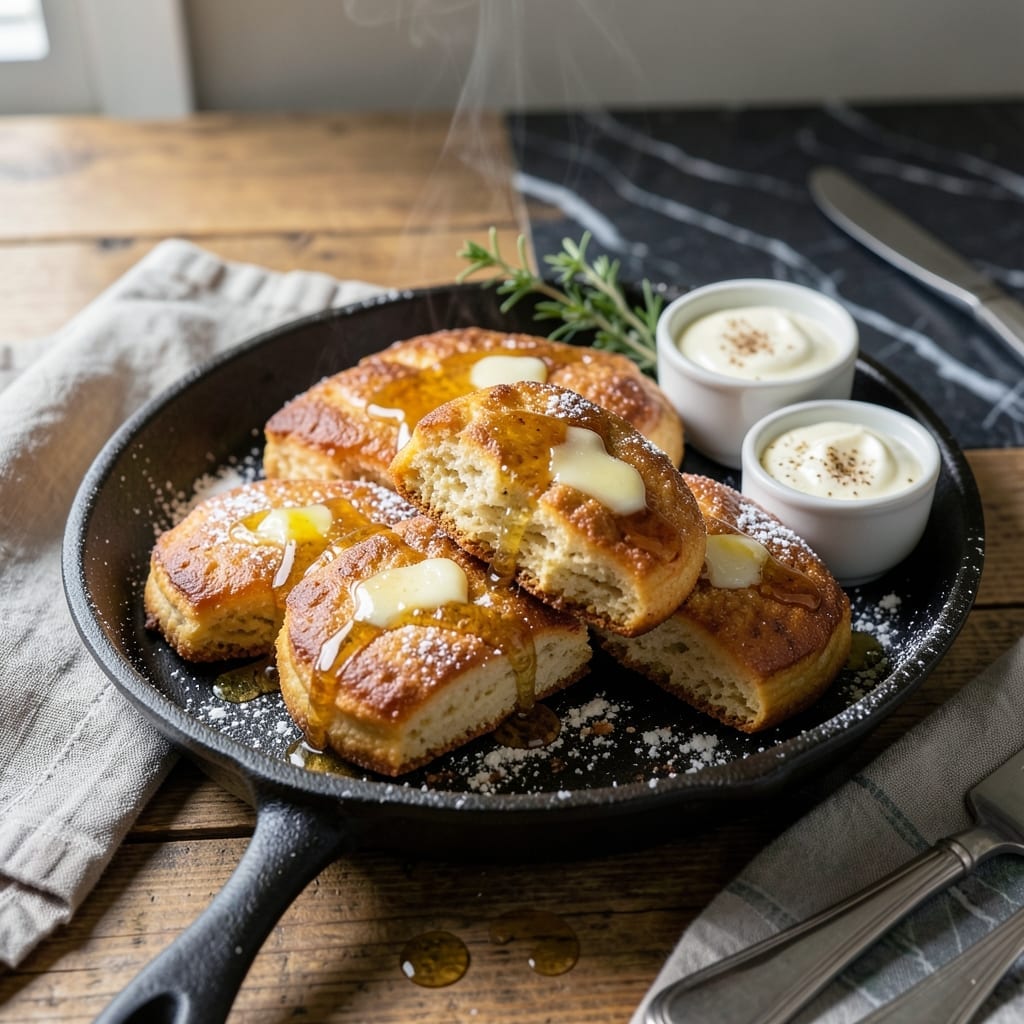
Transform store-bought biscuits into bakery-quality treats with this proven method. The secret lies in proper oven temperature and strategic layering to achieve those flaky results everyone loves.
Preheat your oven to 425°F and arrange the biscuits with space between them. This ensures even baking and maximum rise for that signature layered texture.
Bake for 12-15 minutes until golden brown on top. The high heat creates steam that separates the layers, delivering that perfect flaky structure.
Serve warm with butter or honey for the ultimate comfort food experience. This technique guarantees professional-quality biscuits every time.
Ingredients for Recipe for Canned Biscuits
Just one can of dough plus a few pantry staples creates these bakery-style treats.
| Ingredient | Amount | Notes |
|---|---|---|
| Canned Biscuit Dough 🥖 | 1 can | 16 oz, buttermilk style preferred |
| Unsalted Butter 🧈 | 4 tbsp | Melted for brushing |
| All-Purpose Flour 🌾 | ¼ cup | For dusting work surface |
| Honey 🍯 | 2 tbsp | For drizzling (optional) |
| Heavy Cream 🥛 | 2 tbsp | For extra richness (optional) |
| Garlic Powder 🧄 | ½ tsp | For savory variation |
| Dried Parsley 🌿 | 1 tsp | For garnish (optional) |
| Cinnamon Sugar 🍬 | 2 tbsp | For sweet variation |
| Shredded Cheddar Cheese 🧀 | ½ cup | For cheesy topping (optional) |
| Kosher Salt 🧂 | ¼ tsp | For seasoning |
The biscuit dough quality matters. Pillsbury Grands or Bisquick brands deliver consistent flakiness. Look for buttermilk-style varieties—they have the fat content needed for proper layer separation. Avoid the flaky-layer style cans if you want uniform texture; those are designed differently. Store unopened cans in a cool, dry pantry for up to 3 months.
Out of buttermilk biscuits? Regular canned dough works with half the rise. No honey? Maple syrup or agave substitute beautifully. For savory versions, grated Parmesan replaces cheddar effectively. The heavy cream can be omitted, but it adds a professional touch. Garlic salt works at one-quarter the amount if you’re short on both garlic powder and salt.
Baked biscuits are best served immediately but reheat well. Wrap cooled extras in foil and warm at 350°F for 5-10 minutes. Dough can be frozen in the can (unopened) for up to 2 months. Always check expiration dates—old dough loses its rise.
Why You’ll Love This Recipe
- 5-Minute Start: I just pop open the can, arrange the dough, and brush with butter—no mixing, no measuring dry ingredients.
- Honey Butter Magic: That golden honey glaze on warm, flaky layers? I could eat the whole batch myself.
- Breakfast to Dessert: I’ve served these plain at brunch, drizzled for dessert, and even as emergency dinner rolls.
- Pantry Hero: A can of biscuits plus a few staples I always have means I’m never more than 15 minutes from fresh, hot bread.
Step-by-Step Instructions for Canned Biscuits
Master the technique for achieving perfect flaky layers with minimal effort and maximum reward.
Step 1: Prepare the Work Surface and Dough
Lightly dust your work surface with the 0.25 cup All-Purpose Flour to prevent sticking. Open the 1 can Canned Biscuit Dough and separate the biscuits along their perforated edges. Handle them gently to preserve the layers—this is what creates that coveted flaky texture.
Arrange the biscuits on the floured surface, leaving about 1 inch between each one. If you’re making a savory variation, sprinkle a pinch of the 0.25 tsp Kosher Salt over each biscuit now. This step ensures seasoning is evenly distributed.
Step 2: Add Custom Toppings for Flavor Variations
For a cheesy topping, sprinkle each biscuit with a portion of the 0.5 cup Shredded Cheddar Cheese, pressing lightly so it adheres. If you prefer a savory twist, combine the 0.5 tsp Garlic Powder with the 1 tsp Dried Parsley and sprinkle evenly over the biscuits.
For a sweet version, generously coat each biscuit with the 2 tbsp Cinnamon Sugar, ensuring the tops are fully covered. This customization step is where you tailor the dish to your taste while keeping the flaky layers intact.
Step 3: Bake to Golden Perfection
Preheat your oven to 375°F and place the biscuits on a baking sheet lined with parchment paper. Bake for 10-12 minutes or until the tops are golden brown and the layers have risen and separated slightly.
Avoid opening the oven during the first 8 minutes to prevent heat loss, which could affect the rise. The biscuits are done when they’ve doubled in height and the tops are firm to the touch. If baking multiple sheets, rotate them halfway through for even browning.
Step 4: Finish with Optional Enhancements
As soon as the biscuits come out of the oven, brush the tops with the 4 tbsp Unsalted Butter while they’re still hot. This adds richness and a glossy sheen. For extra indulgence, drizzle with the 2 tbsp Honey or a splash of the 2 tbsp Heavy Cream for added moisture and depth.
Let them cool for 2-3 minutes on the baking sheet before serving. This brief rest allows the layers to set slightly, making them easier to handle without falling apart. Serve warm to fully appreciate the flaky texture and buttery flavor.
Pro Tips For Making Recipe For Canned Biscuits
- Chill the Dough: Pop the canned biscuits in the fridge for 10 minutes before baking—I learned this the hard way after my first batch spread into a single, sad pancake.
- Brush with Cream: Right before baking, brush the tops with heavy cream for that golden, flaky crust my grandmother swore by.
- Skip the Overworking: Press the dough gently—no kneading, no stretching—or you’ll end up with tough biscuits instead of tender ones.
- Melt Butter Slow: If using butter in the dough or topping, melt it slowly over low heat to avoid separating the fat and milk solids, which makes a real difference in texture.
Pro Cooking Tips for recipe for canned biscuits
Oven Preheating Trick
Always preheat your oven for at least 15 minutes to ensure consistent 375°F heat throughout. I place my baking sheet in during preheating—this mimics a pizza stone effect, giving your biscuits a crispier bottom. 🔥
Dough Handling Secret
Never twist or pull the biscuits apart when separating. Instead, use a butter knife to gently cut along the perforations. This preserves the layers for maximum flakiness. Pillsbury Grands work best for this technique.
Spacing Matters
Leave at least 1 inch between each biscuit on the baking sheet. Crowding causes uneven rising and steamed, soggy edges. For extra crispiness, place them 2 inches apart—this allows hot air to circulate.
Butter Timing
Brush with melted unsalted butter immediately after baking, not before. Pre-baking butter can weigh down the dough and prevent proper rising. The hot biscuits will absorb the butter beautifully for that bakery shine.
Resting Period
Let your biscuits rest for 2-3 minutes after baking. This allows the structure to set so the layers don’t separate when serving. I find they taste best straight from the oven but hold their texture for 20 minutes. 💡
Double Batch Tip
For parties, bake two sheets at once, rotating them halfway through. Switch the top rack to the bottom and vice versa for even browning. This method works perfectly with 16 oz cans and saves time.
Nutrition Facts
Frequently Asked Questions
What oven temperature works best?
Preheat to 375°F for even baking and maximum rise. This temperature ensures the layers separate properly while cooking through without burning.
Can I add cheese to the dough?
Sprinkle 0.5 cup shredded cheddar on top before baking for a cheesy topping. Press lightly so it adheres during baking.
How do I prevent soggy bottoms?
Use parchment paper and space biscuits 1-2 inches apart. Preheating the baking sheet also helps create a crispier base.
What’s the ideal baking time?
Bake for 10-12 minutes until golden brown. Avoid opening the oven early to prevent heat loss and uneven rising.

- 6 Egg Cake Recipe with Oil: Light as Air With Buttery Moisture - October 4, 2026
- 4 Bean Casserole Recipe: One-Pan Heartiness With Smoky Paprika Depth - October 4, 2026
- 3-Ingredient Keto Mug Cake Recipe: Microwave Magic in 2 Minutes - October 4, 2026