
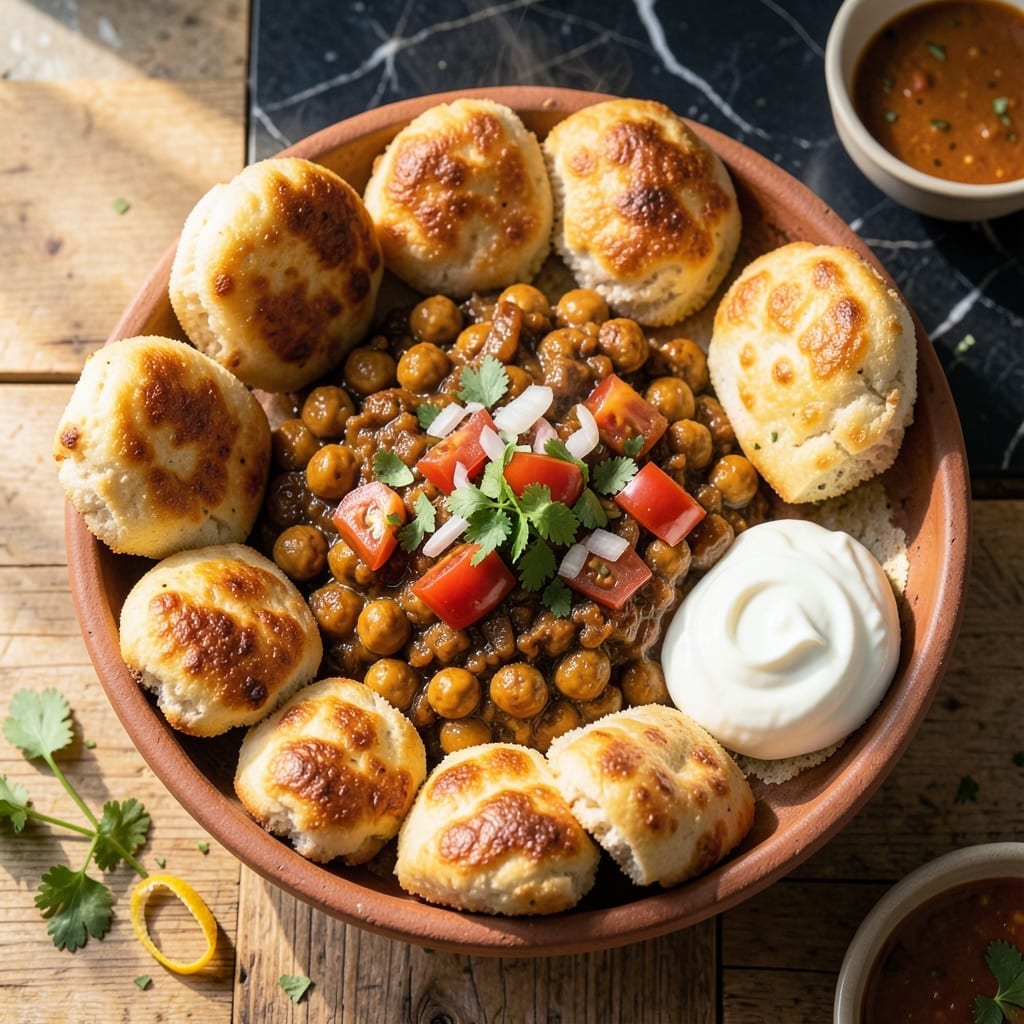
This classic North Indian dish brings together fluffy fried bread and a rich, spiced chickpea curry in perfect harmony. The bhatura puffs up beautifully when fried, while the chana simmers in a fragrant blend of onions, tomatoes, and warming spices.
Traditional techniques ensure authentic results. The dough rests to develop texture, and the chickpeas cook low and slow to absorb every layer of flavor. Serve hot for the best experience.
Ingredients for Recipe for Chana Bhatura
Pantry staples and fresh aromatics create this North Indian favorite with ease.
| Ingredient | Amount | Notes |
|---|---|---|
| Dried Chickpeas 🌱 | 1 ½ cups | Soaked overnight, drained |
| All-Purpose Flour 🌾 | 3 cups | Plus extra for dusting |
| Semolina 🌾 | ½ cup | Fine variety for texture |
| Plain Yogurt 🥛 | ¾ cup | Room temperature, unsweetened |
| Baking Soda 🧂 | ½ tsp | For fluffy bhatura |
| Vegetable Oil 🫒 | 4 cups | For deep frying plus cooking |
| Yellow Onion 🧅 | 2 whole | Finely chopped for curry |
| Garlic Cloves 🧄 | 6 cloves | Minced for curry base |
| Fresh Ginger 🌿 | 1 tbsp | Peeled and grated |
| Tomatoes 🍅 | 3 whole | Chopped, ripe and firm |
| Green Chili Peppers 🌶️ | 2 whole | Finely chopped, adjust to taste |
| Ground Cumin 🌿 | 2 tsp | Toasted for depth |
| Ground Coriander 🌿 | 2 tsp | Freshly ground preferred |
| Turmeric Powder 🌶️ | 1 tsp | For color and warmth |
| Garam Masala 🌶️ | 1 ½ tsp | Freshly ground if possible |
| Salt 🧂 | 1 ½ tsp | Divided between dough and curry |
| Fresh Cilantro 🌿 | ½ cup | Chopped for garnish |
The chickpeas are non-negotiable here. Dried chickpeas (soaked overnight) give the best texture and flavor—canned won’t absorb the spices the same way. For the flour, all-purpose is standard, but adding semolina (find it in the baking aisle at Whole Foods or any Indian grocery) gives that authentic, slightly grainy bite to the bhatura. The yogurt must be plain and unsweetened—Greek or regular both work.
No garam masala? Mix equal parts cumin, coriander, cardamom, and cinnamon for a quick substitute. Fresh ginger and garlic are key, but paste from a jar works in a pinch (use half the amount). The tomatoes can be canned if fresh aren’t great—San Marzano are my go-to. For heat, swap green chilies with cayenne or serrano, or skip them entirely for a milder dish.
The curry tastes even better the next day—flavors deepen overnight. Store in the fridge for up to 4 days or freeze for 3 months. Bhatura dough can rest in the fridge for 24 hours if needed, but fry fresh for the best puff.
Why You’ll Love This Recipe
- No Fuss Dough: I love how the yogurt and baking soda make the bhatura dough come together in minutes—no yeast, no waiting.
- That Spiced Kick: The chickpeas soak up every spice so well, and the semolina adds this subtle crunch that’s ridiculously good.
- Weekend Crowd-Pleaser: Honestly, this is my go-to when friends drop by. It feels special but doesn’t require all-day prep.
- Budget-Friendly Feast: Dried chickpeas and basic pantry staples stretch into a meal that fills everyone up without breaking the bank.
Step-by-Step Instructions for Chana Bhatura
Master the art of this classic dish with my tested method for both components.
Step 1: Prepare the Bhatura Dough
In a large mixing bowl, combine the 3 cups All-Purpose Flour, 0.5 cup Semolina, 0.5 tsp Baking Soda, and ½ tsp Salt. Mix well to distribute the leavening agent evenly throughout the dry ingredients.
Add the 0.75 cup Plain Yogurt and begin mixing with your fingers. The dough will start sticky but will come together as you work it. Knead for 8-10 minutes until smooth and elastic, adding a teaspoon of water at a time if needed. The dough should be soft but not sticky.
Cover the bowl with a damp towel and let it rest for 2-3 hours at room temperature. This resting period allows the gluten to relax and the baking soda to activate, ensuring your bhatura puffs up beautifully when fried.
Step 2: Cook the Chickpea Curry Base
Heat 2 tbsp Vegetable Oil in a heavy pot over medium heat. Add the 2 whole Yellow Onion (finely chopped) and sauté for 6-8 minutes until golden brown. This builds the flavor foundation for your curry.
Stir in the 1 tbsp Fresh Ginger, 6 cloves Garlic Cloves (minced), and 2 whole Green Chili Peppers (finely chopped). Cook for 1-2 minutes until fragrant, then add the 2 tsp Ground Cumin, 2 tsp Ground Coriander, and 1 tsp Turmeric Powder. Toast the spices for 30 seconds to deepen their flavors.
Add the 3 whole Tomatoes (chopped) and cook for 5-6 minutes until they break down into a thick paste. This step ensures your curry has a rich, concentrated base before adding the chickpeas.
Step 3: Simmer the Chickpeas to Perfection
Drain and rinse the 1.5 cups Dried Chickpeas (soaked overnight) and add them to the pot along with 4 cups of water. Bring to a boil, then reduce heat to low and simmer for 45-50 minutes until the chickpeas are tender.
Once the chickpeas are soft, stir in the 1.5 tsp Salt and 1.5 tsp Garam Masala. Simmer for another 5 minutes to allow the flavors to meld. The curry should thicken slightly, with chickpeas that are creamy inside but hold their shape.
Finish by stirring in ¼ cup Fresh Cilantro (reserving the rest for garnish). Taste and adjust seasoning if needed. Keep the curry warm while you prepare the bhatura.
Step 4: Fry the Bhatura to Golden Puffs
Divide the rested dough into 8 equal portions and roll each into a smooth ball. Heat 3 cups Vegetable Oil in a deep, heavy pot to 350-375°F. The oil is ready when a small piece of dough sizzles and rises immediately when dropped in.
On a lightly floured surface, roll each dough ball into a 6-7 inch circle, keeping the center slightly thicker than the edges. This helps the bhatura puff evenly. Dust off any excess flour before frying to prevent burning.
Carefully slide one rolled dough circle into the hot oil. It should puff up dramatically within 20-30 seconds. Use a slotted spoon to gently press down on the bhatura to encourage even puffing. Fry for 1-2 minutes per side until golden brown on both sides. Drain on paper towels and keep warm while frying the remaining dough.
Step 5: Serve and Enjoy
Ladle the hot chickpea curry into bowls and top with the remaining ¼ cup Fresh Cilantro. Serve the puffed bhatura alongside, either whole or torn into pieces for dipping.
The bhatura should be light, crisp on the outside, and soft inside, while the chickpea curry should be thick and aromatic, with each bite offering a balance of spices and tender chickpeas. Serve immediately for the best texture and temperature contrast.
Pro Tips For Making Recipe For Chana Bhatura
- Soak Chickpeas Overnight: I learned this the hard way—dried chickpeas need at least 8 hours in water to soften properly, or your chana will stay stubbornly firm no matter how long you cook it.
- Knead Dough Longer: Give that bhatura dough a good 10 minutes of kneading with the yogurt and semolina—it makes the texture light and airy, not dense and chewy.
- Test Oil Temperature: Drop a tiny piece of dough into the oil first; if it sizzles and rises immediately, the oil is hot enough for frying the bhatura.
- Add Baking Soda Last: Mix the baking soda into the dough right before frying—adding it too early makes the bhatura lose its puff and turn flat.
Pro Cooking Tips for Perfect Results
💡 Master the Dough Consistency
For pillowy-soft bhatura, the dough must be soft but not sticky. Use lukewarm water to activate the yeast properly, and knead for at least 8-10 minutes until smooth. Let it rest for 2-3 hours in a warm place to double in size. This ensures a light, airy texture.
🌡️ Perfect Frying Temperature
Maintain the oil temperature at 350–375°F (175–190°C) for even cooking. If the oil is too hot, the bhatura will brown too quickly without cooking through. If it’s too cool, the bread will absorb excess oil. Use a deep-fry thermometer for accuracy.
🎯 Flavor Boosters for Chana
Enhance the chickpea curry by adding amchur (dry mango powder) for tanginess or a pinch of garam masala for warmth. Sauté the onions until golden for a sweeter base. For extra richness, finish with a drizzle of cream or a pat of butter.
✨ Rest Before Serving
Let the bhatura rest for 1-2 minutes after frying so they crisp up slightly. Serve the chana hot, garnished with fresh cilantro and a squeeze of lemon. This small step ensures the best texture and flavor combination.
Nutrition Facts

- 6 Egg Cake Recipe with Oil: Light as Air With Buttery Moisture - October 4, 2026
- 4 Bean Casserole Recipe: One-Pan Heartiness With Smoky Paprika Depth - October 4, 2026
- 3-Ingredient Keto Mug Cake Recipe: Microwave Magic in 2 Minutes - October 4, 2026