
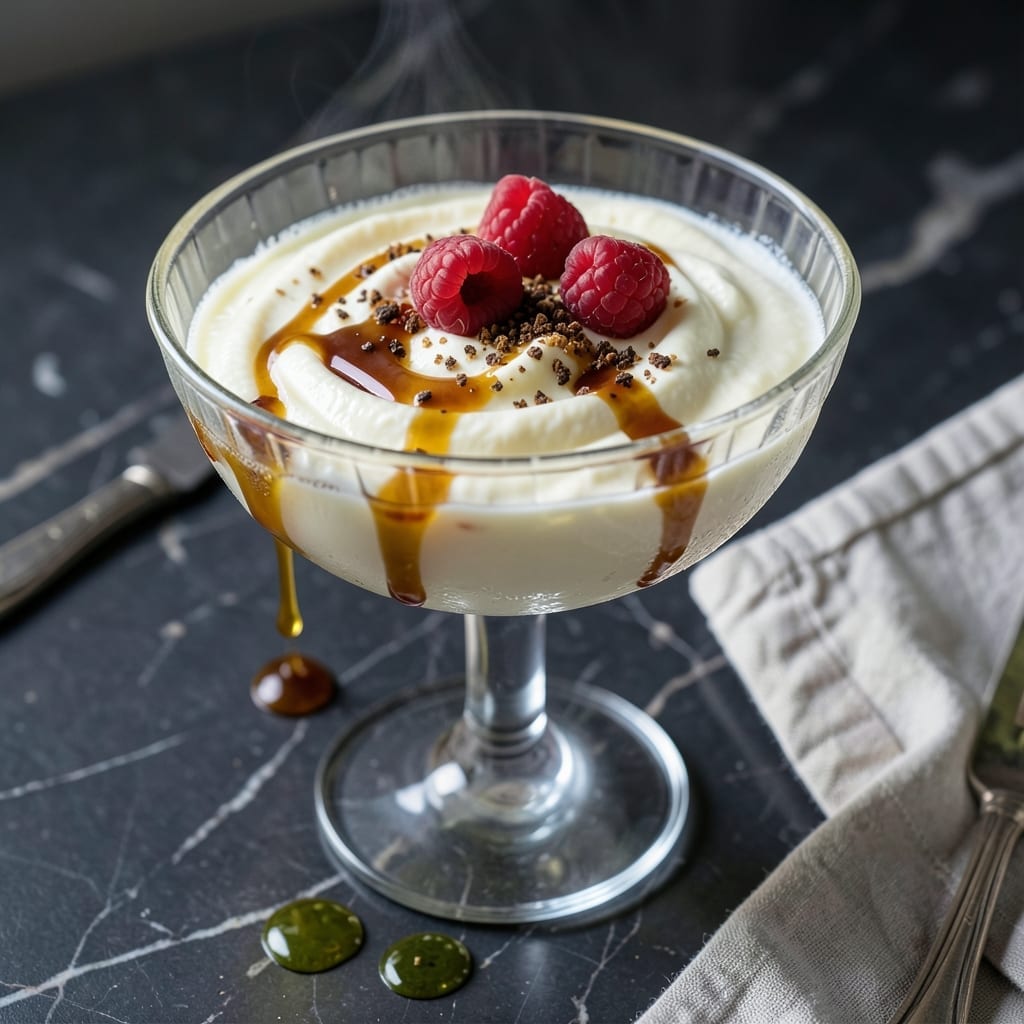
This chilled treat delivers the perfect balance of creamy texture and light refreshment, ideal for warm days or casual gatherings. The process transforms simple ingredients into a smooth, satisfying dessert with minimal effort.
I developed this method to ensure consistent results every time, using a straightforward approach that requires no specialized equipment. The key lies in precise timing and temperature control during preparation and freezing.
The finished product offers a velvety consistency that’s rich yet refreshing, with a clean dairy flavor that appeals to all ages. It maintains its smooth texture even after brief storage in the freezer.
Serve immediately for the best experience or store briefly for later enjoyment. This treat proves that homemade can rival any store-bought version.
Ingredients for Recipe for Ice Milk
Transform these straightforward ingredients into a velvety, refreshing chilled treat with ease.
| Ingredient | Amount | Notes |
|---|---|---|
| Whole Milk 🥛 | 4 cups | Full-fat for creaminess |
| Heavy Cream 🥛 | 1 cup | Cold, for richness |
| Granulated Sugar 🍚 | ¾ cup | Fine white sugar preferred |
| Vanilla Extract 🌿 | 2 tsp | Pure extract for best flavor |
| Salt 🧂 | ¼ tsp | Fine sea salt |
| Large Egg Yolks 🥚 | 4 whole | Room temperature for smooth texture |
| Corn Syrup 🍯 | 2 tbsp | Light or dark variety |
| Lemon Juice 🍋 | 1 tsp | Freshly squeezed brightens flavor |
| Vanilla Bean 🌱 | 1 whole | Split and scraped optional |
| Ice Cubes ❄️ | 2 cups | For churning if needed |
The dairy base is critical here. Whole milk and heavy cream from organic brands like Organic Valley or Straus Family Creamery deliver superior richness without artificial stabilizers. Look for cream labeled at least 36% milkfat—lower percentages yield ice crystals, not that signature smooth texture. Room-temperature egg yolks incorporate more evenly, so set them out 20-30 minutes before starting.
No vanilla bean? Pure vanilla extract at double the amount works fine. Swap corn syrup for honey or agave if avoiding high-fructose options, but note it may slightly alter the freezing point. For a lighter version, half-and-half replaces heavy cream, though the texture won’t be as luxurious. The sugar can be reduced by 25% without major impact, but don’t skip it entirely.
This keeps 1-2 weeks in an airtight container, though it’s best within 3-4 days for peak creaminess. Press plastic wrap directly on the surface before sealing to prevent ice crystals. For longer storage, freeze in portions—thaw in the fridge 12-24 hours before serving.
Why You’ll Love This Recipe
- 5-Minute Mix: I just stir, chill, and spin—no custard cooking, no fuss.
- Pure Vanilla Bliss: That real vanilla extract shines through every creamy spoonful.
- Party or Pajamas: It’s my go-to for birthday cones or a solo Netflix treat.
- Freezer Stash: I always keep a tub; it stays scoopable for weeks.
Step-by-Step Instructions for Ice Milk
This professional method ensures a velvety texture and balanced sweetness in your frozen treat.
Step 1: Infuse the Dairy Base
In a heavy saucepan, combine the 4 cups Whole Milk and 1 cup Heavy Cream. If using the 1 whole Vanilla Bean, split it lengthwise and scrape the seeds into the mixture, then add the pod as well. Heat over medium heat until the mixture reaches 170°F—small bubbles will form at the edges but it should not boil.
This gentle heating infuses the vanilla flavor deeply into the dairy while preventing scorching. Remove from heat, cover, and let steep for 15 minutes to extract maximum vanilla essence. The mixture should smell rich and aromatic, with visible steam but no skin formation on the surface.
Step 2: Temper the Egg Yolks
In a separate bowl, whisk together the 4 whole Large Egg Yolks, 0.75 cup Granulated Sugar, 0.25 tsp Salt, 2 tbsp Corn Syrup, and 1 tsp Lemon Juice until pale and slightly thickened, about 2 minutes. The sugar should be fully dissolved with no visible granules.
Slowly pour about 1 cup of the warm milk mixture into the egg yolk mixture while whisking constantly. This tempering process prevents the eggs from curdling. Once fully incorporated, return the tempered mixture to the saucepan with the remaining dairy.
Step 3: Cook to Custard Consistency
Place the saucepan back over medium-low heat and cook, stirring constantly with a wooden spoon, until the mixture thickens enough to coat the back of the spoon and reaches 175°F on an instant-read thermometer. This should take 8-10 minutes.
Watch for the mixture to leave a clear path when you run your finger along the spoon—a sign it has reached the proper nappe consistency. Do not allow it to boil, as this will cause the custard to curdle. The final mixture should be smooth, glossy, and slightly thicker than heavy cream.
Step 4: Chill and Prepare for Freezing
Strain the custard through a fine-mesh sieve into a clean bowl to remove any cooked egg bits or vanilla pod remnants. Stir in the 2 tsp Vanilla Extract. Place the bowl in an ice bath and stir occasionally until cooled to 40°F or lower, about 30 minutes.
For fastest results, you can divide the custard into smaller containers. The mixture should be cold to the touch and have the consistency of heavy cream. This chilling step is crucial for achieving a smooth texture in the final product.
Step 5: Churn and Freeze to Perfection
Pour the chilled custard into your ice cream maker and churn according to the manufacturer’s instructions, typically 20-25 minutes. The mixture should thicken to the consistency of soft-serve ice cream, with visible ribbons forming from the dasher.
For a firmer texture, transfer to a lidded container and freeze for an additional 4 hours or until solid. If not using an ice cream maker, pour the custard into a shallow dish, cover, and freeze, stirring vigorously with a fork every 30 minutes for 3-4 hours to break up ice crystals, using the 2 cups Ice Cubes to maintain temperature if needed. The final product should be creamy, smooth, and hold its shape when scooped.
Pro Tips For Making Recipe For Ice Milk
- Chill the Base: Always refrigerate your milk-cream-sugar mixture for at least 4 hours before churning—I learned this the hard way after ending up with soupy ice milk that refused to set.
- Use Full-Fat Dairy: Skip the low-fat milk or half-and-half; whole milk and heavy cream are non-negotiable for that creamy texture that makes ice milk actually satisfying.
- Don’t Over-Churn: Watch the ice cream maker carefully—once the mixture thickens to soft-serve consistency (usually 20-25 minutes), stop it, or you’ll end up with a dense, icy block.
- Add Alcohol for Softness: Sounds weird, but a teaspoon of vodka or rum in the mix keeps the ice milk scoopable straight from the freezer—my grandmother swore by this, and she was right.
Storing and Reheating recipe for ice milk
Short-Term Storage
Once churned, transfer to a shallow airtight container and press plastic wrap directly onto the surface to minimize air exposure. This prevents ice crystals from forming on top. Store in the coldest part of your freezer, ideally at 0°F or below, for up to 3 days without quality loss. 🔥
Long-Term Freezing
For storage beyond 3 days, portion into smaller containers to avoid repeated thawing. It maintains best quality for 2-3 weeks if kept consistently frozen. I recommend using quart-sized freezer bags laid flat to save space and thaw more evenly.
Thawing Properly
Move the container from freezer to refrigerator 12-24 hours before serving. This slow thaw preserves the creamy texture. Never microwave or thaw at room temperature, as this creates ice crystals and a grainy consistency. The treat should be soft enough to scoop but still cold.
Re-Freezing Caution
Once thawed, do not refreeze—this will significantly degrade texture. If you’ve scooped some out, consume the remainder within 2-3 days while keeping it refrigerated. The flavor remains excellent, though the texture may soften slightly after the first thaw.
Serving After Storage
If it seems too firm after thawing, let it sit at room temperature for 5-10 minutes before serving. For a quick fix, place the container in a bowl of cold water for 10-15 minutes to soften the edges without melting the center. ❄️
Storage Container Tips
Use containers with tight-sealing lids—glass or BPA-free plastic works best. Avoid metal containers, which can impart off-flavors. Leave ½ inch headspace to allow for expansion during freezing. Label with the date to track freshness.
Nutrition Facts
Frequently Asked Questions
Can I make this without an ice cream maker?
Yes! Pour the chilled custard into a shallow dish and freeze. Stir vigorously with a fork every 30 minutes for 3-4 hours to break up ice crystals.
Why does the recipe call for corn syrup?
Corn syrup lowers the freezing point, preventing iciness and creating a smoother texture. You can substitute honey or agave in equal amounts.
How can I make a lighter version?
Replace the heavy cream with half-and-half. The texture will be less rich but still creamy. Reduce sugar by 25% if desired.
What if my custard curdles during cooking?
Strain it immediately through a fine-mesh sieve to remove any cooked egg bits. Next time, temper the eggs more slowly and cook at medium-low heat.

- 6 Egg Cake Recipe with Oil: Light as Air With Buttery Moisture - October 4, 2026
- 4 Bean Casserole Recipe: One-Pan Heartiness With Smoky Paprika Depth - October 4, 2026
- 3-Ingredient Keto Mug Cake Recipe: Microwave Magic in 2 Minutes - October 4, 2026