
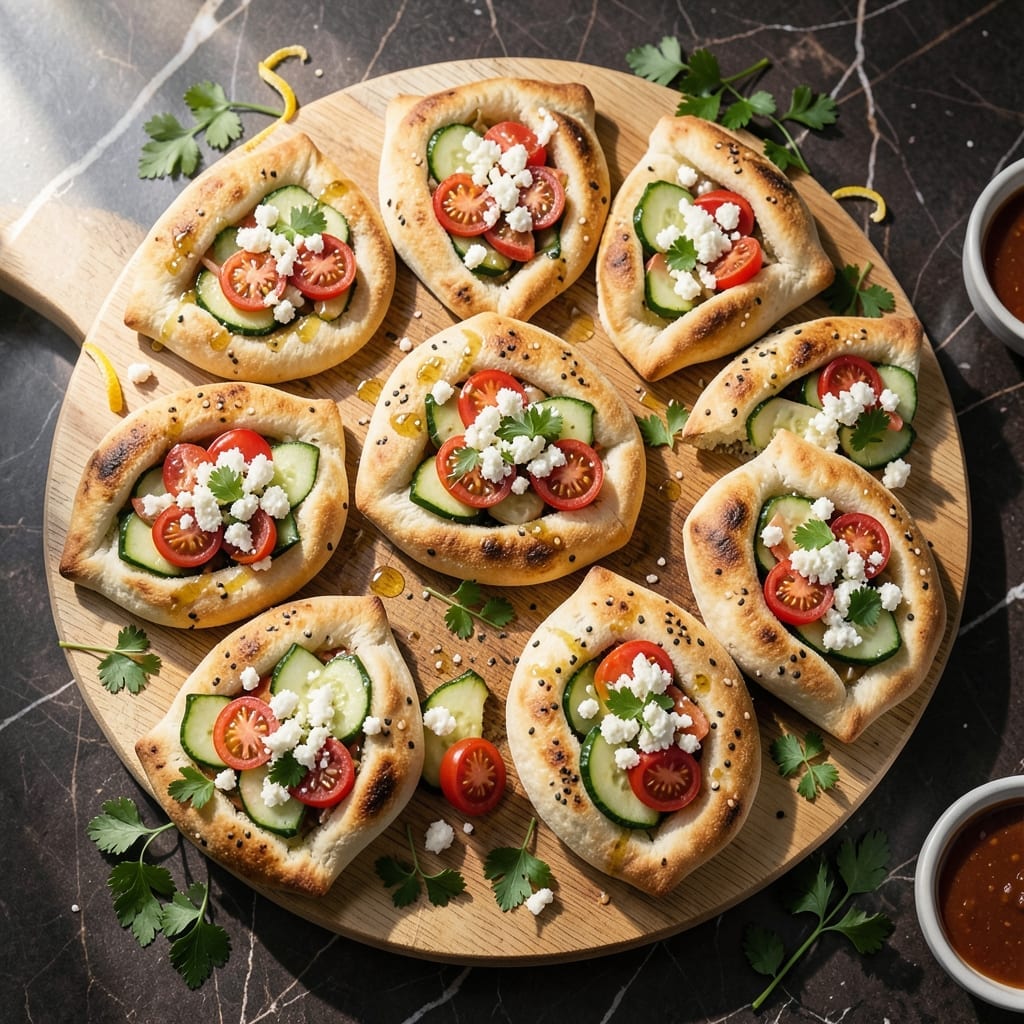
Nothing beats the satisfaction of pulling apart warm, homemade pita bread to reveal a perfect pocket. This proven technique delivers soft, fluffy bread every time, with just the right amount of chew and a hollow center ideal for stuffing.
The secret lies in the dough’s hydration and a two-stage rise, which develops the gluten structure needed for that signature pocket. A hot oven and brief baking time create the steam that makes the bread puff dramatically, then settle into its final form.
You’ll achieve bakery-quality results with basic pantry ingredients and minimal effort. The process is straightforward but precise, with each step building toward that moment when your pitas emerge golden and beautifully puffed from the oven.
Fill with your favorite ingredients or enjoy warm as is. This method never fails to deliver the perfect pita pocket.
Ingredients for Recipe for Pita Bread Pockets
Basic pantry staples transform into golden, pocketed bread with minimal effort and maximum satisfaction.
| Ingredient | Amount | Notes |
|---|---|---|
| All-Purpose Flour 🌾 | 3 cups | Plus extra for dusting |
| Warm Water 💧 | 1 ¼ cups | About 110°F for proofing |
| Active Dry Yeast 🍞 | 2 ¼ tsp | One packet, fresh and active |
| Granulated Sugar 🍚 | 1 tsp | To activate yeast |
| Olive Oil 🫒 | 2 tbsp | Extra-virgin preferred |
| Salt 🧂 | 1 ½ tsp | Fine sea salt for even distribution |
| Plain Greek Yogurt 🥛 | ¼ cup | Full-fat for tenderness |
| Honey 🍯 | 1 tbsp | Optional for slight sweetness |
The flour is the foundation here. King Arthur all-purpose is my go-to—consistent protein content means reliable results every time. Yeast is non-negotiable: check the expiration date and store it in the freezer (yes, really) to extend shelf life. Warm water should feel like bathwater—too hot kills the yeast, too cold won’t wake it up.
No Greek yogurt? Plain whole-milk yogurt works just as well. Out of honey? Agave or sugar in the dough does the trick. Want to go vegan? Swap honey for maple syrup and yogurt for a neutral plant-based version. The olive oil can be any variety, but extra-virgin adds a subtle depth that’s worth it.
Dough keeps in the fridge for 24-48 hours (flavor actually improves). Baked pitas are best fresh but reheat beautifully wrapped in foil at 350°F for 5-10 minutes. Freeze extras for up to 1 month—just thaw and warm before serving.
Why You’ll Love This Recipe
- No-Knead Magic: Honestly, mixing flour, water, yeast, and a touch of sugar takes less effort than my morning coffee routine.
- Pillowy Perfection: The olive oil gives these pockets that tender, slightly crisp edge with a soft center that’s impossible to resist.
- Lunchbox Hero: I stuff them with whatever’s in the fridge—leftover chicken, hummus, or just cheese—and the kids devour them.
- Pennywise Winner: A bag of flour and yeast makes a dozen for the cost of one store-bought pack. Here’s what sold me—no trade-off on taste.
Step-by-Step Instructions for Pita Bread Pockets
This method delivers tender, pillowy bread with that signature pocket every time—let’s make magic happen.
Step 1: Activate the Yeast for Maximum Rise
In a small bowl, combine the 1.25 cups Warm Water with the 1 tsp Granulated Sugar and 2.25 tsp Active Dry Yeast. Stir gently and let it sit for 5-7 minutes until the mixture becomes frothy and cloudy. This visual confirmation means the yeast is alive and ready to work its leavening magic.
If your yeast doesn’t bubble, it’s expired—start over with fresh yeast. The water must be 110°F; too hot kills the yeast, too cold slows activation. I always use a thermometer for precision, but you can test it with your wrist—it should feel comfortably warm, not hot.
Step 2: Mix and Knead the Dough to Silky Perfection
In a large mixing bowl, whisk together the 3 cups All-Purpose Flour and 1.5 tsp Salt. Create a well in the center and pour in the activated yeast mixture, 2 tbsp Olive Oil, 0.25 cup Plain Greek Yogurt, and 1 tbsp Honey. Use a wooden spoon to combine until a shaggy dough forms.
Turn the dough onto a lightly floured surface and knead for 8-10 minutes until smooth and elastic. The dough should spring back when poked and feel slightly tacky but not sticky. The Greek yogurt adds tenderness, while the honey enhances browning and adds subtle sweetness.
Step 3: Let the Dough Rise Until Doubled in Size
Place the dough in a lightly oiled bowl, turning once to coat. Cover with a damp kitchen towel and let it rise in a warm, draft-free spot for 1-2 hours, or until doubled in volume. I like to preheat my oven to 200°F, turn it off, and place the bowl inside for a consistent environment.
Press your finger into the dough—if the indentation remains, it’s ready. If it springs back quickly, give it more time. This rise develops flavor and ensures your pitas will be light and airy, with the perfect pocket structure for stuffing.
Step 4: Shape and Rest the Pita Rounds
Punch down the risen dough to release excess air, then divide it into 8 equal portions (about 3 ounces each). Roll each portion into a ball, then flatten into a ¼-inch thick round on a floured surface. Use a rolling pin and work from the center outward, rotating the dough to maintain an even thickness.
Place the shaped pitas on a floured surface, cover with a towel, and let them rest for 20-30 minutes. This final rest relaxes the gluten, preventing the dough from shrinking when baked and ensuring even cooking. Don’t skip this—it’s the secret to pitas that puff beautifully in the oven.
Step 5: Bake Until Puffed and Golden
Preheat your oven to 475°F and place a baking stone or inverted baking sheet inside to heat. Working in batches, transfer the rested pitas directly onto the hot stone. Bake for 2-3 minutes until they puff dramatically and develop light golden spots.
Flip each pita and bake for an additional 1-2 minutes until fully puffed and golden brown on both sides. Remove from the oven and transfer to a clean towel. Press gently to deflate slightly—this creates the perfect pocket. Let them cool completely before slicing open and stuffing with your favorite fillings.
Pro Tips For Making Recipe For Pita Bread Pockets
- Test the Yeast: I learned this the hard way—always bloom your yeast in warm water with sugar for 5-10 minutes first. If it doesn’t get foamy, your pitas won’t rise, and you’ll waste flour.
- Knead Longer: Sounds tedious, but 8-10 minutes of kneading develops the gluten for that perfect stretchy pocket. Skip this, and your pitas will be dense.
- Rest the Dough: After shaping, let the dough rest for 15-20 minutes before rolling. It relaxes the gluten, making it easier to roll thin without shrinking back.
- Use High Heat: Crank your oven to 475°F or use a hot skillet. High heat is non-negotiable for getting those signature puffed pockets with a soft interior.
Make-Ahead Tips for This recipe for pita bread pockets
Dough Prep Ahead
Mix and knead the dough as directed, then let it complete its first rise. Instead of shaping, transfer the dough to an oiled airtight container and refrigerate for up to 24 hours. The cold slows fermentation, developing deeper flavor while keeping the dough manageable.
Cold Fermentation
For even more flavor, let the dough cold-ferment for 48 hours in the fridge. Punch it down once at the 24-hour mark to release gases. This extended rest creates complex flavors and a more open crumb structure.
Pre-Shape and Store
After the first rise, divide and shape the dough into balls, then place them on a floured tray. Cover with plastic wrap and refrigerate for up to 12 hours. This lets you bake fresh pitas on demand without starting from scratch.
Freeze for Later
Shape the dough into balls and freeze on a tray before transferring to a ziplock bag. They’ll keep for 1 month. Thaw overnight in the fridge, then rest at room temperature for 30 minutes before rolling and baking. 💡
Baked Pita Storage
Once cooled, store baked pitas in an airtight container at room temperature for up to 3 days. For longer storage, freeze with parchment between each pita to prevent sticking.
Reheating Tips
Revive room-temperature pitas by wrapping in foil and warming at 350°F for 5-10 minutes. For frozen pitas, add 2-3 minutes to the reheating time. Spritz with water before reheating to restore softness. 🔥
Nutrition Facts
Frequently Asked Questions
Why didn’t my pitas form pockets?
Insufficient heat or short baking time often prevents puffing. Ensure your oven is preheated to 475°F and bake until fully puffed and golden.
Can I make these without yeast?
Yes, but they won’t puff the same way. Use 1 tsp baking powder per cup of flour for a quick version, though the texture will be denser.
What’s the best way to reheat leftovers?
Wrap in foil and warm at 350°F for 5-10 minutes. Spritz with water first to restore softness.
Can I use whole wheat flour?
Yes, but replace only 50% of the all-purpose flour. Whole wheat makes dough heavier, so pockets may not form as well.

- 6 Egg Cake Recipe with Oil: Light as Air With Buttery Moisture - October 4, 2026
- 4 Bean Casserole Recipe: One-Pan Heartiness With Smoky Paprika Depth - October 4, 2026
- 3-Ingredient Keto Mug Cake Recipe: Microwave Magic in 2 Minutes - October 4, 2026