
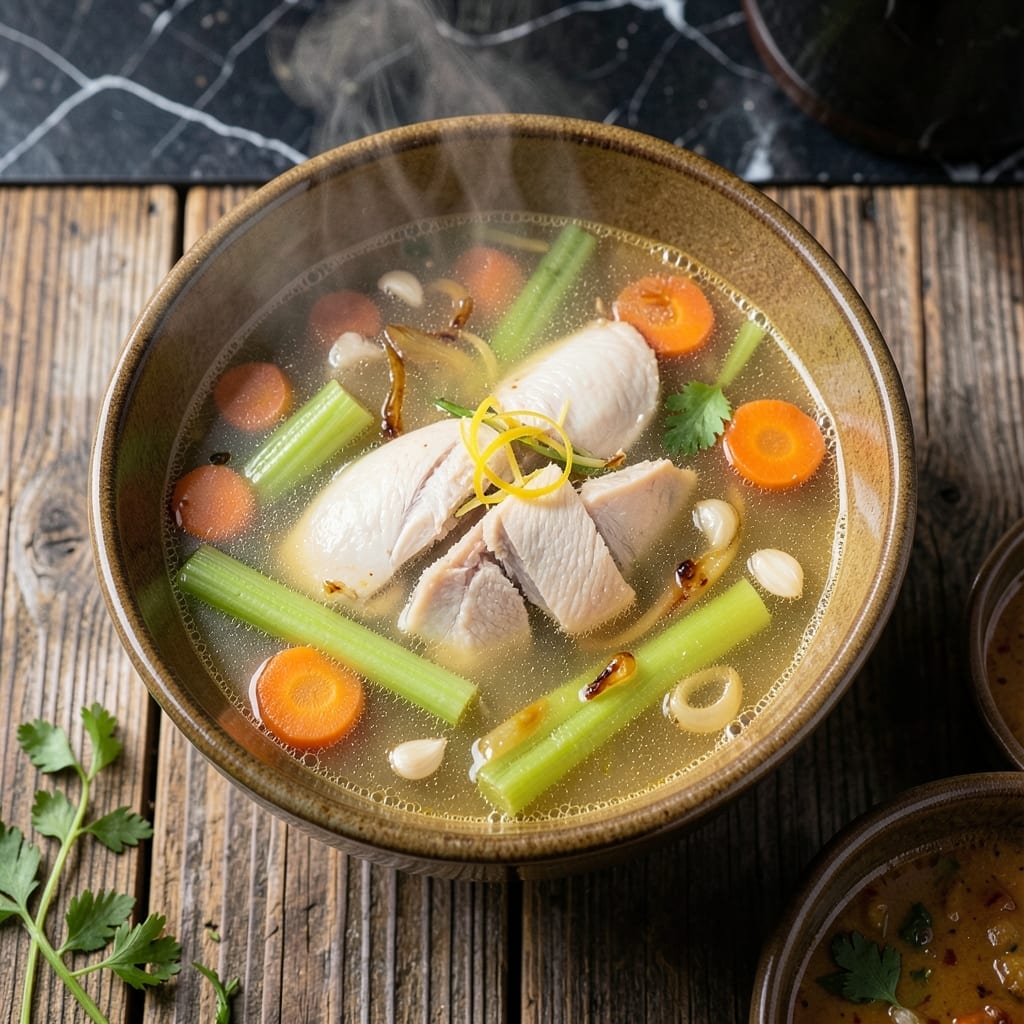
This soup maker recipe delivers restaurant-quality results with minimal effort. I developed this method after realizing how perfectly these appliances maintain steady heat for even cooking.
The appliance handles the simmering, allowing flavors to meld together without constant stirring. Just add your ingredients, set the timer, and let the machine work its magic.
What emerges is a perfectly balanced soup with tender vegetables and rich broth. The hands-off approach doesn’t sacrifice depth of flavor.
This method proves that excellent soup doesn’t require hours at the stove. The machine’s consistent heat creates ideal conditions for developing complex tastes.
Ingredients for Recipe for Soup Maker
Restaurant-quality soup starts with fresh, simple ingredients for hands-off cooking perfection.
| Ingredient | Amount | Notes |
|---|---|---|
| Chicken Breast 🍗 | 1 lb | Boneless, skinless, diced |
| Carrots 🥕 | 2 whole | Peeled and chopped |
| Celery Stalks 🌿 | 2 whole | Diced, leaves included |
| Yellow Onion 🧅 | 1 whole | Medium, finely diced |
| Garlic Cloves 🧄 | 3 cloves | Minced for depth |
| Chicken Stock 🥣 | 6 cups | Low-sodium preferred |
| Diced Tomatoes 🍅 | 1 can | 14.5 oz, with juices |
| Bay Leaf 🍃 | 1 whole | Dried, removed before serving |
| Dried Thyme 🌿 | 1 tsp | Crushed between fingers |
| Dried Parsley 🌿 | 1 tsp | For garnish and flavor |
| Olive Oil 🫒 | 1 tbsp | Extra-virgin for sautéing |
| Salt 🧂 | 1 tsp | Kosher or sea salt |
| Black Pepper 🌶️ | ½ tsp | Freshly ground preferred |
| Fresh Spinach 🥬 | 2 cups | Loosely packed, added last |
The chicken stock is non-negotiable for depth. Opt for low-sodium from Swanson or Kitchen Basics to control seasoning. Fresh chicken breast yields the cleanest flavor, but thighs work too if you prefer richer broth. The vegetables should be uniform in size for even cooking—pre-cut mirepoix from Whole Foods saves time without sacrificing quality.
No fresh spinach? Frozen works at a 1:1 ratio (thaw and drain first). Short on thyme? Fresh rosemary at half the amount offers a nice twist. Chicken stock can be swapped for vegetable stock, but the flavor profile will shift. The bay leaf is subtle but essential—don’t omit it, even if it seems minor.
Store uncooked chicken in the fridge for up to 2 days. Prepped veggies keep 3-4 days in airtight containers. The soup itself tastes even better after 24 hours—flavors meld overnight. Freezes beautifully for 3 months if needed.
Why You’ll Love This Recipe
- Set It and Forget: I toss everything in, press a button, and the soup maker does the rest—no stirring, no watching.
- Garlic-Infused Comfort: The garlic and onion simmer together into a rich base that makes the chicken taste like it slow-cooked all day.
- Meal Prep Hero: I make a double batch on Sunday and portion it out for lunches all week.
- Stretches the Budget: One chicken breast, a handful of veggies, and I get four hearty bowls of soup.
Step-by-Step Instructions for Soup Maker
Here’s the method. Straightforward, tested, works every time.
Step 1: Sauté Aromatics for Flavor Foundation
Heat the olive oil in the soup maker or a large pot over medium heat. Add the yellow onion, carrots, and celery stalks. Sauté for 5-7 minutes until the vegetables soften and the onion becomes translucent.
This step builds the base of your soup. The natural sugars in the vegetables caramelize slightly, adding depth to the final dish. Stir occasionally to prevent browning and ensure even cooking.
Step 2: Incorporate Protein and Seasonings
Add the diced chicken breast to the pot and cook for 4-5 minutes, stirring occasionally, until the chicken is no longer pink on the outside. This ensures the meat begins to develop flavor while remaining tender.
Stir in the minced garlic cloves, salt, and black pepper. Cook for an additional 1 minute until the garlic releases its aroma. Be careful not to let it burn, as this will impart a bitter taste to the soup.
Step 3: Combine Liquids and Simmer
Pour in the 6 cups chicken stock, diced tomatoes with juices, bay leaf, and dried thyme. Stir well to combine all ingredients. If using a soup maker, select the appropriate setting. Otherwise, bring the mixture to a boil, then reduce the heat to low.
Let the soup simmer for 20-25 minutes until the chicken breast is fully cooked and the vegetables are tender. The simmering process allows the flavors to meld together beautifully.
Step 4: Add Spinach and Finish
Stir in the 2 cups fresh spinach and dried parsley. Cook for an additional 2-3 minutes until the spinach wilts and becomes bright green. The spinach adds a fresh, vibrant element to the soup.
Remove the bay leaf before serving. Taste and adjust seasoning with additional salt or black pepper if needed. The soup should be rich, flavorful, and comforting.
Serve hot, garnished with extra dried parsley if desired. The combination of tender chicken, hearty vegetables, and aromatic broth makes this dish a satisfying meal for any occasion.
Pro Tips For Making Recipe For Soup Maker
- Pre-cook the Chicken: Sear the chicken breast in a pan for 3-4 minutes per side before adding it to the soup maker—this locks in flavor and prevents that rubbery texture I got tired of after my first few attempts.
- Uniform Chopping: Cut the carrots, celery, and onion into even, bite-sized pieces so they cook at the same rate; I learned this the hard way after fishing out crunchy carrots from an otherwise perfect batch.
- Don’t Overfill: Resist the urge to cram in extra ingredients—the soup maker needs room for everything to circulate, or you’ll end up with unevenly cooked veggies and chicken (yes, even if you’re impatient like me).
- Add Garlic Later: Toss the minced garlic in during the last 10 minutes of cooking to keep its flavor bright and punchy; my grandmother swore by this, and she was right.
Troubleshooting This Dish
Overfilling the Maker
Never exceed the maximum fill line—most soup makers hold 4-6 cups liquid. Overfilling causes spills and uneven cooking. I learned this the hard way with a tomato-based soup that bubbled over and made a mess of my countertop. 💡
Underseasoning the Broth
Taste before serving and adjust with salt or pepper. The low-sodium stock lets you control the flavor. I often add an extra pinch of salt right at the end to make the flavors pop.
Skipping the Sauté Step
Even if your model has a sauté function, don’t skip it. The 5-7 minutes of browning the onion, carrots, and celery builds the flavor foundation. Without it, your soup will taste flat.
Adding Spinach Too Early
The 2 cups fresh spinach should go in last. Adding it early turns it mushy and dull. Stir it in during the final 2-3 minutes for bright color and texture.
Ignoring the Bay Leaf
It’s subtle but essential. Forgetting the bay leaf leaves your soup lacking depth. Just
Using Cold Stock
Start with room-temperature chicken stock. Cold liquid slows the cooking process and can trigger the machine’s safety features. I keep mine on the counter for 30 minutes before starting. ✨
Nutrition Facts
Frequently Asked Questions
Do I need to preheat the appliance first?
Most modern models heat automatically when started. Just add ingredients and select your program.
Can I use frozen vegetables?
Yes, but thaw and drain them first to avoid excess liquid. This prevents a watery final result.
How do I clean my soup maker afterward?
Unplug and let it cool completely. The non-stick pot usually lifts out for easy hand-washing. Never submerge the base in water.
Why does my soup sometimes taste bland?
Underseasoning is the most common issue. Taste and adjust with salt or pepper before serving. The sauté step also builds crucial flavor.

- 6 Egg Cake Recipe with Oil: Light as Air With Buttery Moisture - October 4, 2026
- 4 Bean Casserole Recipe: One-Pan Heartiness With Smoky Paprika Depth - October 4, 2026
- 3-Ingredient Keto Mug Cake Recipe: Microwave Magic in 2 Minutes - October 4, 2026