
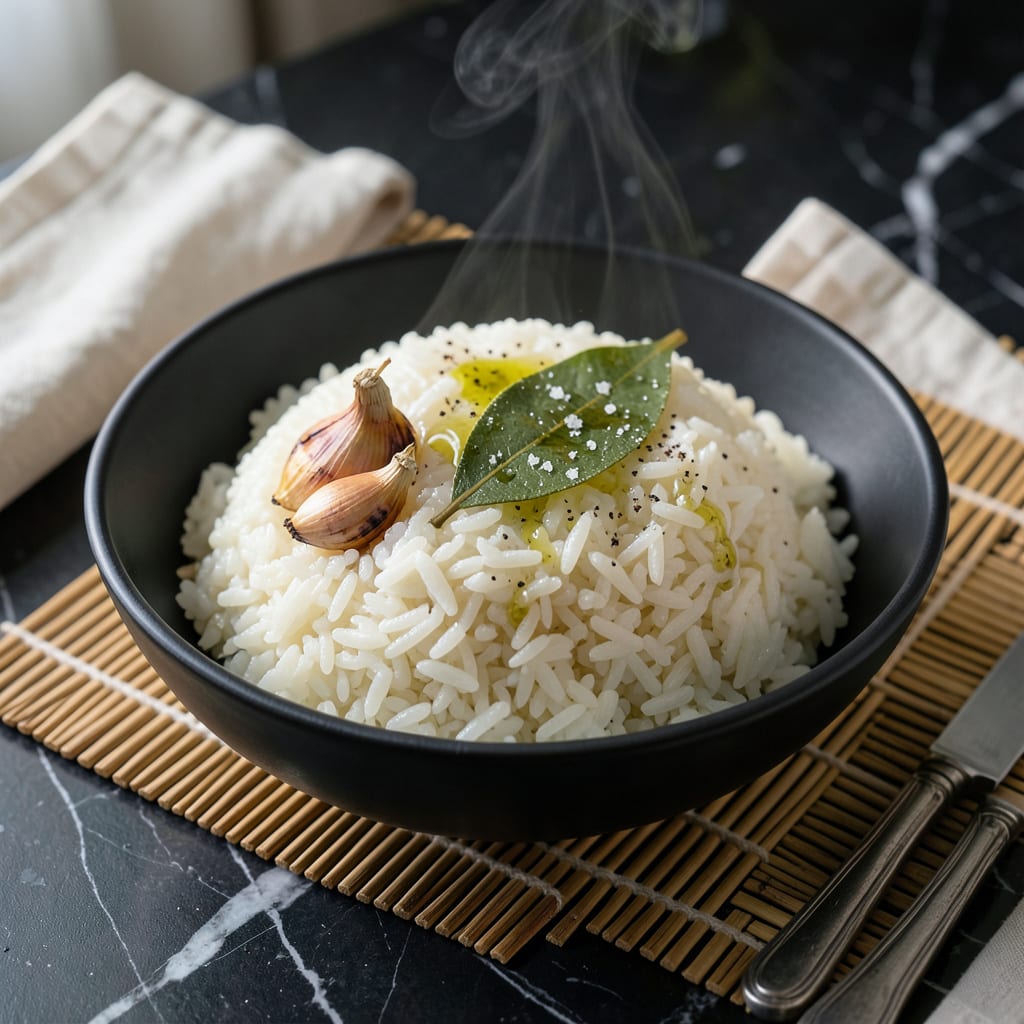
Mastering perfectly steamed rice requires just a few simple principles. The right water-to-rice ratio and gentle heat transform plain grains into fluffy, separate perfection every time.
This method works for any variety, from jasmine to basmati. With minimal effort and 15 minutes, you’ll achieve restaurant-quality results that pair with any meal.
Ingredients for Recipe for Steam Rice
Basic pantry items yield perfectly fluffy, separate grains every time with this method.
| Ingredient | Amount | Notes |
|---|---|---|
| Jasmine Rice 🌾 | 2 cups | Long-grain, rinsed thoroughly |
| Water 💧 | 3 cups | Filtered for best results |
| Fine Sea Salt 🧂 | ½ tsp | Optional, for seasoning |
| Neutral Oil 🫒 | 1 tsp | Avocado or vegetable oil |
| Bay Leaf 🍃 | 1 whole | Optional for aroma |
| Garlic Cloves 🧄 | 2 cloves | Smashed, optional for flavor |
| Fresh Cilantro 🌿 | ¼ cup | Chopped, for garnish |
| Lime 🍈 | 1 whole | Cut into wedges for serving |
The rice quality matters most here. Jasmine or basmati deliver the best texture, but any long-grain variety works. Look for unbroken grains with a vibrant color—avoid dusty or yellowed rice. Whole Foods and Asian markets typically have the freshest stock. Rinse until the water runs clear to remove excess starch, which ensures fluffier results.
No jasmine? Basmati or long-grain white are direct substitutes. For brown rice, increase water to 2.5 cups per 1 cup rice and extend cooking time. The bay leaf and garlic are optional but add subtle depth—skip if you prefer plain rice. If using a rice cooker, follow the 1:1.5 rice-to-water ratio. Frozen rice? Thaw completely before steaming.
Cooked rice keeps 4-5 days in the fridge, 6 months frozen. Store in an airtight container to prevent drying. Reheat with a splash of water and a tight lid to revive moisture. Always rinse rice before cooking—worth the extra minute.
Why You’ll Love This Recipe
- One Pot Wonder: I just toss jasmine rice, water, and a bay leaf in a pot—no fancy steps, no stress.
- Subtle Aroma: The bay leaf and hint of salt make the rice smell and taste way more interesting than plain steamed rice.
- Meal Prep Star: This rice pairs with literally everything—stir-fries, curries, or just a fried egg on top.
- Penny Pincher: Jasmine rice and a few pantry staples stretch into meals for days. Honestly, it’s my cheapest staple.
Step-by-Step Instructions for Steamed Rice
This method ensures perfectly fluffy grains with minimal effort and maximum flavor.
Step 1: Rinse and Soak the Jasmine Rice
Place the 2 cups Jasmine Rice in a fine-mesh strainer and rinse under cold running water until the water runs clear. This removes excess starch that could make the rice gummy. I typically rinse for 30-45 seconds while swirling the grains with my hand.
After rinsing, transfer the rice to a bowl and cover with cool water. Let it soak for 15-20 minutes. This step hydrates the grains evenly, preventing uneven cooking. You’ll notice the grains plump slightly during soaking—this is exactly what you want.
Step 2: Prepare the Aromatics and Water
In a medium saucepan with a tight-fitting lid, combine the 3 cups Water, 1 tsp Neutral Oil, 0.5 tsp Fine Sea Salt, 1 whole Bay Leaf, and 2 cloves Garlic Cloves. The oil prevents sticking, while the bay leaf and garlic infuse subtle aroma into the grains.
Bring this mixture to a boil over high heat. As it heats, the garlic will release its fragrance, and you’ll see small bubbles forming around the edges before it reaches a full rolling boil. This takes about 3-4 minutes depending on your stove.
Step 3: Add Rice and Begin Steaming
Drain the soaked rice thoroughly in the strainer, shaking gently to remove all excess water. Add the rice to the boiling water mixture and stir once to distribute the grains evenly. The water should come about ½ inch above the rice level.
Immediately reduce the heat to low, cover the pot with its lid, and let it simmer undisturbed. You should see gentle steam escaping from under the lid. This is the critical phase—resist the urge to lift the lid and peek, as this releases valuable steam.
Step 4: Complete the Cooking Process
Cook the rice for 15 minutes on low heat. After this time, turn off the heat but keep the pot covered. Let it sit for an additional 10 minutes—this allows the residual steam to finish cooking the grains and lets them absorb any remaining moisture.
You’ll know it’s perfect when you remove the lid and see small steam holes throughout the rice surface. The grains should be tender but still distinct, with no hard centers. Fluff gently with a fork to separate the grains without mashing them.
Step 5: Rest and Serve with Garnishes
Transfer the rice to a serving bowl and let it rest for 2-3 minutes. This final rest allows the grains to settle and any remaining moisture to distribute evenly. Discard the bay leaf and garlic cloves before serving.
Sprinkle with 0.25 cup Fresh Cilantro and serve with lime wedges on the side. The bright citrus and herbal notes complement the subtle aroma of the steamed rice beautifully. This dish serves 4 perfectly as a side or base for other components.
Pro Tips For Making Recipe For Steam Rice
- Rinse the Rice: Soak jasmine rice in cold water for 10 minutes, then rinse until the water runs clear—this removes excess starch and prevents gummy, clumpy grains.
- Use Less Water: For steam rice, the ratio is 1:1—equal parts jasmine rice to water by volume. I learned this the hard way after too many mushy batches.
- Add Bay Leaf Early: Toss the bay leaf into the water before steaming starts so its subtle floral aroma infuses the rice as it cooks.
- Rest After Steaming: Let the rice sit covered for 5–10 minutes off the heat—this lets the grains firm up and absorb any lingering moisture.
Dietary Considerations for This recipe for steam rice
Naturally Gluten-Free
This dish is inherently gluten-free, making it safe for those with celiac disease or gluten sensitivity. Plain rice contains no gluten proteins, so you can enjoy it without worry. Just ensure your water and aromatics are free from cross-contamination. 💪
Vegan and Vegetarian
Steamed rice fits perfectly into vegan and vegetarian diets. The basic recipe uses no animal products, and the optional aromatics like garlic and bay leaf are plant-based. Even the garnishes—cilantro and lime—are fully plant-derived.
Low-Fat Option
With just 1 tsp Neutral Oil used in the entire recipe, this is naturally low in fat. You can omit the oil entirely if you prefer, though I find it helps prevent sticking. Each serving contains minimal fat, making it heart-healthy.
Sodium Control
The recipe includes only 0.5 tsp Fine Sea Salt, which you can reduce or eliminate entirely. For those monitoring sodium intake, this provides excellent control. The natural flavors of the rice shine through even with minimal seasoning.
Allergen-Friendly
This is free from the top eight allergens: no dairy, eggs, peanuts, tree nuts, fish, shellfish, soy, or wheat. The only potential concern would be cross-contamination from shared equipment. Always check your rice packaging for facility warnings. ✨
Diabetic Considerations
White rice has a high glycemic index, so those with diabetes may want to moderate portions. Consider using brown rice instead, which has more fiber and a lower glycemic impact. The cooking method remains the same, just increase water and time.
Nutrition Facts
Frequently Asked Questions
Why do I need to rinse the rice?
Rinsing removes excess starch that can make rice gummy. It ensures fluffy, separate grains. Stop when water runs clear, usually after 30-45 seconds.
Can I use a rice cooker instead?
Use a 1:1.5 rice-to-water ratio and follow your cooker’s instructions. Most models automatically switch to keep-warm mode when done.
What if my rice is undercooked?
Add 2-3 tablespoons of hot water, cover, and steam for an additional 5 minutes. Avoid stirring to prevent mushiness.
How do I store leftover rice?
Keep in an airtight container in the fridge for 4-5 days or freeze for up to 6 months. Reheat with a splash of water.

- 6 Egg Cake Recipe with Oil: Light as Air With Buttery Moisture - October 4, 2026
- 4 Bean Casserole Recipe: One-Pan Heartiness With Smoky Paprika Depth - October 4, 2026
- 3-Ingredient Keto Mug Cake Recipe: Microwave Magic in 2 Minutes - October 4, 2026