
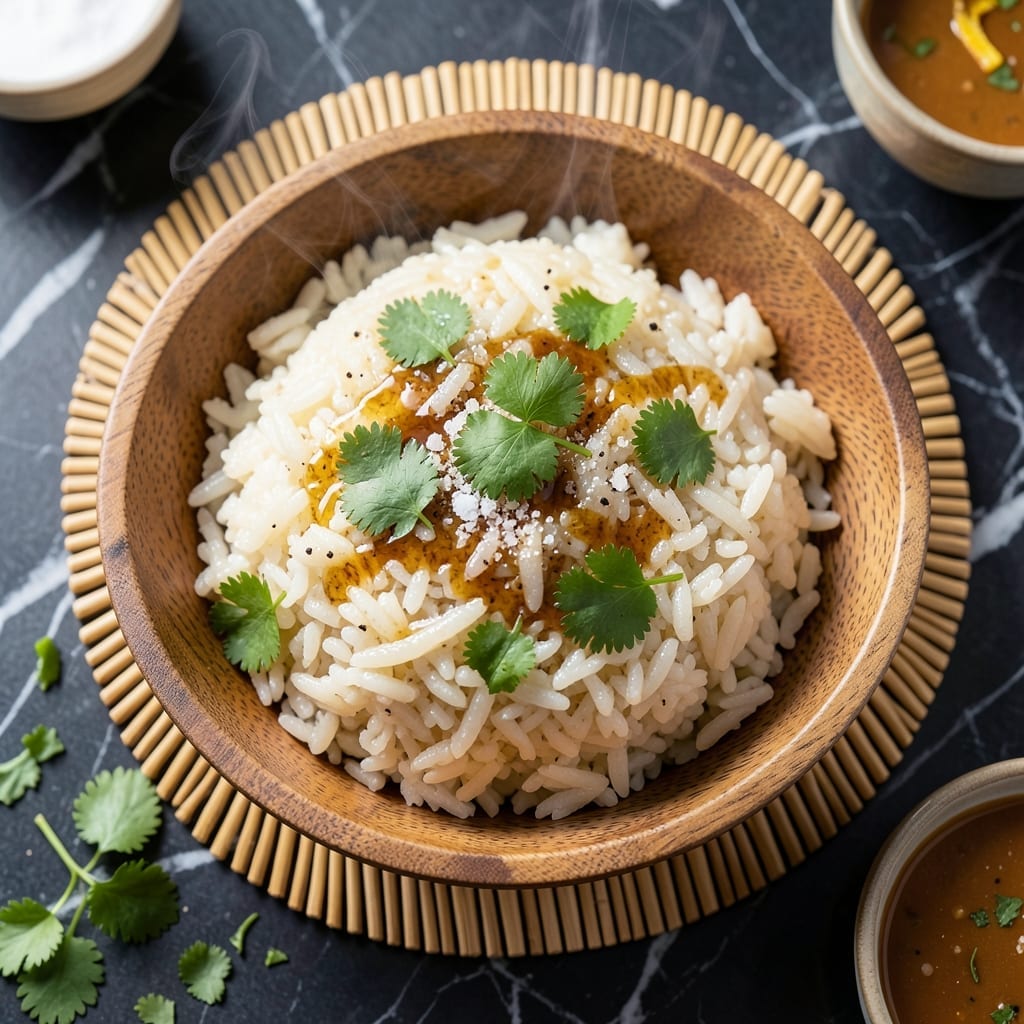
Recipe For Sticky Rice: Steamed to Glutinous Perfection

Recipe For Sticky Rice: Steamed to Glutinous Perfection

Achieving perfect sticky rice requires attention to detail, but the results are worth every minute. This method delivers the ideal balance of chewy texture and subtle sweetness that defines great glutinous rice.

The secret lies in proper soaking and precise steaming. I’ve tested countless ratios and times to develop a foolproof approach that works with standard kitchen tools. No special equipment is needed—just a steamer and patience.

Expect tender grains that cling together just enough to hold their shape while remaining light and fluffy. The rice absorbs steam evenly, ensuring consistent doneness throughout the batch.

Serve warm as a base for savory dishes or as a sweet treat with fresh fruit. This technique never fails to impress.

👨‍🍳
Difficulty
Medium
🌿
Diet
Vegetarian
⏱️
Total Time
30 min
🔥
Calories
Med Cal

Ingredients for Recipe for Sticky Rice

Simple ingredients transform into perfectly steamed glutinous rice with ideal texture and subtle sweetness.

Ingredient Amount Notes
Glutinous Rice 🍚 2 cups Also called sweet rice, rinsed thoroughly
Water 💧 2 ½ cups For soaking rice
Water 💧 1 ½ cups For steaming, divided
Salt 🧂 ½ tsp Fine sea salt preferred
Neutral-Flavored Oil 🫒 1 tsp Optional, for greasing steamer
Fresh Cilantro 🌿 ¼ cup Chopped, for garnish
Green Onions 🧅 3 whole Thinly sliced for serving
Sesame Seeds 🌾 1 tbsp Toasted, for garnish
Soy Sauce 🫒 2 tbsp Tamari for gluten-free option
Rice Vinegar 💧 1 tbsp For light acidity
Garlic Cloves 🧄 2 cloves Minced, optional for savory version
Fresh Ginger 🌿 1 tsp Grated, optional for savory version
Mango 🥭 1 whole Diced, optional for sweet version
Coconut Milk 🥥 ¼ cup Full-fat, optional for sweet version

The rice selection is critical. Glutinous rice (also labeled sweet rice or sticky rice) is non-negotiable—regular long-grain won’t deliver the right texture. Look for brands like Koda Farms or Lundberg in the Asian aisle of most supermarkets or at Whole Foods. Ensure the grains are uniform in size and free of debris. Rinsing removes excess starch, which prevents gumminess.

Need a swap? Short-grain sushi rice works in a pinch (though less sticky). For sweet versions, coconut milk at half the amount of water adds richness. Skip the salt if using salty toppings like soy sauce. Fresh herbs? Thai basil or mint complement both sweet and savory servings. The soy sauce can be coconut aminos for a gluten-free, less salty alternative.

Uncooked rice stores in a cool, dry place for 6-12 months. Once steamed, keep leftovers sealed in the fridge for 3-4 days. Reheat with a splash of water in the microwave (covered) to restore moisture. This freezes beautifully for 1 month—portion into bags for easy use.

❤️

Why You’ll Love This Recipe

  • Five-Minute Prep: I just rinse, soak, and steam—the glutinous rice does all the work while I set the table.
  • Chewy Perfection: That slightly sticky, chewy bite with just a hint of salt? It’s my idea of comfort in every grain.
  • Pairs with Anything: I serve it under mango for dessert or alongside teriyaki chicken for dinner. Between us, it never feels out of place.
  • Budget Stretcher: A pound of glutinous rice feeds four for less than a dollar. Honestly, it’s my most reliable cheap thrill.

Step-by-Step Instructions for Sticky Rice

Master this technique for perfectly tender, clumping grains that hold their shape yet melt in your mouth.

Step 1: Soak the Glutinous Rice Thoroughly

Begin by rinsing the 2 cups Glutinous Rice under cold water in a fine-mesh strainer until the water runs clear. This removes excess starch that could make the rice gummy rather than perfectly sticky. Transfer the rinsed rice to a bowl and cover with the 2.5 cups Water.

Let it soak at room temperature for at least 4 hours, or preferably overnight. The rice grains will plump significantly and turn from opaque to slightly translucent. This soaking is non-negotiable—it ensures even cooking and the signature sticky texture. Drain the rice completely before steaming.

Step 2: Prepare the Steamer and Season the Water

Fill your steamer pot with the 1.5 cups Water and bring it to a rolling boil. Add the 0.5 tsp Salt to the water. If using a bamboo steamer, brush the inside lightly with the 1 tsp Neutral-Flavored Oil to prevent sticking.

The water should be at a vigorous boil before adding the rice. The salt in the steaming water subtly seasons the rice, while the oil creates a barrier that helps the rice release cleanly from the steamer. Ensure your steamer setup has a tight-fitting lid to trap the essential steam.

Step 3: Steam the Rice to Perfection

Spread the drained rice evenly in the prepared steamer, creating a single layer no thicker than 1 inch. Place the steamer over the boiling water, cover tightly with the lid, and steam for 20-25 minutes.

Check the rice at the 20-minute mark—it should be tender and slightly translucent with no hard center. The grains will clump together when pressed with a spoon. If it’s not fully cooked, continue steaming in 5-minute increments until done. Avoid lifting the lid unnecessarily, as this releases critical steam.

Step 4: Rest and Fluff the Finished Rice

Once cooked, turn off the heat and let the rice rest in the steamer, covered, for an additional 10 minutes. This resting period allows the grains to absorb any remaining moisture and reach their maximum stickiness.

Transfer the rice to a serving bowl and gently fold it with a silicone spatula to separate any large clumps while maintaining its characteristic stickiness. The grains should hold together when pressed but separate easily when eaten. Serve immediately with your choice of accompaniments.

Step 5: Add Optional Garnishes and Serving Suggestions

For a savory presentation, mix the minced 2 cloves Garlic Cloves and grated 1 tsp Fresh Ginger with the 2 tbsp Soy Sauce and 1 tbsp Rice Vinegar to create a dipping sauce. Drizzle this over the rice or serve on the side.

For a sweet version, fold the diced 1 whole Mango and 0.25 cup Coconut Milk into the warm rice. Garnish with the chopped 0.25 cup Fresh Cilantro, thinly sliced 3 whole Green Onions, and toasted 1 tbsp Sesame Seeds for either variation.

👨‍🍳

Pro Tips For Making Recipe For Sticky Rice

  • Soak Overnight: I learned this the hard way—glutinous rice needs at least 4 hours in water, but overnight soaking guarantees even, sticky perfection.
  • Use Equal Parts: Measure rice and water 1:1 by volume for the right texture; anything less and it’ll be dry, anything more and it turns to mush.
  • Skip the Rinse: After burning a batch, I realized rinsing washes away the starch that makes sticky rice actually sticky.
  • Steam, Don’t Boil: Boiling makes it gluey and uneven; steam it in a lined basket over simmering water for 20-25 minutes—this actually changes the outcome.

Perfect Pairings for This Dish

Savory Pairings

This rice shines alongside Thai dishes like green papaya salad or satay skewers. The mild sweetness complements spicy flavors perfectly. I love it with lemongrass chicken for a balanced meal. 🌶️

Sweet Combinations

For dessert-style servings, pair with ripe mango slices and coconut milk. The natural sweetness enhances the rice’s delicate flavor. A drizzle of honey elevates it further.

Dipping Sauces

Create a quick sauce with 2 tbsp soy sauce, 1 tbsp rice vinegar, and 1 tsp sesame oil. This savory dip adds depth. For sweet versions, try sweetened condensed milk.

Protein Partners

Grilled salmon or tofu make excellent companions. The rice soaks up marinades beautifully. I often serve it with teriyaki-glazed proteins for extra flavor.

Vegetable Sides

Steamed bok choy or snap peas add freshness. Their crisp texture contrasts nicely with the soft rice. Stir-fried mushrooms bring earthy notes.

Beverage Matches

Jasmine tea or a crisp Riesling complement both sweet and savory versions. The floral notes pair wonderfully with the rice’s subtle sweetness. 💛

Nutrition Facts

Servings 4
Amount Per Serving
Calories 360kcal
% Daily Value
Total Fat 5g6%
Saturated Fat 3g15%
Cholesterol 0mg0%
Sodium 480mg21%
Total Carbohydrate 72g26%
Dietary Fiber 3g11%
Sugars 8g
Protein 7g14%
Percent Daily Values are based on a 2,000 calorie diet. Your daily values may be higher or lower depending on your calorie needs.

Frequently Asked Questions

1

Can I use a rice cooker instead of steaming?

Yes, but use a 1:1 rice-to-water ratio and the “glutinous” setting. The texture won’t be as perfect as steaming.

2

Why did my rice turn out mushy?

Likely over-soaked or over-steamed. Stick to 4 hours max soaking and check at 20 minutes of steaming.

3

Is there a quick soak method?

Soak in warm water for 1-2 hours if short on time, but texture may be less consistent.

4

Can I make this ahead of time?

Refrigerate for up to 3-4 days or freeze for 1 month. Reheat with a splash of water.

★★★★★4.6(13 reviews)
Tyler Parker

Recipe For Sticky Rice: Steamed to Glutinous Perfection

Recipe For Sticky Rice: Steamed to Glutinous Perfection

Achieving perfect sticky rice requires attention to detail, but the results are worth every minute. This method delivers the ideal balance of chewy texture and subtle sweetness that defines great glutinous rice.

The secret lies in proper soaking and precise steaming. I’ve tested countless ratios and times to develop a foolproof approach that works with standard kitchen tools. No special equipment is needed—just a steamer and patience.

Expect tender grains that cling together just enough to hold their shape while remaining light and fluffy. The rice absorbs steam evenly, ensuring consistent doneness throughout the batch.

Serve warm as a base for savory dishes or as a sweet treat with fresh fruit. This technique never fails to impress.

👨‍🍳
Difficulty
Medium
🌿
Diet
Vegetarian
⏱️
Total Time
30 min
🔥
Calories
Med Cal

Ingredients for Recipe for Sticky Rice

Simple ingredients transform into perfectly steamed glutinous rice with ideal texture and subtle sweetness.

Ingredient Amount Notes
Glutinous Rice 🍚 2 cups Also called sweet rice, rinsed thoroughly
Water 💧 2 ½ cups For soaking rice
Water 💧 1 ½ cups For steaming, divided
Salt 🧂 ½ tsp Fine sea salt preferred
Neutral-Flavored Oil 🫒 1 tsp Optional, for greasing steamer
Fresh Cilantro 🌿 ¼ cup Chopped, for garnish
Green Onions 🧅 3 whole Thinly sliced for serving
Sesame Seeds 🌾 1 tbsp Toasted, for garnish
Soy Sauce 🫒 2 tbsp Tamari for gluten-free option
Rice Vinegar 💧 1 tbsp For light acidity
Garlic Cloves 🧄 2 cloves Minced, optional for savory version
Fresh Ginger 🌿 1 tsp Grated, optional for savory version
Mango 🥭 1 whole Diced, optional for sweet version
Coconut Milk 🥥 ¼ cup Full-fat, optional for sweet version

The rice selection is critical. Glutinous rice (also labeled sweet rice or sticky rice) is non-negotiable—regular long-grain won’t deliver the right texture. Look for brands like Koda Farms or Lundberg in the Asian aisle of most supermarkets or at Whole Foods. Ensure the grains are uniform in size and free of debris. Rinsing removes excess starch, which prevents gumminess.

Need a swap? Short-grain sushi rice works in a pinch (though less sticky). For sweet versions, coconut milk at half the amount of water adds richness. Skip the salt if using salty toppings like soy sauce. Fresh herbs? Thai basil or mint complement both sweet and savory servings. The soy sauce can be coconut aminos for a gluten-free, less salty alternative.

Uncooked rice stores in a cool, dry place for 6-12 months. Once steamed, keep leftovers sealed in the fridge for 3-4 days. Reheat with a splash of water in the microwave (covered) to restore moisture. This freezes beautifully for 1 month—portion into bags for easy use.

❤️

Why You’ll Love This Recipe

  • Five-Minute Prep: I just rinse, soak, and steam—the glutinous rice does all the work while I set the table.
  • Chewy Perfection: That slightly sticky, chewy bite with just a hint of salt? It’s my idea of comfort in every grain.
  • Pairs with Anything: I serve it under mango for dessert or alongside teriyaki chicken for dinner. Between us, it never feels out of place.
  • Budget Stretcher: A pound of glutinous rice feeds four for less than a dollar. Honestly, it’s my most reliable cheap thrill.

Step-by-Step Instructions for Sticky Rice

Master this technique for perfectly tender, clumping grains that hold their shape yet melt in your mouth.

Step 1: Soak the Glutinous Rice Thoroughly

Begin by rinsing the 2 cups Glutinous Rice under cold water in a fine-mesh strainer until the water runs clear. This removes excess starch that could make the rice gummy rather than perfectly sticky. Transfer the rinsed rice to a bowl and cover with the 2.5 cups Water.

Let it soak at room temperature for at least 4 hours, or preferably overnight. The rice grains will plump significantly and turn from opaque to slightly translucent. This soaking is non-negotiable—it ensures even cooking and the signature sticky texture. Drain the rice completely before steaming.

Step 2: Prepare the Steamer and Season the Water

Fill your steamer pot with the 1.5 cups Water and bring it to a rolling boil. Add the 0.5 tsp Salt to the water. If using a bamboo steamer, brush the inside lightly with the 1 tsp Neutral-Flavored Oil to prevent sticking.

The water should be at a vigorous boil before adding the rice. The salt in the steaming water subtly seasons the rice, while the oil creates a barrier that helps the rice release cleanly from the steamer. Ensure your steamer setup has a tight-fitting lid to trap the essential steam.

Step 3: Steam the Rice to Perfection

Spread the drained rice evenly in the prepared steamer, creating a single layer no thicker than 1 inch. Place the steamer over the boiling water, cover tightly with the lid, and steam for 20-25 minutes.

Check the rice at the 20-minute mark—it should be tender and slightly translucent with no hard center. The grains will clump together when pressed with a spoon. If it’s not fully cooked, continue steaming in 5-minute increments until done. Avoid lifting the lid unnecessarily, as this releases critical steam.

Step 4: Rest and Fluff the Finished Rice

Once cooked, turn off the heat and let the rice rest in the steamer, covered, for an additional 10 minutes. This resting period allows the grains to absorb any remaining moisture and reach their maximum stickiness.

Transfer the rice to a serving bowl and gently fold it with a silicone spatula to separate any large clumps while maintaining its characteristic stickiness. The grains should hold together when pressed but separate easily when eaten. Serve immediately with your choice of accompaniments.

Step 5: Add Optional Garnishes and Serving Suggestions

For a savory presentation, mix the minced 2 cloves Garlic Cloves and grated 1 tsp Fresh Ginger with the 2 tbsp Soy Sauce and 1 tbsp Rice Vinegar to create a dipping sauce. Drizzle this over the rice or serve on the side.

For a sweet version, fold the diced 1 whole Mango and 0.25 cup Coconut Milk into the warm rice. Garnish with the chopped 0.25 cup Fresh Cilantro, thinly sliced 3 whole Green Onions, and toasted 1 tbsp Sesame Seeds for either variation.

👨‍🍳

Pro Tips For Making Recipe For Sticky Rice

  • Soak Overnight: I learned this the hard way—glutinous rice needs at least 4 hours in water, but overnight soaking guarantees even, sticky perfection.
  • Use Equal Parts: Measure rice and water 1:1 by volume for the right texture; anything less and it’ll be dry, anything more and it turns to mush.
  • Skip the Rinse: After burning a batch, I realized rinsing washes away the starch that makes sticky rice actually sticky.
  • Steam, Don’t Boil: Boiling makes it gluey and uneven; steam it in a lined basket over simmering water for 20-25 minutes—this actually changes the outcome.

Perfect Pairings for This Dish

Savory Pairings

This rice shines alongside Thai dishes like green papaya salad or satay skewers. The mild sweetness complements spicy flavors perfectly. I love it with lemongrass chicken for a balanced meal. 🌶️

Sweet Combinations

For dessert-style servings, pair with ripe mango slices and coconut milk. The natural sweetness enhances the rice’s delicate flavor. A drizzle of honey elevates it further.

Dipping Sauces

Create a quick sauce with 2 tbsp soy sauce, 1 tbsp rice vinegar, and 1 tsp sesame oil. This savory dip adds depth. For sweet versions, try sweetened condensed milk.

Protein Partners

Grilled salmon or tofu make excellent companions. The rice soaks up marinades beautifully. I often serve it with teriyaki-glazed proteins for extra flavor.

Vegetable Sides

Steamed bok choy or snap peas add freshness. Their crisp texture contrasts nicely with the soft rice. Stir-fried mushrooms bring earthy notes.

Beverage Matches

Jasmine tea or a crisp Riesling complement both sweet and savory versions. The floral notes pair wonderfully with the rice’s subtle sweetness. 💛

Nutrition Facts

Servings 4
Amount Per Serving
Calories 360kcal
% Daily Value
Total Fat 5g6%
Saturated Fat 3g15%
Cholesterol 0mg0%
Sodium 480mg21%
Total Carbohydrate 72g26%
Dietary Fiber 3g11%
Sugars 8g
Protein 7g14%
Percent Daily Values are based on a 2,000 calorie diet. Your daily values may be higher or lower depending on your calorie needs.

Frequently Asked Questions

1

Can I use a rice cooker instead of steaming?

Yes, but use a 1:1 rice-to-water ratio and the “glutinous” setting. The texture won’t be as perfect as steaming.

2

Why did my rice turn out mushy?

Likely over-soaked or over-steamed. Stick to 4 hours max soaking and check at 20 minutes of steaming.

3

Is there a quick soak method?

Soak in warm water for 1-2 hours if short on time, but texture may be less consistent.

4

Can I make this ahead of time?

Refrigerate for up to 3-4 days or freeze for 1 month. Reheat with a splash of water.

★★★★★4.6(13 reviews)
Tyler Parker