
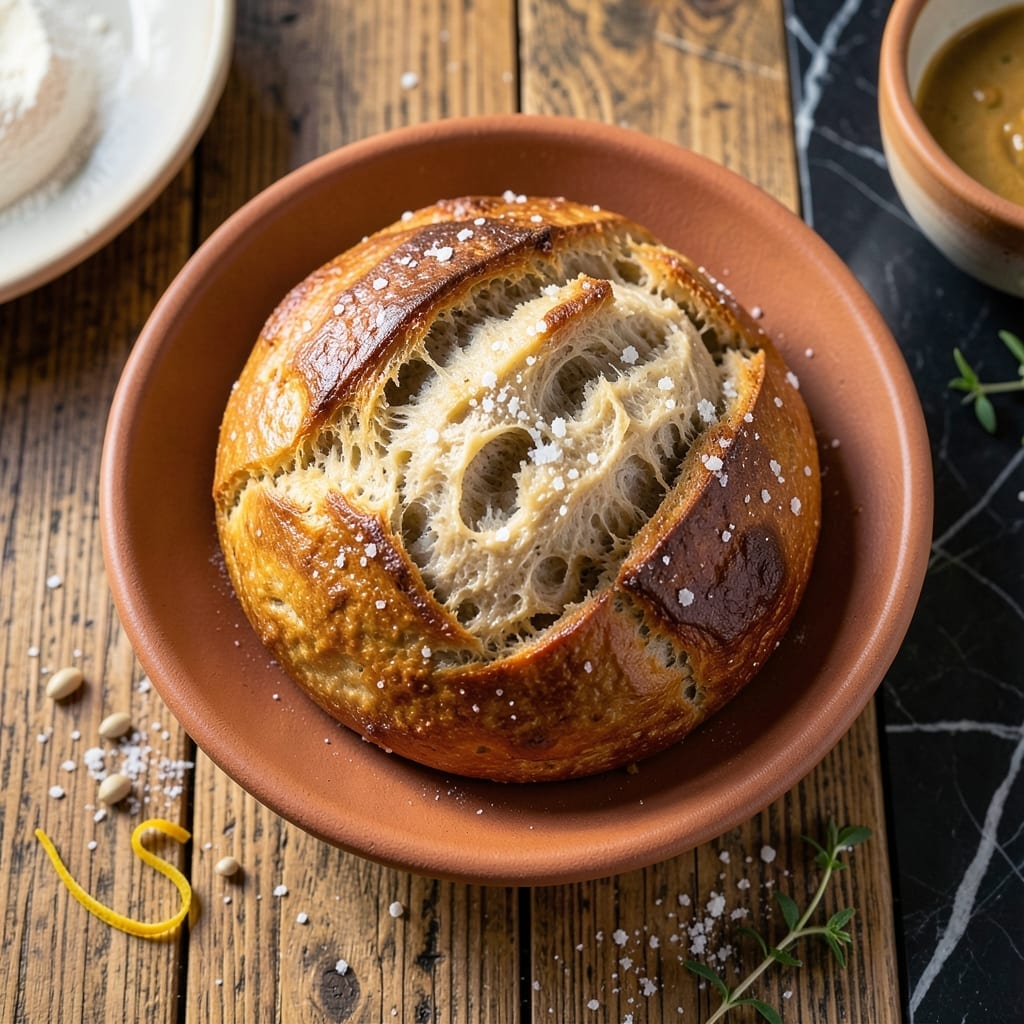
This artisan loaf proves that incredible bread doesn’t require a long ingredient list. With just four simple components, you’ll create a crusty, airy loaf that rivals any bakery’s offerings.
The magic lies in the technique: high hydration dough and a Dutch oven for steam baking. This method yields a crispy crust and an open crumb structure without commercial yeast or enhancers.
What emerges is a rustic round with a shatteringly thin crust and a light, airy interior. The minimal ingredients allow the natural wheat flavors to shine through in every bite.
Perfect for beginners, this recipe delivers professional results with minimal effort. The process is straightforward, and the outcome is consistently impressive.
Ingredients for Recipe for Water Bread
Four essential components create this crusty, airy artisan loaf with professional results.
| Ingredient | Amount | Notes |
|---|---|---|
| Bread Flour 🌾 | 3 ½ cups | High-protein preferred for structure |
| Water 💧 | 1 ¾ cups | Filtered, room temperature |
| Sea Salt 🧂 | 2 tsp | Fine grain for even distribution |
| Active Dry Yeast 🍞 | ½ tsp | Instant yeast works too |
The flour is critical here. King Arthur Bread Flour is my go-to for its consistent protein content (12.7%), which develops the gluten structure needed for that open crumb. Bob’s Red Mill also produces excellent results. Avoid all-purpose flour—it lacks the protein necessary for proper rise. Room temperature water activates the yeast more effectively than cold (worth the extra minute to warm it slightly if needed).
No bread flour? All-purpose plus 1 tbsp vital wheat gluten per cup gets you close. Instant yeast can replace active dry at a 1:1 ratio with no proofing required. The salt can be table salt at half the amount, but fine sea salt dissolves more evenly. For a sourdough variation, replace yeast with 1 cup active starter and extend fermentation.
This dough ferments best at 70-75°F. Store flour in an airtight container to prevent moisture absorption. The yeast keeps for 6 months unopened in a cool, dark place. Baked loaves stay fresh for 2-3 days in a bread box (or wrapped in a linen towel).
Why You’ll Love This Recipe
- Four Ingredients Only: I love that this comes together with just bread flour, water, sea salt, and yeast—no fancy additions needed.
- Crusty Perfection: The high hydration gives it that addictive crisp crust with a soft, airy center.
- Breakfast to Dinner: Honestly, it works as toast in the morning or alongside soup at night.
- Pennywise Loaf: A bag of flour and yeast makes multiple loaves—my wallet’s never complained.
Step-by-Step Instructions for Water Bread
Master the technique for this artisan loaf with precise timing and handling.
Step 1: Activate the Yeast and Hydrate the Flour
In a large mixing bowl, combine the 0.5 tsp Active Dry Yeast with the 1.75 cups Water. Stir gently until the yeast fully dissolves—this takes about 1 minute. You’ll notice the water become slightly cloudy as the yeast activates.
Add all 3.5 cups Bread Flour and the 2 tsp Sea Salt to the bowl. Use a wooden spoon or your hands to mix until no dry flour remains. The dough will be shaggy and sticky; resist the urge to add more flour. This high hydration is essential for the open crumb structure.
Step 2: Perform the Bulk Fermentation
Cover the bowl with a damp kitchen towel and let the dough rest at room temperature for 12-18 hours. The ideal spot is away from drafts, around 70°F. During this time, the dough will nearly double in volume and develop visible air bubbles on the surface and sides of the bowl.
After 8 hours, perform a series of stretch-and-folds: wet your hands, grab one side of the dough, stretch it upward, and fold it over itself. Rotate the bowl and repeat this process 4-5 times total. This builds structure without overworking the gluten.
Step 3: Shape and Proof the Dough
Turn the dough onto a lightly floured surface. Fold the edges toward the center to create a round shape, then flip it seam-side down. Use a bench scraper to help tighten the surface—this creates surface tension for a better rise.
Place the shaped dough on a piece of parchment paper, cover with the damp towel, and let it proof for 1-2 hours at room temperature. It’s ready when it has risen about 50% and a gentle poke leaves a slow-to-spring-back indentation. Preheat your Dutch oven in a 450°F oven during the last 30 minutes of proofing.
Step 4: Bake to Crusty Perfection
Carefully transfer the dough (still on parchment) into the preheated Dutch oven. Use a sharp knife or lame to score the top of the dough in a ½-inch deep pattern—this controls the expansion. Cover with the lid and bake for 20 minutes.
Remove the lid and continue baking for 20-25 minutes until the loaf is deep golden brown and the internal temperature reaches 205-210°F. The crust should be thick and crackly, and the loaf should sound hollow when tapped on the bottom. Transfer to a wire rack to cool completely before slicing.
Pro Tips For Making Recipe For Water Bread
- Proof the Yeast: Always activate your dry yeast in warm water (around 110°F) with a pinch of sugar first—I learned this the hard way after a few flat loaves.
- Weigh Your Flour: Bread flour is dense and inconsistent by volume; 1 cup can weigh 120g or 140g depending on how you scoop. Use a scale for accuracy.
- Skip the Rush: Resist the urge to add more flour if the dough seems sticky. Water bread dough is supposed to be tacky; it comes together during the long, slow rise.
- Salt Last: Add sea salt after the yeast has foamed, not before. Salt can inhibit yeast activation if introduced too early, and your bread won’t rise properly.
Make-Ahead Tips for This Recipe
Overnight Dough Prep
Mix your dough as usual, then let it undergo bulk fermentation in the refrigerator for up to 16 hours. The cold slows yeast activity, developing deeper flavor while maintaining structure. I often start this before bed and shape the next morning.
Cold Proofing
After shaping, place your dough in the fridge for the final proof. This cold proof can last 8-12 hours, giving you flexibility for baking. Remove it 1 hour before baking to let it warm slightly.
Freezer Storage
Baked loaves freeze beautifully for up to 3 months. Wrap cooled bread in aluminum foil, then place in a freezer bag. Squeeze out all air to prevent freezer burn. Label with the date for easy tracking. ❄️
Reheating Methods
To revive frozen bread, thaw overnight at room temperature. For best results, wrap in foil and warm in a 350°F oven for 10-15 minutes. Spritz with water before reheating to restore crust crispness.
Dough Ball Storage
Unbaked, shaped dough can be refrigerated for 24 hours before baking. This works perfectly when unexpected guests arrive. Just extend the final proof time by 30-60 minutes.
Room Temperature Tips
Store cooled bread in a bread box or wrapped in a linen towel for 2-3 days. Avoid plastic bags—they trap moisture and soften the crust. For longer storage, slicing before freezing allows for single-serving portions. 💡
Nutrition Facts
Frequently Asked Questions
What makes this bread different from regular loaves?
Its high hydration dough creates an open crumb structure and crackly crust. With just 4 ingredients, it highlights natural wheat flavors without additives. The long fermentation develops complex taste.
Can I use all-purpose flour instead?
Not recommended—the lower protein content won’t support the structure. For best results, use bread flour or add 1 tbsp vital wheat gluten per cup of all-purpose.
Why does the dough need such a long rest?
The 12-18 hour fermentation allows gluten to develop slowly and enhances flavor. Rushing this step results in dense bread with less character. Patience is key!

- 6 Egg Cake Recipe with Oil: Light as Air With Buttery Moisture - October 4, 2026
- 4 Bean Casserole Recipe: One-Pan Heartiness With Smoky Paprika Depth - October 4, 2026
- 3-Ingredient Keto Mug Cake Recipe: Microwave Magic in 2 Minutes - October 4, 2026