
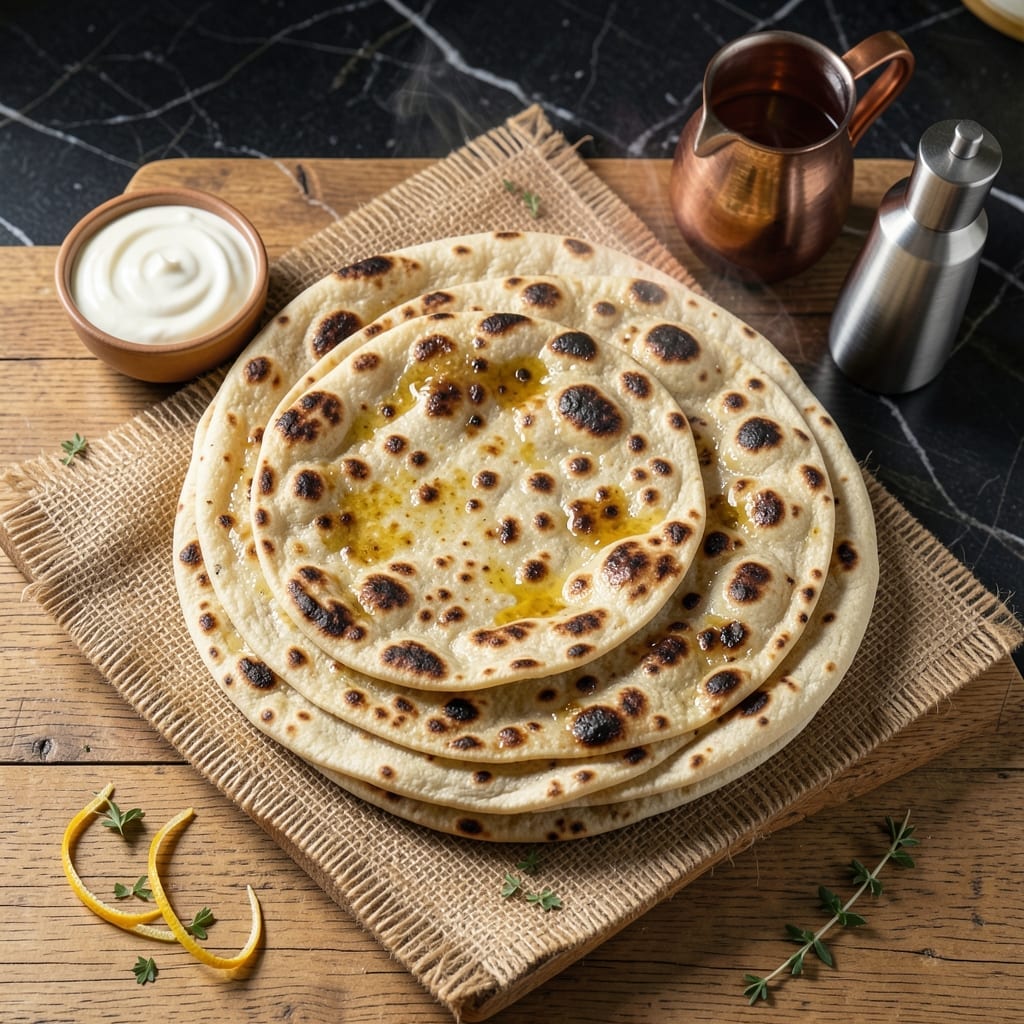
This flat bread recipe delivers perfectly soft centers with beautifully charred edges every time. The secret lies in the simple dough and proper cooking technique.
With just a few ingredients and 10 minutes of active prep, you can create restaurant-quality results at home. The charred spots add smoky depth while keeping the inside tender.
Ingredients for Recipe Indian Flat Bread
Simple pantry ingredients yield restaurant-quality flatbread with minimal effort and maximum flavor.
| Ingredient | Amount | Notes |
|---|---|---|
| All-Purpose Flour 🌾 | 3 cups | Plus extra for dusting |
| Warm Water 💧 | 1 ¼ cups | About 110°F for activation |
| Active Dry Yeast 🍞 | 2 ¼ tsp | One 0.25 oz package |
| Granulated Sugar 🍚 | 1 tsp | For yeast activation |
| Plain Yogurt 🥛 | ½ cup | Room temperature, full-fat preferred |
| Olive Oil 🫒 | 2 tbsp | Divided for dough and cooking |
| Salt 🧂 | 1 ½ tsp | Fine sea salt for even distribution |
| Vegetable Oil 🫒 | ¼ cup | For cooking flatbreads |
| Fresh Cilantro 🌿 | ¼ cup | Chopped, for garnish |
| Garlic Cloves 🧄 | 3 cloves | Minced, optional for flavor |
The flour forms the foundation—King Arthur or Bob’s Red Mill all-purpose deliver consistent results. Yeast freshness is critical; check the expiration date and store unopened packets in the freezer to extend shelf life. For yogurt, full-fat Greek yogurt adds richness, but any plain variety works. Warm the water to about 110°F (comfortable to touch) to properly activate the yeast without killing it.
No yogurt? Buttermilk at equal volume works beautifully. For a dairy-free option, use unsweetened almond yogurt. The olive oil can be swapped for melted ghee for a more traditional flavor. If you lack fresh cilantro, dried mint or parsley can substitute, though fresh herbs are ideal for garnish. The dough is forgiving—adjust flour or water slightly if the texture seems off.
Prepared dough keeps in the fridge for 24 hours (let it come to room temperature before shaping). Cooked flatbreads stay soft for 2-3 days in an airtight container—reheat on a dry skillet to restore freshness. For longer storage, freeze the dough balls (up to 1 month) and thaw overnight in the refrigerator before using.
Why You’ll Love This Recipe
- No-Knead Magic: I just mix flour, yogurt, and warm water—no fancy techniques, and the yeast does all the work.
- Warm, Pillowy Bite: That soft, slightly tangy flavor from the yogurt makes these irresistible right off the griddle.
- Pairs With Anything: I serve these with curries, soups, or even as a wrap for leftovers—so versatile.
- Budget Stretch: A bag of flour and a spoonful of yogurt make a batch for pennies. Honestly, it’s my cheapest meal staple.
Step-by-Step Instructions for Indian Flat Bread
Master the technique for achieving that ideal balance of soft texture and charred spots.
Step 1: Activate the Yeast and Prepare the Dough Base
In a large bowl, combine the 1.25 cups Warm Water, 2.25 tsp Active Dry Yeast, and 1 tsp Granulated Sugar. Let this mixture sit for 5-7 minutes until it becomes frothy and cloudy—this visual confirmation means the yeast is active and ready to work its magic.
Stir in the 0.5 cup Plain Yogurt and 1 tbsp Olive Oil from the 2 tbsp Olive Oil total. The yogurt adds tenderness while the oil ensures the dough stays pliable. This combination creates the perfect foundation for pillowy flatbread.
Step 2: Incorporate Dry Ingredients and Knead
Add the 3 cups All-Purpose Flour and 1.5 tsp Salt to the wet mixture. Use a wooden spoon to combine until a shaggy dough forms. The salt strengthens the gluten structure while enhancing flavor—don’t skip it.
Turn the dough onto a lightly floured surface and knead for 8-10 minutes until smooth and elastic. You’ll know it’s ready when the dough springs back slowly when pressed with a finger. This development of gluten ensures your flatbreads will be both soft and sturdy enough to hold their shape.
Step 3: First Rise and Portioning
Place the dough in a lightly oiled bowl (use the remaining 1 tbsp Olive Oil), cover with a damp towel, and let it rise in a warm place for 1-2 hours or until doubled in volume. The ideal environment is 80-85°F—I often place it in an oven with the light turned on.
Once risen, punch down the dough and divide it into 8 equal portions. Roll each portion into a ball, then flatten slightly. Cover with a towel and let rest for 15 minutes—this makes rolling easier and prevents the dough from springing back.
Step 4: Roll and Cook the Flatbreads
Heat 2 tbsp Vegetable Oil (from the 0.25 cup Vegetable Oil) in a cast-iron skillet over medium-high heat. While it heats, roll one dough ball into a thin circle, about ⅛-inch thick. The skillet is ready when a drop of water sizzles and evaporates immediately.
Cook each flatbread for 1-2 minutes per side until puffed in spots and charred in areas. Press down gently with a spatula to encourage even browning. For added flavor, brush the cooked side with a little more Vegetable Oil before flipping. You’ll see beautiful blisters forming—this is the signature of perfect flatbread.
Step 5: Finish and Serve
Transfer cooked flatbreads to a clean towel-lined basket to keep warm. If using, finely mince the 3 cloves Garlic Cloves and mix with the remaining Vegetable Oil. Brush this garlic oil over the warm flatbreads for an aromatic finish.
Garnish with 0.25 cup Fresh Cilantro and serve immediately. The flatbreads should be soft and pliable with distinct charred spots. They’re best enjoyed fresh, but can be reheated briefly in a dry skillet to restore their texture. Each batch should yield consistent results with that perfect balance of chewiness and crispness.
Pro Tips For Making Recipe Indian Flat Bread
- Prove the Yeast: Always activate your dry yeast in the warm water with a pinch of sugar first—if it doesn’t foam within 5-10 minutes, your bread won’t rise. I learned this the hard way after wasting a batch of dough.
- Use Room-Temp Yogurt: Cold yogurt straight from the fridge can shock the dough and slow fermentation. Pull it out 30 minutes before mixing to guarantee smooth, elastic dough.
- Skip Over-Flouring: Resist the urge to add extra flour while kneading—sticky dough now means tender flatbread later. Sounds weird, but it works.
- Rest Before Rolling: Let the dough rest for at least 1 hour after kneading, covered with a damp towel. This relaxes the gluten so it rolls out thin without springing back.
Serving Suggestions for This recipe indian flat bread
🍽️ Plating Styles
Indian flat breads like roti, naan, or paratha can be served in various styles. For a casual setting, stack them warm in a cloth-lined basket for a rustic feel. A formal dinner calls for neatly folded breads arranged on a plated platter with a side of ghee or chutney. At a buffet, keep them in a covered dish to retain warmth and freshness.
🌿 Garnishing Techniques
Enhance the presentation with simple yet elegant garnishes. Brush naan with garlic butter and sprinkle finely chopped cilantro for a fresh touch. For a festive look, drizzle melted ghee over roti and top with sesame or nigella seeds. A sprinkle of chaat masala adds a tangy twist to plain flat breads.
🍴 Portion Sizes
Serve individual portions for a refined dining experience, pairing each bread with curated sides like curries or dips. For a family-style meal, present a stack of breads on a communal platter, encouraging sharing. Smaller breads like mini naans work well for appetizers, while larger rotis are ideal for main courses.
🌡️ Serving Temperature
Indian flat breads are best served hot off the griddle or tawa. Let them rest for 1-2 minutes after cooking to soften before serving. If preparing ahead, reheat on a skillet or wrap in foil and warm in an oven. Slicing naan or paratha into wedges makes them easier to share, especially in group settings.
Nutrition Facts

- 6 Egg Cake Recipe with Oil: Light as Air With Buttery Moisture - October 4, 2026
- 4 Bean Casserole Recipe: One-Pan Heartiness With Smoky Paprika Depth - October 4, 2026
- 3-Ingredient Keto Mug Cake Recipe: Microwave Magic in 2 Minutes - October 4, 2026