
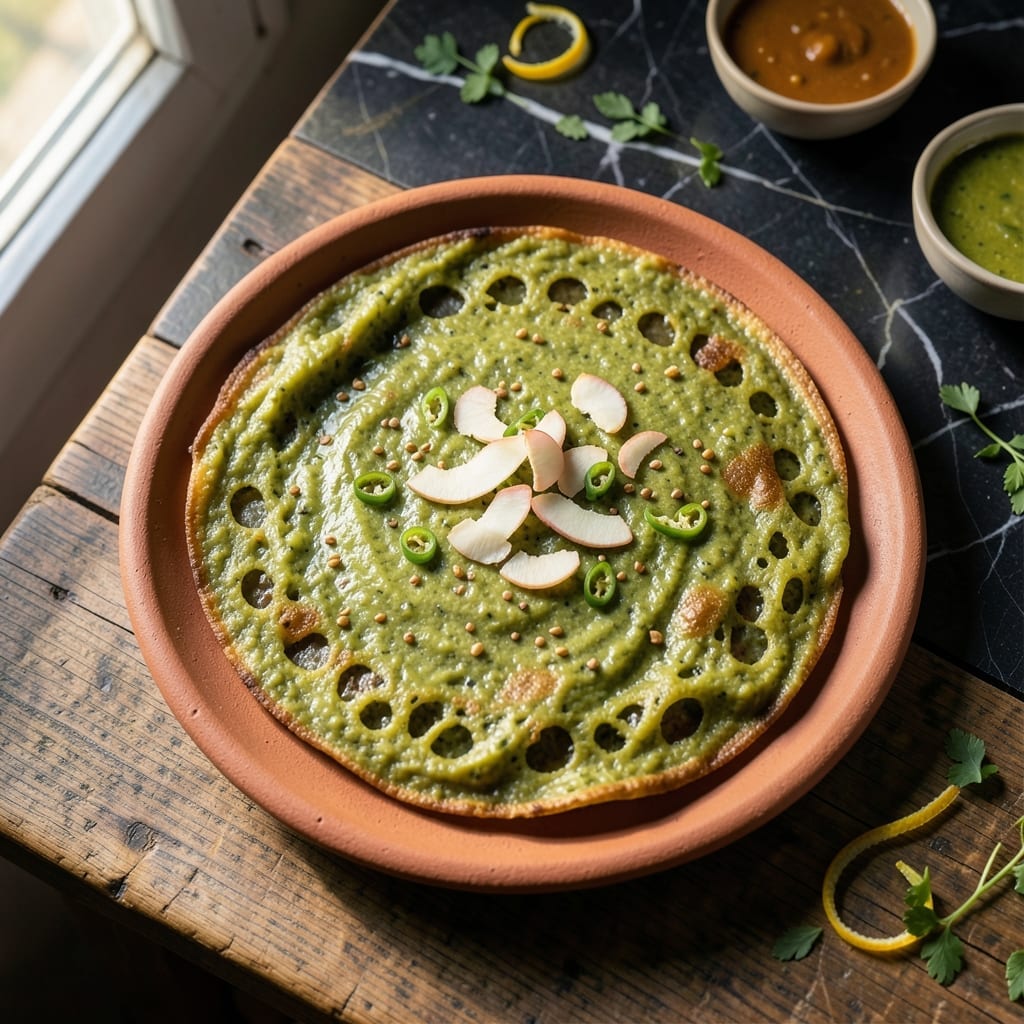
These savory pancakes bring traditional Indian flavors to your breakfast table. Made from split green lentils, they pack serious protein into every bite.
Soaked moong dal blends into a smooth batter that cooks into tender, flavorful chillas. Perfect for a vegan meal that feels both light and satisfying.
Ingredients for Recipe of Green Moong Dal Chilla
Split moong dal and a handful of fresh veggies make these protein-packed pancakes.
| Ingredient | Amount | Notes |
|---|---|---|
| Split Green Moong Dal 🌿 | 1 ½ cups | Rinsed and soaked overnight |
| Water 💧 | 3 cups | For soaking and blending |
| Rice Flour 🌾 | ¼ cup | For crispness and binding |
| Cumin Seeds 🌿 | 1 tsp | For earthy aroma |
| Green Chili 🌶️ | 1 whole | Finely chopped, adjust to taste |
| Fresh Ginger 🌿 | 1 whole | 1-inch piece, grated |
| Fresh Cilantro 🍃 | ¼ cup | Chopped, for garnish and batter |
| Red Onion 🧅 | ½ cup | Finely chopped for texture |
| Tomato 🍅 | 1 whole | Small, finely chopped |
| Turmeric Powder 🌶️ | ¼ tsp | For color and health benefits |
| Salt 🧂 | 1 tsp | Adjust to taste |
| Vegetable Oil 🫒 | 2 tbsp | For cooking chillas |
| Lemon Juice 🍋 | 1 tbsp | Freshly squeezed for brightness |
The moong dal is the star here. Indian grocery stores carry it in bulk—look for split, skinless green lentils. Soak them overnight (or at least 6 hours) for the smoothest batter. The rice flour adds crispness, but chickpea flour works in a pinch. I grab mine from Patel Brothers or any well-stocked Asian market. Don’t skip the soaking step (worth the extra minute).
No green chili? A pinch of cayenne or half a jalapeño gets you close. Fresh ginger is ideal, but ground ginger at half the amount works. Out of cilantro? Skip it—it’s mostly for garnish anyway. The rice flour can be left out if you want softer chillas. Tomato can be swapped for shredded zucchini if that’s what’s in the fridge.
Batter keeps in the fridge for 2 days, but it thickens—add water before using. Cooked chillas taste best fresh but reheat okay in a dry pan for 2-3 minutes. Leftovers? Wrap and freeze for up to 1 month.
Why You’ll Love This Recipe
- Soak and Cook: I just soak the moong dal for 2 hours, blend with a little water, and it’s ready to cook—no fancy steps.
- Crispy Spice Kick: The cumin seeds sizzle and the green chili gives a sharp heat that’s balanced by the earthy dal.
- Breakfast or Snack: Honestly, I make these for a quick breakfast or pack them for a light lunch—they work any time of day.
- Budget Stretch: A cup of split moong dal makes a stack of chillas, and leftovers taste just as good the next morning.
Instructions
Here’s the method I use to make these savory pancakes crispy outside, tender inside.
Step 1: Soak and Blend the Batter
Rinse the 1.5 cups Split Green Moong Dal thoroughly under cold water until the water runs clear. Then soak it in 3 cups Water overnight or for at least 6-8 hours. This soaking softens the dal and ensures a smooth batter.
Drain the soaked dal and transfer it to a blender. Add the 1 whole Fresh Ginger (peeled and grated), 1 whole Green Chili (finely chopped), 0.5 cup Red Onion, and 1 whole Tomato. Blend until smooth, adding a splash of water if needed to get the right consistency—it should be like pancake batter, not too thick or thin.
Step 2: Prepare the Batter with Spices and Binding
Pour the blended mixture into a large bowl. Stir in the 0.25 cup Rice Flour, 1 tsp Cumin Seeds, 0.25 tsp Turmeric Powder, and 1 tsp Salt. The rice flour gives the chillas that perfect crispness, while the cumin and turmeric add depth of flavor and a warm, earthy aroma.
Fold in 0.25 cup Fresh Cilantro (chopped), reserving a little for garnish. Mix well until everything is evenly combined. Let the batter rest for 10-15 minutes—this helps the flavors meld together and the rice flour to hydrate properly.
Step 3: Cook the Chillas to Golden Perfection
Heat a non-stick skillet over medium heat and add 1 tbsp Vegetable Oil. Once hot, pour a ladleful of batter into the center of the pan, spreading it in a circular motion to form a thin, even layer (about 6-7 inches in diameter).
Cook for 2-3 minutes until the edges start to lift and the bottom turns golden brown. Drizzle a little more vegetable oil around the edges if needed. Carefully flip the chilla and cook for another 2 minutes until both sides are golden and crisp. Repeat with the remaining batter, adding the last 1 tbsp Vegetable Oil as needed.
Step 4: Garnish and Serve Warm
Transfer the cooked chillas to a serving plate. Drizzle with 1 tbsp Lemon Juice for a bright, zesty finish. Garnish with the remaining fresh cilantro for a pop of color and freshness.
Serve warm with your favorite chutney or yogurt on the side. These chillas are best enjoyed fresh off the pan when they’re still crispy. If you need to keep them warm, place them in a 200°F oven on a wire rack to maintain their texture.
Pro Tips For Making Recipe Of Green Moong Dal Chilla
- Soak Overnight: I learned this the hard way—dry moong dal just won’t blend smooth. Soak the split green moong dal for at least 4-5 hours, or overnight for the creamiest batter.
- Heat the Pan First: After burning three batches, I finally figured out the pan needs to be screaming hot before pouring the batter—medium-high heat, no exceptions.
- Skip the Lumps: Sounds weird, but it works: strain the batter through a sieve after blending to remove any stubborn lumps from the rice flour or dal.
- Press While Cooking: Gently press the edges of the chilla with a spatula while it cooks to ensure even crispiness—this isn’t the prettiest method, but it’s the tastiest.
Storing and Reheating This recipe of green moong dal chilla
🍳 Refrigerator Storage
To store your green moong dal chilla in the fridge, let them cool completely to room temperature. Place them in an airtight container, separating each chilla with parchment paper to prevent sticking. Stored this way, they’ll stay fresh for 3-4 days. For best results, keep the container in the coldest part of your fridge.
❄️ Freezer Storage
For longer storage, freeze your chillas! Wrap each chilla individually in plastic wrap or aluminum foil, then place them in a freezer-safe bag or container. Squeeze out excess air to avoid freezer burn. When stored properly, they can last up to 2-3 months without losing flavor or texture.
🔥 Reheating Methods
Reheating is simple! For the fridge-stored chillas, warm them in a preheated skillet over medium heat (350°F) for 1-2 minutes per side until crispy. For frozen chillas, thaw them overnight in the fridge first. Alternatively, microwave them for 30-45 seconds on high, covered with a damp paper towel to retain moisture.
✨ Quality Preservation
To maintain the best texture, avoid stacking chillas while warm—they can turn soggy. If reheating from frozen, thaw them in the fridge to prevent condensation. For extra crispiness, sprinkle a few drops of water on the chilla before reheating in a pan. This keeps them soft inside while restoring a delicious crunch outside!
Nutrition Facts

- 6 Egg Cake Recipe with Oil: Light as Air With Buttery Moisture - October 4, 2026
- 4 Bean Casserole Recipe: One-Pan Heartiness With Smoky Paprika Depth - October 4, 2026
- 3-Ingredient Keto Mug Cake Recipe: Microwave Magic in 2 Minutes - October 4, 2026