
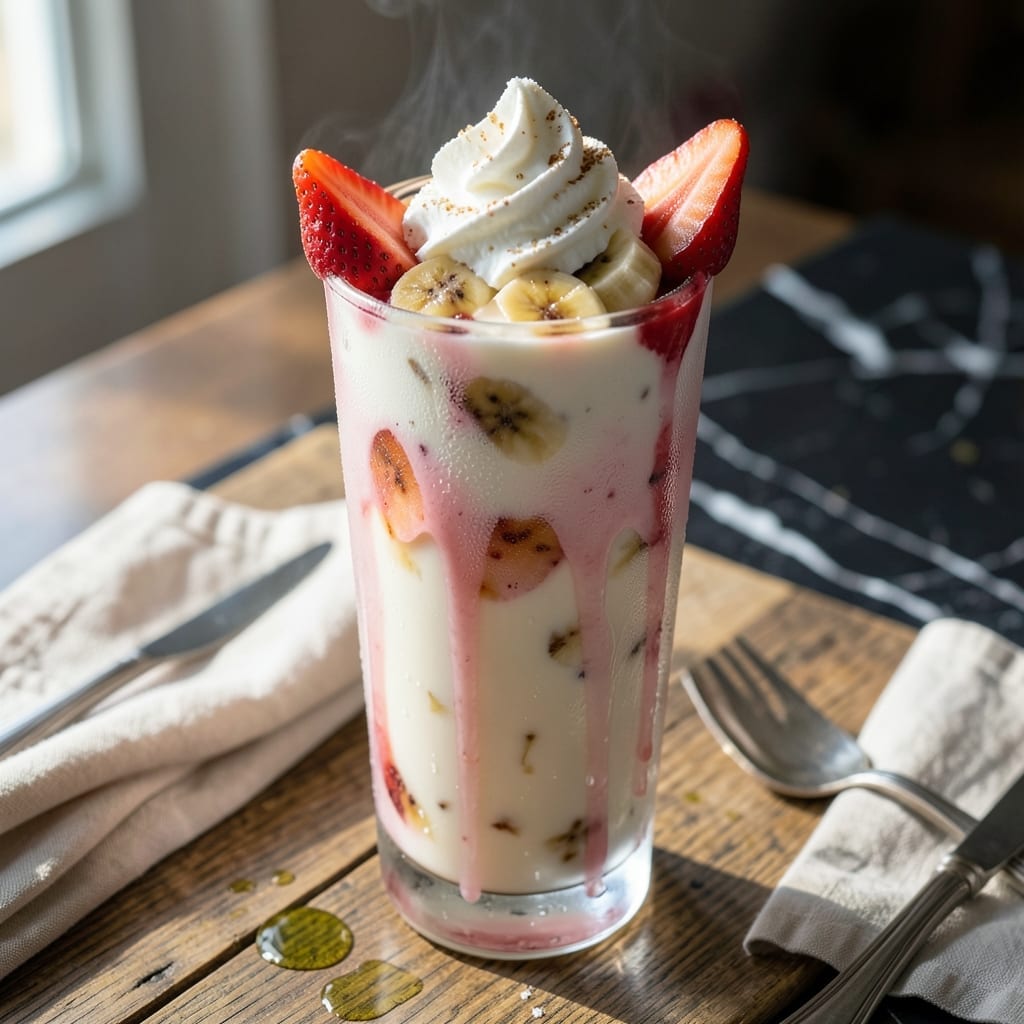
This milkshake recipe delivers the creamy texture you crave with minimal effort. A simple blend of ice cream, milk, and your favorite flavorings creates a rich, satisfying treat in minutes.
Perfect for hot days or dessert cravings, this method ensures a smooth, thick consistency every time. Customize with fruits, syrups, or toppings to suit any taste preference.
Ingredients for Recipe of Milk Shake
Creamy, dreamy ingredients for a blender masterpiece in minutes. Simple, satisfying, and totally customizable.
| Ingredient | Amount | Notes |
|---|---|---|
| Vanilla Ice Cream 🍦 | 3 cups | Full-fat for creaminess |
| Whole Milk 🥛 | ¾ cup | Cold for best texture |
| Vanilla Extract 🌿 | 1 tsp | Pure for best flavor |
| Granulated Sugar 🧂 | 2 tbsp | Adjust to taste preference |
| Heavy Whipping Cream 🥛 | ¼ cup | Whipped for extra thickness |
| Fresh Strawberries 🍓 | 1 cup | Hulled and sliced (optional for flavor) |
| Chocolate Syrup 🍫 | 2 tbsp | For swirl or topping |
| Banana 🍌 | 1 whole | Ripe for natural sweetness |
| Crushed Ice ❄️ | ½ cup | For frosty texture |
| Salt 🧂 | 0.125 tsp | Enhances all flavors |
The ice cream is the foundation here. Full-fat vanilla from brands like Ben & Jerry’s or Häagen-Dazs gives that ultra-creamy texture we’re after. Whole milk works best, but 2% in a pinch—just avoid skim, which makes shakes watery. If you’re feeling fancy, heavy cream takes it over the top. Most grocery stores carry all these, but Trader Joe’s has great options at better prices.
No strawberries? Frozen berries (thawed first) work just as well. Swap chocolate syrup for caramel or peanut butter if that’s your thing. Banana haters can skip it entirely—a spoonful of peanut butter adds thickness and richness. The sugar can be reduced or replaced with honey or maple syrup (just add a touch more to compensate for liquid sweetener).
Best enjoyed immediately, but leftovers keep 24 hours in the fridge (shake well before drinking). Freeze extras in popsicle molds for up to 1 month. The strawberries? Wash and hull just before blending.
Why You’ll Love This Recipe
- Five-Minute Fix: I just dump everything in the blender—ice cream, milk, a splash of vanilla extract—and hit pulse. Honestly, it’s ready before the kids finish arguing over who gets the first sip.
- Velvety Dream: That combo of heavy whipping cream and whole milk makes it so rich and smooth it’s ridiculous. I’ll be real: I’ve caught myself sneaking a second glass when no one’s looking.
- Crowd Pleaser: Birthday parties, movie nights, or just because—it’s my go-to for any gathering. Between us, even the pickiest eaters in my family can’t resist it.
- Pantry Hero: All the ingredients are already in my fridge or cupboard, so it’s my emergency dessert. No last-minute store runs, just instant satisfaction.
Step-by-Step Instructions for Milk Shake
This method guarantees the thickest, creamiest shake you’ve ever made at home.
Step 1: Prep the Fresh Ingredients
Hull and slice the 1 cup Fresh Strawberries into quarters—smaller pieces blend more smoothly. Peel the 1 whole Banana and break it into chunks. I always use ripe bananas with brown speckles for natural sweetness and a creamy texture.
Place both the strawberries and banana on a small plate and freeze for 10-15 minutes while you gather the rest of your ingredients. This extra chill helps the blender process them more efficiently and keeps your final shake frosty.
Step 2: Layer Ingredients in the Blender
Start with the 0.5 cup Crushed Ice at the bottom—this helps the blades grab everything immediately. Add the 3 cups Vanilla Ice Cream next, breaking any large chunks into smaller pieces. The full-fat version is essential for that ultra-creamy texture.
Pour in the 0.75 cup Whole Milk and 0.25 cup Heavy Whipping Cream—the combination gives you richness without being overly thick. Add the 2 tbsp Granulated Sugar, 1 tsp Vanilla Extract, and 0.125 tsp Salt, which enhances all the flavors.
Top with your prepped strawberries and banana. This order prevents the lighter ingredients from getting stuck at the bottom and ensures everything blends evenly from the start.
Step 3: Blend to Thick and Creamy Perfection
Secure the lid tightly and start on low speed, then quickly increase to high. Use a tamper (if your blender has one) to push ingredients toward the blades, especially at the beginning when the mixture is thickest.
Blend for 45-60 seconds until completely smooth, with no visible chunks of fruit or ice. Stop and scrape down the sides with a spatula if needed, then blend for another 10-15 seconds to incorporate everything.
The mixture should be thick enough that if you stop the blender and dip a spoon in, it holds its shape momentarily before slowly dripping. If it’s too thin, add 2-3 ice cubes and blend again.
Step 4: Add Chocolate Swirl and Serve
Pour the shake into chilled glasses, filling them about three-quarters full. Drizzle the 2 tbsp Chocolate Syrup over the top—use the back of a spoon to gently swirl it into the shake for a marbled effect.
Serve immediately with a straw and a long spoon. The shake should be so thick that it requires a good pull through the straw. If it sits for more than 5 minutes, give it a quick stir before serving to recombine the ingredients.
Pro Tips For Making Recipe Of Milk Shake
- Chill Your Glass: I learned this the hard way—warm glassware melts your ice cream too fast, turning your shake into soup. Pop your glass in the freezer for 10 minutes before serving.
- Use Soft Ice Cream: Let the vanilla ice cream sit out for 5-10 minutes before blending. It mixes smoother and puts less strain on your blender.
- Skip the Overfill: Resist the urge to pack the blender to the top. Fill it only halfway to give the shake room to move and blend evenly.
- Swap Milk for Cream: Sounds weird, but it works: Use heavy whipping cream instead of whole milk for a richer, thicker texture without extra sugar.
Essential Equipment for Perfect Results
Must-Have Tools
To whip up a perfect milkshake, a high-speed blender is non-negotiable. Brands like Vitamix or Ninja deliver ultra-smooth textures, crushing ice and fruit with ease. A measuring cup ensures precision for liquids and mix-ins, while a long spoon or spatula helps scrape down the sides mid-blend. 🥤
Nice-to-Have
For extra flair, consider a milkshake maker like the Hamilton Beach for a retro diner vibe. A straw set with reusable metal or silicone straws adds eco-friendly style, and a whipped cream dispenser takes your topping game to the next level. These tools elevate the experience without being essential. ✨
Budget Alternatives
No blender? No problem! A hand mixer or immersion blender works for simpler recipes. Mason jars with tight lids can shake smaller batches, and a fork or whisk helps combine ingredients in a pinch. These swaps keep costs low while still delivering tasty results. 💡
Nutrition Facts

- 6 Egg Cake Recipe with Oil: Light as Air With Buttery Moisture - October 4, 2026
- 4 Bean Casserole Recipe: One-Pan Heartiness With Smoky Paprika Depth - October 4, 2026
- 3-Ingredient Keto Mug Cake Recipe: Microwave Magic in 2 Minutes - October 4, 2026