
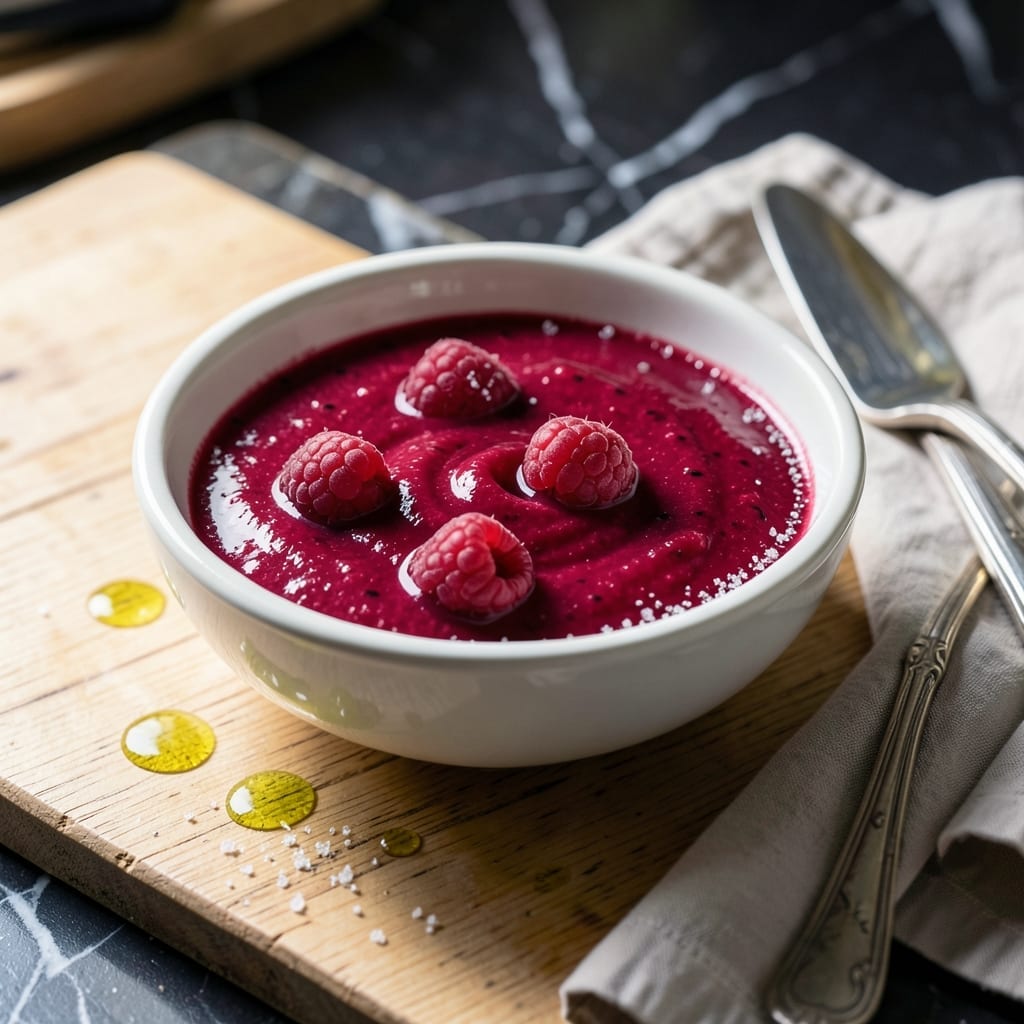
There’s a simple way to elevate any dessert with minimal effort. This vibrant sauce transforms plain cakes, cheesecakes, or ice cream into something extraordinary.
With just a handful of ingredients and 10 minutes, you create a smooth, glossy coulis that balances sweet and tart perfectly. The natural raspberry flavor shines through without artificial additives.
The process is straightforward: simmer, blend, and strain. No cooking experience required. The result is a versatile sauce that keeps well in the fridge for up to a week.
Use it as a drizzle, topping, or filling. This recipe delivers professional-quality results with ease.
Ingredients for Recipe Raspberry Coulis
Six ingredients transform into a glossy, vibrant sauce for desserts.
| Ingredient | Amount | Notes |
|---|---|---|
| Fresh Raspberries 🍇 | 4 cups | Fully ripe, not overripe |
| Granulated Sugar 🍚 | ½ cup | Adjust to taste preference |
| Fresh Lemon Juice 🍋 | 2 tbsp | Recently squeezed for brightness |
| Water 💧 | ¼ cup | For simmering consistency |
| Vanilla Extract 🌿 | 1 tsp | Pure extract for depth |
| Salt 🧂 | 0.125 tsp | Fine grain for even distribution |
The raspberries are non-negotiable for authentic flavor. Farmers markets or Whole Foods typically carry the freshest options—look for deep red color and no moisture in the container (a sign of spoilage). Frozen raspberries work in a pinch, but thaw and drain them first to avoid a watery sauce. This recipe demands ripe but firm berries; overripe ones turn mushy and dilute the vibrant tartness.
No fresh lemon juice? Bottled works at half the amount (it’s more concentrated). Swap granulated sugar for agave or maple syrup at a 1:1 ratio for a vegan alternative. Want more complexity? Add a pinch of orange zest while simmering. If your berries are particularly tart, you might need an extra tablespoon of sugar—taste as you go.
This keeps beautifully in an airtight container. Good for 1 week in the fridge, 6 months frozen. The flavor actually intensifies after a day or two, making it perfect for meal prep. Strain once more after thawing if freezing causes separation.
Why You’ll Love This Recipe
- Five-Minute Magic: I toss fresh raspberries, sugar, and a splash of lemon juice into a saucepan and it practically makes itself.
- Bright Tangy Sweetness: The vanilla extract rounds out the raspberries’ natural tartness in a way that’s honestly addictive.
- Endless Pairing: Drizzle it over ice cream, swirl into yogurt, or glaze a cake—I’ve used it every way imaginable.
- Budget Stretch: A pound of raspberries turns into a versatile sauce that keeps for days, so nothing goes to waste.
Step-by-Step Instructions for Raspberry Coulis
This refined technique transforms fresh fruit into a velvety sauce with minimal effort and maximum flavor impact.
Step 1: Combine Ingredients and Begin Simmering
In a medium saucepan, combine the 4 cups Fresh Raspberries, 0.5 cup Granulated Sugar, 2 tbsp Fresh Lemon Juice, and 0.25 cup Water. I prefer using fully ripe raspberries for their natural sweetness and intense color.
Place the saucepan over medium heat and stir gently to dissolve the sugar. You’ll notice the berries begin to release their juices, creating a vibrant pink liquid. This process should take about 3-4 minutes of gentle simmering.
Watch for the mixture to start bubbling at the edges—this indicates it’s reached the proper simmering temperature. The sugar should be completely dissolved before proceeding to the next step.
Step 2: Simmer and Break Down the Berries
Once simmering, reduce the heat to medium-low to maintain a gentle, steady simmer. Using a wooden spoon, gently mash the raspberries to help break them down. The berries will naturally collapse as they cook, but this manual mashing ensures an even texture.
Continue simmering for 8-10 minutes, stirring occasionally to prevent sticking. You’ll see the mixture thicken slightly and the color deepen to a rich, jewel-toned red. The berries should be completely broken down at this point.
The consistency will be slightly thicker than water but still pourable. This is the perfect stage for the next additions.
Step 3: Add Final Flavorings and Adjust Consistency
Remove the saucepan from heat and stir in the 1 tsp Vanilla Extract and 0.125 tsp Salt. The vanilla adds depth to the bright berry flavor, while the salt enhances all the other flavors without making the coulis taste salty.
Taste and adjust the sweetness if needed—remember the sugar amount can be modified to your preference as noted in the ingredients. For a smoother texture, you can press the mixture through a fine-mesh sieve to remove the seeds, though I often leave them for rustic appeal.
If the coulis seems too thick, add a splash of water to reach your desired consistency. It should coat the back of a spoon but still be easily pourable.
Step 4: Cool and Store for Optimal Flavor
Transfer the coulis to a clean bowl or jar and let it cool to room temperature. As it cools, the flavors will meld together and the sauce will thicken slightly more. This resting period takes about 30-45 minutes.
Once cooled, the coulis is ready to use. For best results, cover and refrigerate for at least 1 hour before serving. This chilling time allows the flavors to fully develop and the texture to set properly.
The coulis will keep in an airtight container in the refrigerator for up to 1 week, making it perfect for preparing ahead of time. Stir before using as some separation may occur during storage.
Pro Tips For Making Recipe Raspberry Coulis
- Simmer Gently: Keep the heat low to medium—raspberries break down fast, and high heat can make the coulis bitter. I learned this the hard way after scorching my first batch.
- Strain the Seeds: Push the cooked mixture through a fine-mesh sieve to remove seeds for a silky texture. It takes an extra 2 minutes but makes a real difference in the final dish.
- Skip Frozen Raspberries: Fresh raspberries release the right amount of liquid; frozen ones often turn the coulis watery. If you must use frozen, thaw and drain them first.
- Add Vanilla Last: Stir in the vanilla extract after removing the coulis from heat to preserve its flavor. Sounds weird, but it works—boiling can dull its aroma.
Make-Ahead Tips for recipe raspberry coulis
Prep Ahead Strategy
This sauce actually improves with time as the flavors meld together. I recommend making it 1-2 days ahead for peak flavor. The tartness mellows slightly while the sweetness becomes more pronounced, creating a perfectly balanced coulis. 💡
Refrigerator Storage
Store in a clean glass jar or airtight container in the fridge for up to 1 week. I use Ball mason jars for easy pouring. The color may darken slightly, but the flavor remains vibrant.
Freezing Tips
For longer storage, freeze in ice cube trays first, then transfer cubes to a freezer bag. This lets you thaw only what you need. It keeps for 6 months without quality loss. Thaw overnight in the fridge.
Reheating Method
Gently warm in a saucepan over low heat for 2-3 minutes, stirring frequently. Avoid microwaving as it can make the sauce separate. If it thickens too much, thin with 1-2 tsp water.
Portion Control
Divide into small containers based on your needs. A ½ cup portion is perfect for drizzling over 4-6 desserts. Label containers with the date for easy tracking.
Flavor Boost
After storage, taste before using. You might want to add ½ tsp lemon juice to brighten the flavor. This is especially true for frozen coulis that may need a little revival.
Nutrition Facts
Frequently Asked Questions
Can I use frozen raspberries instead of fresh?
Yes, but thaw and drain them first to avoid excess liquid. The texture may be slightly softer, but the flavor remains excellent.
How can I make it smoother?
Press the mixture through a fine-mesh sieve after cooking to remove seeds. For ultra-smooth results, blend before straining.
Why did my coulis turn out watery?
Overripe berries or insufficient simmering time can cause this. Cook until slightly thickened, then cool fully—it will thicken more as it chills.
Can I reduce the sugar?
Yes, but start with half the amount, taste, and adjust. Very tart berries may need the full ½ cup to balance.

- 6 Egg Cake Recipe with Oil: Light as Air With Buttery Moisture - October 4, 2026
- 4 Bean Casserole Recipe: One-Pan Heartiness With Smoky Paprika Depth - October 4, 2026
- 3-Ingredient Keto Mug Cake Recipe: Microwave Magic in 2 Minutes - October 4, 2026