
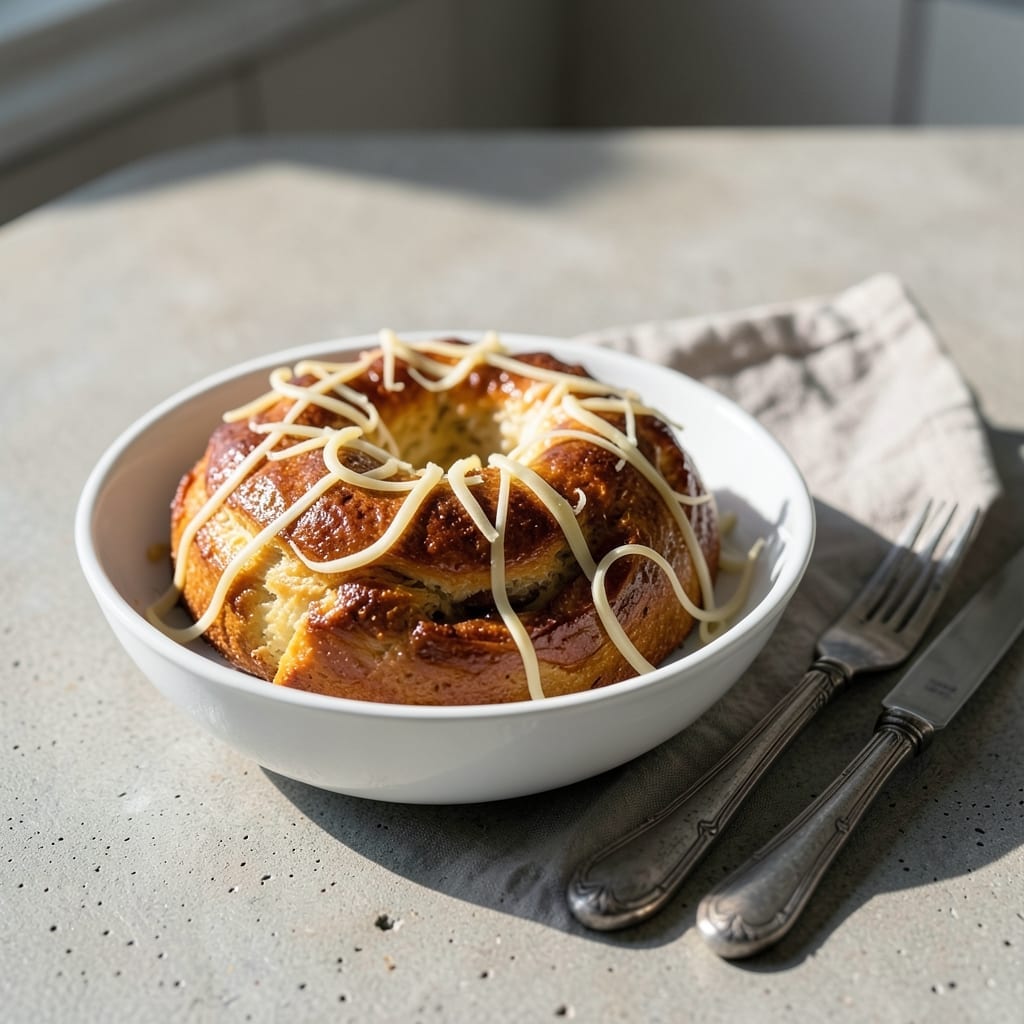
This traditional Spanish Epiphany ring brings festive cheer to any celebration. I’ve perfected the technique for achieving a light, airy texture with a citrus-kissed glaze that’s both sweet and refreshing.
The secret lies in proper yeast activation and gentle folding of the dough. The result is a golden, fragrant ring that honors its cultural roots while delighting modern palates.
Ingredients for Recipe Roscon De Reyes
Traditional Spanish ingredients create a festive Epiphany ring with bright citrus notes and airy texture.
| Ingredient | Amount | Notes |
|---|---|---|
| All-Purpose Flour 🌾 | 4 cups | Plus extra for dusting |
| Granulated Sugar 🍚 | ½ cup | Divided for dough and glaze |
| Active Dry Yeast 🍞 | 1 package | 2 1/4 tsp equivalent |
| Whole Milk 🥛 | ¾ cup | Warmed to 110°F |
| Unsalted Butter 🧈 | ½ cup | Softened to room temperature |
| Large Eggs 🥚 | 3 whole | Room temperature, divided |
| Orange Zest 🍊 | 1 tbsp | Freshly grated from 2 oranges |
| Lemon Zest 🍋 | 1 tbsp | Freshly grated from 1 lemon |
| Vanilla Extract 🌿 | 1 tsp | Pure extract preferred |
| Salt 🧂 | ½ tsp | Fine sea salt |
| Orange Juice 🍊 | ¼ cup | Freshly squeezed for glaze |
| Powdered Sugar 🍬 | 1 ½ cups | For citrus glaze |
| Candied Fruit 🍒 | ½ cup | Chopped, for decoration |
| Sliced Almonds 🌰 | ¼ cup | Toasted, for garnish |
The flour forms the foundation—King Arthur or Bob’s Red Mill all-purpose delivers consistent results for this enriched dough. Yeast freshness is critical; check the expiration date and store unopened packets in the freezer. For the citrus, navel oranges and Meyer lemons provide the best zest. The milk and butter should be full-fat for optimal richness (low-fat versions compromise texture).
No candied fruit? Dried apricots or cranberries add color and sweetness. Short on orange juice for the glaze? Fresh lemon juice at a 1:1 ratio works well. The almonds can be omitted or replaced with crushed pistachios. For a shortcut, use store-bought orange glaze (though homemade tastes far superior). The dough can handle 20% whole wheat flour if you prefer a nuttier flavor.
The baked ring stays fresh for 2-3 days at room temperature in an airtight container. For longer storage, wrap tightly and freeze for up to 1 month. Glaze the ring just before serving—it’s best enjoyed the same day it’s prepared.
Why You’ll Love This Recipe
- No-Knead Magic: The yeast and milk do most of the work overnight. I just shape it in the morning—honestly, the easiest dough I’ve ever made.
- Buttery Sweetness: That rich butter and sugar combo gives it a tender crumb with just the right caramelized crust.
- Crowd Pleaser: Between us, this is my go-to for holidays, brunch, or just because it disappears faster than I can slice it.
- Budget-Friendly Feast: Flour, sugar, milk—pantry staples turn into a showstopper. I’ll be real: it feeds eight for the cost of a fancy coffee.
Step-by-Step Instructions for Spanish Epiphany Ring
Master this traditional technique for a showstopping centerpiece with citrus-kissed sweetness.
Step 1: Activate Yeast and Prepare Dough Base
Warm the 0.75 cup Whole Milk to 110°F—it should feel just barely warm to the touch. In a stand mixer bowl, dissolve the 1 package Active Dry Yeast in the warm milk with a pinch of the 0.5 cup Granulated Sugar. Let it stand for 5-7 minutes until foamy and fragrant.
This activation step is critical. If the milk is too hot, you’ll kill the yeast; too cold, and it won’t bloom properly. The foam should rise to nearly double the volume, signaling the yeast is alive and ready to leaven your dough.
Step 2: Develop the Enriched Dough
Add the 4 cups All-Purpose Flour, remaining granulated sugar, 0.5 tsp Salt, 0.5 cup Unsalted Butter, 2 whole Large Eggs, 1 tbsp Orange Zest, 1 tbsp Lemon Zest, and 1 tsp Vanilla Extract to the yeast mixture. Using the dough hook attachment, mix on low speed until combined, then increase to medium for 8-10 minutes.
The dough should pull away from the bowl sides and become smooth, elastic, and slightly tacky. If it’s too sticky, resist adding more flour—enriched doughs like this are naturally softer. The citrus zests will perfume the dough beautifully as it kneads.
Step 3: First Rise and Shape the Ring
Transfer the dough to a lightly greased bowl, cover with a damp towel, and let rise in a warm place for 1.5-2 hours or until doubled in volume. I like to place it in a turned-off oven with the light on for consistent warmth.
Once risen, punch down the dough and shape it into a 12-inch ring on a parchment-lined baking sheet. Pinch the ends together securely to maintain the shape. Cover and let rise again for 1 hour until puffy—it should spring back slowly when pressed gently.
Step 4: Bake and Prepare Citrus Glaze
Preheat oven to 350°F. Brush the ring with the remaining 1 whole Large Egg (lightly beaten with a splash of water) for a golden finish. Bake for 25-30 minutes until deep golden brown and hollow-sounding when tapped.
While baking, whisk together the 1.5 cups Powdered Sugar with 0.25 cup Orange Juice until smooth. The glaze should be thick but pourable—adjust with a teaspoon of juice or sugar if needed. This citrus glaze will add a bright, tangy contrast to the rich dough.
Step 5: Finish and Decorate
Remove the roscon from the oven and let cool for 10 minutes on the baking sheet. Transfer to a wire rack set over parchment paper. While still warm, drizzle the citrus glaze evenly over the top, allowing it to cascade down the sides.
Immediately decorate with 0.5 cup Candied Fruit and 0.25 cup Sliced Almonds, pressing them gently into the glaze so they adhere. The glaze will set as it cools, creating a glossy finish that makes the colors of the candied fruit pop beautifully. Serve at room temperature for the best texture.
Pro Tips For Making Recipe Roscon De Reyes
- Proof the Yeast: Always dissolve the active dry yeast in warm (not hot) whole milk with a pinch of sugar first—if it doesn’t foam within 5-10 minutes, your roscon won’t rise, and I learned this the hard way after a few dense, sad loaves.
- Soften the Butter: Take the unsalted butter out 1-2 hours before starting so it’s truly room temperature; cold butter won’t incorporate smoothly into the dough, and you’ll end up with uneven texture.
- Skip Rushing the Rise: Resist the urge to speed up the first rise by placing the dough in a hot spot—slow, steady warmth (like a turned-off oven with the light on) gives the best flavor and crumb.
- Use a Ring Mold: If you don’t have a traditional roscon mold, a round cake pan with a small oven-safe bowl in the center works just as well to shape the dough into that classic crown—sounds weird, but it works.
Make-Ahead Tips for This recipe roscon de reyes
🔪 Week Before
Start by preparing the dough’s base. Mix the flour, sugar, and yeast, then store the dry ingredients in an airtight container. This saves 10-15 minutes on the day of baking. Also, zest the citrus fruits (orange and lemon) and refrigerate the zest in a sealed bag to preserve freshness. 💡 Pro tip: Label everything to avoid mix-ups!
⏰ Day Before
Knead the dough with the pre-mixed dry ingredients, butter, and eggs, then let it rise overnight in the fridge. This slow fermentation enhances flavor and texture. Shape the dough into a ring, place it on a baking sheet, and cover it tightly. This step cuts 2-3 hours off your day-of prep. Chill the citrus glaze ingredients (powdered sugar, juice) separately for quick assembly later.
🍳 Day Of
Remove the dough from the fridge and let it warm up for 1-2 hours before baking. Preheat the oven and prepare the egg wash. Bake the roscon as directed, then cool it completely. While it cools, whisk together the chilled glaze ingredients for a smooth finish.
✨ Last-Minute Tasks
Once the ring is cooled, drizzle the glaze evenly and add candied fruit or sprinkles for decoration. Serve at room temperature. 🎯 Pro tip: Keep a small bowl of warm water nearby to thin the glaze if it thickens too much!
Nutrition Facts

- 6 Egg Cake Recipe with Oil: Light as Air With Buttery Moisture - October 4, 2026
- 4 Bean Casserole Recipe: One-Pan Heartiness With Smoky Paprika Depth - October 4, 2026
- 3-Ingredient Keto Mug Cake Recipe: Microwave Magic in 2 Minutes - October 4, 2026