
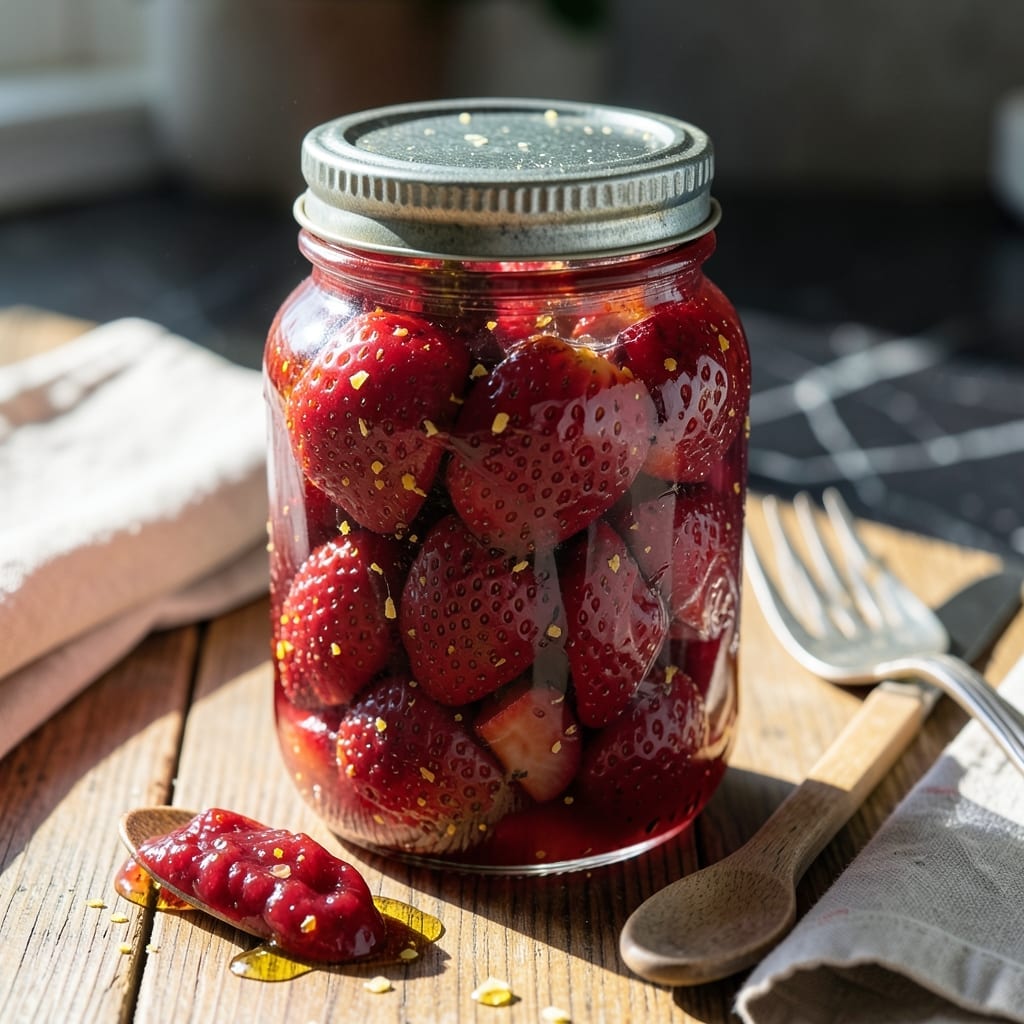
There’s something special about making strawberry preserves without pectin—just fruit, sugar, and lemon juice create a naturally thick spread. This method lets the berries shine with pure, vibrant flavor.
With a little patience, the strawberries break down into a glossy, spreadable consistency that’s perfect for toast, pastries, or gifting. No artificial thickeners, just simple, timeless technique.
Ingredients for Recipe Strawberry Preserves No Pectin
Six simple ingredients transform into vibrant strawberry preserves with natural thickness and pure fruit flavor.
| Ingredient | Amount | Notes |
|---|---|---|
| Fresh Strawberries 🍓 | 4 cups | Ripe, hulled and quartered |
| Granulated Sugar 🍚 | 2 cups | Adjust to taste preference |
| Lemon Juice 🍋 | ¼ cup | Freshly squeezed preferred |
| Lemon Zest 🍋 | 1 tbsp | Optional for extra brightness |
| Vanilla Bean 🌿 | ½ whole | Split and scraped optional |
| Water 💧 | 2 tbsp | If needed for consistency |
The strawberries are everything here. Farmers market berries deliver the most intense flavor, but supermarket varieties work if they’re fully ripe and fragrant. Look for bright red color with no white shoulders—underripe fruit won’t break down properly. Organic isn’t mandatory, but in-season berries have superior sweetness and require less added sugar.
No vanilla bean? Pure vanilla extract at half the amount works beautifully. Want to reduce sugar? Substitute a portion with light brown sugar for depth, but don’t go below 1.5 cups total. The lemon juice is non-negotiable—it’s doing triple duty as acid, pectin substitute, and flavor brightener. If your lemons are small, you may need 2-3 to get 1/4 cup juice.
Preserves keep beautifully. Properly canned, they’ll last 1 year in a cool, dark place. For fridge storage, use within 3 weeks (the flavor actually improves over time). Always use clean, sterilized jars—prevents mold and extends shelf life significantly.
Why You’ll Love This Recipe
- No-Fuss Method: I just toss strawberries with sugar, a squeeze of lemon, and let the pot do the work—no fancy steps or pectin required.
- Vanilla-Kissed Sweetness: The vanilla bean and lemon zest turn the berries into something rich and complex, way beyond plain jam.
- Gift-Worthy Jars: I double the batch and fill cute jars for hostess gifts—everyone thinks I slaved over them.
- Pantry Hero: Honestly, it’s saved me from last-minute breakfast slumps—spread on toast, swirled into yogurt, or spooned straight from the jar.
Step-by-Step Instructions for Strawberry Preserves
Master this technique and you’ll achieve perfectly thick, glossy preserves without commercial pectin.
Step 1: Prepare and Mash the Strawberries
Begin by quartering all 4 cups Fresh Strawberries if you haven’t already. Transfer them to a wide, heavy-bottomed pot or Dutch oven. Using a potato masher, gently crush the berries to release their juices while leaving some chunks for texture.
I find that a few firm presses with the masher achieve the ideal consistency—enough juice to create a syrupy base while maintaining visible fruit pieces. The natural pectin in strawberries will activate during cooking, so avoid over-mashing into a puree.
Step 2: Combine with Sugar and Lemon
Add all 2 cups Granulated Sugar to the crushed strawberries and stir to combine. Pour in the 0.25 cup Lemon Juice and, if using, the 1 tbsp Lemon Zest. The acid from the lemon is crucial—it helps extract the natural pectin from the fruit while balancing the sweetness.
If incorporating the 0.5 whole Vanilla Bean, split it lengthwise, scrape the seeds into the pot, and add the pod as well. This will infuse the preserves with a subtle floral depth. Stir everything together and let the mixture sit for 10-15 minutes to begin macerating.
During this time, you’ll notice the sugar start to dissolve and the strawberries release more liquid. This resting period jumpstarts the cooking process and ensures even distribution of flavors.
Step 3: Cook to the Perfect Consistency
Place the pot over medium-high heat and bring to a full rolling boil, stirring frequently with a wooden spoon. Once boiling, reduce the heat to medium and continue cooking at a lively simmer, stirring often to prevent sticking.
After about 15-20 minutes, the mixture will begin to thicken. Here’s the thing—this is where most people stop too early. You want to continue cooking until the preserves reach 220-222°F on a candy thermometer, or until they pass the plate test: spoon a small amount onto a chilled plate, let it sit for 30 seconds, then tilt the plate. The preserves should hold their shape and wrinkle slightly when pushed with a finger.
If the mixture seems too thick before reaching temperature, add up to 2 tbsp Water to prevent scorching. This step typically takes 25-35 minutes total from the start of cooking.
Step 4: Test and Adjust for Set
As the preserves near completion, they’ll change from a bubbly, liquid state to a thicker, more glossy appearance. The bubbles will become smaller and more syrupy. This visual transformation is your cue that the natural pectin is activating.
Remove the vanilla bean pod if used. Taste and adjust sweetness if needed, though keep in mind the flavor will intensify slightly as it cools. If you prefer a brighter profile, add a touch more lemon juice at this stage.
Real talk: if your preserves aren’t thickening as expected, don’t panic. The natural pectin in strawberries varies by variety and ripeness. Continue cooking and testing—it will set, but it may take up to 45 minutes total.
Step 5: Jar and Seal for Storage
Once the preserves have reached the desired consistency, remove the pot from heat. Skim off any foam that has risen to the surface with a clean spoon. This foam is harmless but can affect the appearance of your final product.
Ladle the hot preserves into clean, sterilized jars, leaving ¼-inch headspace at the top. For short-term storage (up to 3 weeks), simply seal with lids and let cool to room temperature before refrigerating. For longer storage, process in a water bath for 10 minutes to create a vacuum seal.
The preserves will continue to thicken as they cool. Once completely set, they should hold their shape on a spoon but still be easily spreadable. Store in a cool, dark place for unopened jars, or in the refrigerator once opened.
Pro Tips For Making Recipe Strawberry Preserves No Pectin
- Simmer Slowly: Keep the heat at a gentle, steady simmer—boiling too hard will turn your preserves into strawberry syrup. I learned this the hard way after my first batch turned into a thin, runny mess.
- Mash Some Berries: Lightly crush about a quarter of the strawberries before cooking to release pectin naturally. Sounds weird, but it works: your preserves will thicken without added pectin.
- Use Ripe but Firm: Pick strawberries that are fully ripe but still hold their shape—overripe ones will dissolve into mush. My grandmother swore by this, and she was right.
- Add Lemon Early: Toss the lemon juice and zest in with the strawberries and sugar at the start so the acid can break down the fruit gradually. After burning three batches, I finally figured out that timing matters here.
Troubleshooting recipe strawberry preserves no pectin
Too Runny?
If your preserves didn’t thicken, the fruit may have been too watery or the cooking time too short. Strawberries release a lot of juice, and without pectin, they need more reduction to reach the right consistency.
Quick Fix: Return the mixture to the pot and simmer on medium-low heat, stirring frequently, until it thickens (about 10–15 minutes). Test by spooning a bit onto a chilled plate—it should wrinkle when pushed.
Crystals Formed?
Sugar crystals can appear if the sugar wasn’t fully dissolved before boiling. This often happens if you added all the sugar at once or didn’t stir enough early in the process.
Quick Fix: Gently reheat the preserves, stirring constantly until the crystals dissolve. To prevent this next time, sprinkle sugar gradually and stir well before boiling.
Mold Growth?
Mold usually means the preserves weren’t properly sealed or sterilized. Even a tiny gap in the jar lid can let in bacteria or spores, especially if the fruit wasn’t acidic enough.
Quick Fix: Discard moldy preserves—it’s not safe to salvage. For future batches, sterilize jars and lids, and ensure a tight seal while the preserves are hot.
Flavor Too Bland?
Underripe strawberries or insufficient sugar can leave your preserves tasting flat. Sugar isn’t just for sweetness—it enhances the fruit’s natural flavors and helps with preservation.
Quick Fix: Stir in a bit of lemon juice for brightness or a splash of vanilla extract for depth. Next time, use fully ripe, flavorful berries and adjust sugar to taste.
Nutrition Facts

- 6 Egg Cake Recipe with Oil: Light as Air With Buttery Moisture - October 4, 2026
- 4 Bean Casserole Recipe: One-Pan Heartiness With Smoky Paprika Depth - October 4, 2026
- 3-Ingredient Keto Mug Cake Recipe: Microwave Magic in 2 Minutes - October 4, 2026