
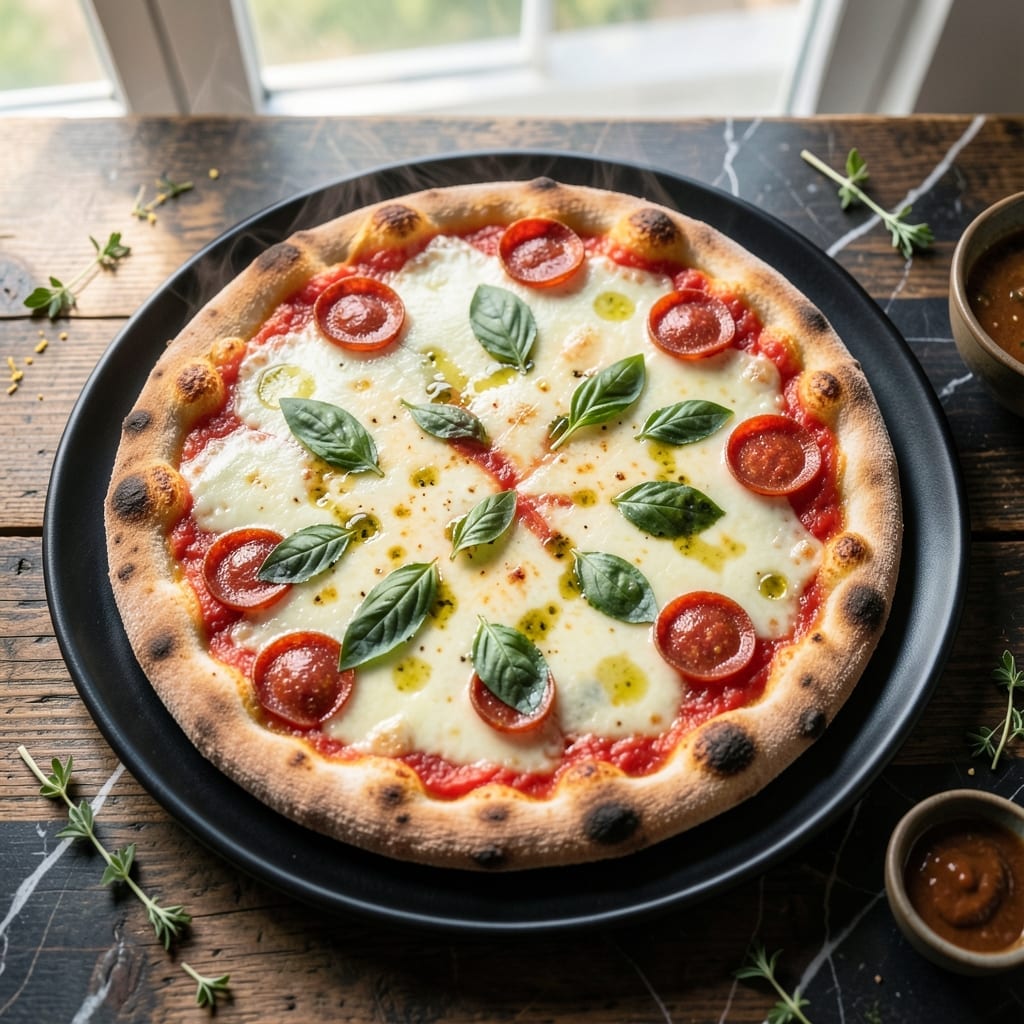
Achieving a crispy thin crust pizza at home is simpler than you think. This proven method delivers professional results without specialized equipment or advanced techniques.
The dough comes together quickly with basic pantry staples, resting just long enough to develop flavor without requiring hours of waiting. Rolling it thin ensures that perfect crackling texture when baked at high heat.
What sets this version apart is the precise balance between a sturdy yet delicate base and your choice of gourmet toppings. The crust holds up to sauces and cheeses while maintaining its signature snap.
Baking at the right temperature transforms simple ingredients into restaurant-quality pizza with a crispy foundation and perfectly melted toppings.
Ingredients for Recipe Thin Crust Pizza
Basic pantry staples form the foundation of this restaurant-quality thin crust pizza with gourmet toppings.
| Ingredient | Amount | Notes |
|---|---|---|
| All-Purpose Flour 🌾 | 2 ½ cups | Bread flour works too |
| Active Dry Yeast 🍞 | 2 ¼ tsp | One 0.25 oz packet |
| Granulated Sugar 🧂 | 1 tsp | Feeds the yeast activation |
| Kosher Salt 🧂 | 1 ½ tsp | Diamond Crystal preferred |
| Olive Oil 🫒 | 2 tbsp | Extra-virgin for flavor depth |
| Warm Water 💧 | 1 cup | 105-110°F for yeast activation |
| San Marzano Tomatoes 🍅 | 1 can | 28 oz can, crushed by hand |
| Fresh Garlic Cloves 🧄 | 4 cloves | Minced for sauce base |
| Dried Oregano 🌿 | 1 tsp | Mediterranean variety preferred |
| Dried Basil 🍃 | 1 tsp | Rubbed between fingers |
| Fresh Mozzarella Cheese 🧀 | 8 oz | Low-moisture, shredded |
| Parmesan Cheese 🧀 | ½ cup | Freshly grated from wedge |
| Fresh Basil Leaves 🌿 | ¼ cup | Torn, for finishing |
| Red Pepper Flakes 🌶️ | ½ tsp | Optional for heat |
| Cornmeal 🌽 | ¼ cup | For dusting pizza peel |
The flour choice impacts texture significantly. King Arthur all-purpose delivers consistent results, while Caputo 00 (available at Eataly or specialty stores) creates an ultra-crisp base. Yeast freshness is critical—check the expiration date and store unopened packets in the freezer. For water, use filtered if your tap has strong odors (worth the extra minute).
No San Marzano tomatoes? Muir Glen or Stanislaus crushed tomatoes work well. Substitute dried herbs at one-third the amount if using fresh. For cheese, whole-milk mozzarella provides better melt than part-skim. The Parmesan can be Pecorino Romano for sharper flavor. Skip the cornmeal? Semolina or extra flour prevents sticking.
Dough balls keep 3 days refrigerated or 1 month frozen. Sauce can be made 1 week ahead. Baked pizza stays crisp when reheated in a 400°F oven for 8-10 minutes (microwaving ruins the texture). Always bring cheese to room temperature before shredding for even melting.
Why You’ll Love This Recipe
- No-Fuss Dough: I can mix these five ingredients in one bowl, let it rise, and roll it out—no fancy tools or hours of kneading.
- Crispy Perfection: The olive oil in the dough gives it that golden, crackly crust with just the right chew.
- Endless Toppings: Honestly, it’s my blank canvas for whatever’s in the fridge—pepperoni tonight, veggies tomorrow.
- Budget Winner: A bag of flour and a packet of yeast make two pizzas for less than takeout.
Step-by-Step Instructions for Thin Crust Pizza
Achieve a perfectly crispy base with these precise, tested techniques for professional results.
Step 1: Activate the Yeast and Prepare the Dough
In a large mixing bowl, combine the 1 cup warm water, 1 tsp granulated sugar, and 2.25 tsp active dry yeast. Let it sit for 5-7 minutes until the mixture becomes foamy and fragrant—this confirms the yeast is active and ready to work.
Add the 2.5 cups all-purpose flour and 1.5 tsp kosher salt to the yeast mixture. Stir with a wooden spoon until a shaggy dough forms. The dough should pull away from the sides of the bowl but still feel slightly sticky to the touch.
Drizzle in the 2 tbsp olive oil and knead the dough for 8-10 minutes by hand until it becomes smooth and elastic. You’ll know it’s ready when the dough bounces back slightly when pressed with a finger.
Step 2: Proof the Dough for Optimal Texture
Lightly oil a clean bowl, place the dough inside, and cover it with a damp kitchen towel. Let it rise in a warm, draft-free area for 1-2 hours or until doubled in size. The ideal temperature for proofing is around 75-80°F.
For best results, I recommend using a stand mixer with a dough hook attachment for kneading. This ensures even development of the gluten strands, which is crucial for achieving that thin, crispy crust. The dough should spring back slowly when poked.
Once proofed, punch down the dough to release the air and divide it into 4 equal portions for individual pizzas. Cover and let rest for 15 minutes before shaping—this relaxation period makes the dough easier to stretch.
Step 3: Prepare the Sauce and Preheat the Oven
While the dough rests, prepare the sauce. In a bowl, combine the 1 can San Marzano tomatoes (crushed by hand), 4 cloves fresh garlic cloves (minced), 1 tsp dried oregano, 1 tsp dried basil, and 0.5 tsp red pepper flakes. Season with a pinch of salt and set aside.
Preheat your oven to its highest setting, typically 500-550°F, with a pizza stone or inverted baking sheet inside. Allow at least 30 minutes for the stone to heat thoroughly—this mimics the high heat of a professional pizza oven.
Dust your work surface and pizza peel with 0.25 cup cornmeal to prevent sticking. The cornmeal adds a subtle crunch and helps the pizza slide easily onto the hot stone.
Step 4: Shape, Top, and Bake the Pizza
On the cornmeal-dusted surface, stretch each dough portion into a thin round, about 12 inches in diameter. For an ultra-thin crust, use a rolling pin to achieve even thickness. Transfer the shaped dough to the prepared peel.
Spread a thin layer of the tomato sauce over the dough, leaving a ½-inch border for the crust. Sprinkle 0.5 cup parmesan cheese evenly over the sauce, then top with 8 oz fresh mozzarella cheese (shredded). Avoid overloading with toppings to ensure a crispy crust.
Slide the pizza onto the preheated stone and bake for 8-12 minutes until the crust is golden brown and the cheese is bubbly with light brown spots. The exact time depends on your oven’s temperature and the thickness of your crust.
Step 5: Finish and Serve Immediately
Remove the pizza from the oven and transfer it to a cutting board. Immediately top with 0.25 cup fresh basil leaves (torn) for a burst of freshness. The residual heat will lightly wilt the basil, enhancing its aroma.
Let the pizza rest for 2-3 minutes before slicing to allow the cheese to set slightly. This brief rest prevents the toppings from sliding off when you cut into it. Use a sharp pizza wheel or knife for clean slices.
Serve hot, while the crust is at its crispiest. Each pizza should have a thin, crackling base with a slightly chewy interior and well-browned cheese. The combination of San Marzano tomatoes and fresh mozzarella creates an authentic, gourmet flavor profile.
Pro Tips For Making Recipe Thin Crust Pizza
- Preheat the Stone: Get your pizza stone or inverted baking sheet screaming hot—at least 30 minutes at 500°F. I learned this the hard way after pulling out pale, soggy crusts from a lukewarm stone.
- Rest the Dough: Let the dough relax for 10 minutes before rolling it thin. After struggling with shrinking dough for years, I finally realized it just needs a short break to cooperate.
- Skip the Overload: Resist the urge to pile on toppings—thin crust can’t handle the weight. Stick to a light layer of sauce and cheese, or it’ll turn into a floppy mess.
- Use Less Yeast: Cut the yeast back by half if your recipe calls for more than 1/4 teaspoon. Sounds weird, but it works: the dough stays thin and crispy instead of puffing up like a loaf.
Serving Suggestions for This recipe thin crust pizza
Plating Tips
Transfer your pizza to a wooden cutting board for rustic presentation—the natural grain adds warmth to your table. I love how the golden crust contrasts against the dark wood. Use a sharp wheel to slice into 6-8 even pieces for easy serving.
Fresh Garnishes
A sprinkle of fresh basil leaves right before serving adds vibrant color and aroma. Drizzle with 1-2 tsp extra-virgin olive oil for a glossy finish. The oil enhances the flavors while keeping the crust crisp.
Side Pairings
A simple arugula salad with lemon vinaigrette cuts through the richness beautifully. I toss 4 cups arugula with 1 tbsp olive oil and 1 tsp lemon juice. The peppery greens complement the pizza’s savory notes perfectly. 🥗
Drink Pairings
An Italian lager like Peroni or Moretti cleanses your palate between bites. For wine lovers, a crisp Pinot Grigio from Alto Adige pairs wonderfully. The acidity balances the cheesy richness without overpowering the flavors.
Serving Style
Serve family-style on a large platter for sharing, or place individual slices on small plates for a casual vibe. I always keep a pizza stone on the table to maintain warmth. This keeps the crust crispy longer during the meal.
Finishing Touch
Add red pepper flakes on the side for guests who want heat. A small bowl of grated Parmesan lets everyone customize their slices. These little touches make your pizza night feel like a true pizzeria experience. 🔥
Nutrition Facts
Frequently Asked Questions
What’s the secret to an extra crispy base?
Preheat your oven to 550°F with a pizza stone for 30 minutes. Roll the dough paper-thin and avoid overloading toppings. The high heat creates that perfect snap.
Can I make the dough ahead of time?
Yes! Prepare the dough, then refrigerate for up to 3 days or freeze for 1 month. Let it come to room temperature before shaping for best results.
Why does my crust stay soft?
Common culprits: oven not hot enough, dough too thick, or too much sauce. Use minimal toppings and bake on the lowest rack for maximum crispiness.
Can I use store-bought dough?
Look for pizza dough in the refrigerated section. Let it rest at room temp for 30 minutes before stretching for easier handling.

- 6 Egg Cake Recipe with Oil: Light as Air With Buttery Moisture - October 4, 2026
- 4 Bean Casserole Recipe: One-Pan Heartiness With Smoky Paprika Depth - October 4, 2026
- 3-Ingredient Keto Mug Cake Recipe: Microwave Magic in 2 Minutes - October 4, 2026