
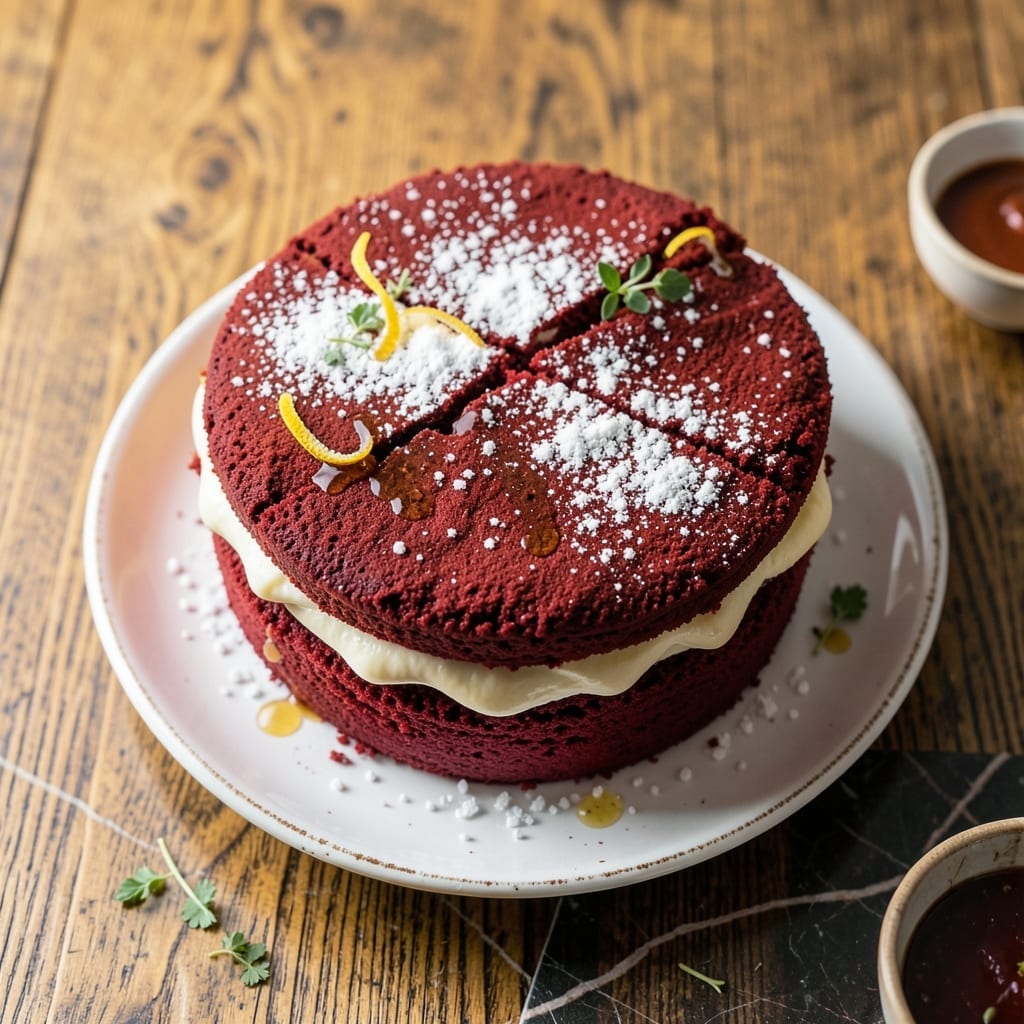
This red velvet cake delivers a moist crumb and rich cocoa flavor that’s hard to resist. The secret lies in the perfect balance of buttermilk and vinegar, creating a tender texture that melts in your mouth.
Swirls of tangy cream cheese frosting add contrast and depth, making every bite unforgettable. It’s a classic dessert that always impresses, whether for a celebration or a simple indulgence.
Ingredients for Red Velvet Cake Recipe Cake
A few pantry staples and fridge basics bring this classic dessert to life beautifully.
| Ingredient | Amount | Notes |
|---|---|---|
| All-Purpose Flour 🌾 | 2 ½ cups | Sifted for best texture |
| Granulated Sugar 🍚 | 1 ½ cups | Fine grain for even mixing |
| Unsweetened Cocoa Powder 🍫 | ¼ cup | Dutch-process preferred |
| Baking Soda 🧂 | 1 tsp | Fresh for optimal rise |
| Salt 🧂 | ½ tsp | Fine sea salt preferred |
| Vegetable Oil 🫒 | 1 cup | Neutral flavor for balance |
| Buttermilk 🥛 | 1 cup | Room temperature for best results |
| Large Eggs 🥚 | 2 whole | Room temperature, lightly beaten |
| White Vinegar 💧 | 1 tbsp | For chemical reaction |
| Vanilla Extract 🌿 | 1 tsp | Pure extract for best flavor |
| Red Food Coloring 🎨 | 2 tbsp | Liquid type for vibrant color |
| Cream Cheese 🧀 | 8 oz | Full-fat, softened |
| Unsalted Butter 🧈 | ½ cup | Softened for smooth frosting |
| Powdered Sugar 🍚 | 4 cups | Sifted for lump-free texture |
The cocoa matters here—Dutch-process gives that deep, rich flavor without bitterness. I always grab mine from King Arthur (their baking line is solid). Buttermilk is non-negotiable for that signature tang and moisture, so don’t try to fake it with milk plus vinegar (it’s not the same). Food coloring is the wildcard—liquid works better than gel for even distribution in this batter.
No buttermilk? Plain yogurt thinned with a splash of milk gets you 80% there. Short on cocoa? Melted chocolate plus a bit of flour can sub in a pinch (use 1 oz chocolate + 1 tbsp flour per 2 tbsp cocoa). The vinegar is doing chemical work here, so don’t swap it for lemon juice. For the frosting, full-fat cream cheese is key—low-fat makes it weep.
Cake layers keep 3 days wrapped tight at room temp, or freeze for 3 months. Frosting can sit in the fridge 5 days (let it soften before using). Bake and cool layers a day ahead—saves time and actually improves texture (the flavors meld overnight).
Why You’ll Love This Recipe
- One Bowl Magic: I love that I can mix everything—flour, sugar, cocoa—in a single bowl and still get that perfect crumb.
- Rich Chocolate Kiss: The unsweetened cocoa powder gives it just enough depth without overpowering that classic red velvet taste.
- Birthday Star: Honestly, it’s my go-to for celebrations, but I’ve also baked it just because Tuesday needed a win.
- Budget Friendly: All-purpose flour and basic pantry staples mean I can make this without a special grocery trip.
Step-by-Step Instructions for Red Velvet Cake
This method delivers a moist crumb and perfect texture every single time.
Step 1: Combine Wet Ingredients for Vibrant Color
In a large bowl, whisk together the 1 cup vegetable oil and 1.5 cups granulated sugar until fully combined. This creates the base for your cake batter. Add the 2 whole large eggs, 1 tsp vanilla extract, and 2 tbsp red food coloring.
Whisk vigorously for 1-2 minutes until the mixture turns a deep, uniform red color. The food coloring needs thorough mixing to eliminate streaks. Then stir in the 1 tbsp white vinegar—this reacts with the baking soda later for a tender crumb.
Step 2: Alternate Dry Ingredients and Buttermilk
In a separate bowl, sift together the 2.5 cups all-purpose flour, 0.25 cup unsweetened cocoa powder, 1 tsp baking soda, and 0.5 tsp salt. Sifting prevents lumps and ensures even distribution of the cocoa powder.
Add about a third of the dry ingredients to the wet mixture and stir until just combined. Pour in half of the 1 cup buttermilk and stir again. Repeat, ending with the last third of dry ingredients. The batter should be smooth and thick, with no flour streaks.
Step 3: Bake Until Springy to the Touch
Divide the batter evenly between two greased and floured 9-inch round cake pans. Smooth the tops with a spatula. Bake in a preheated 350°F oven for 25-30 minutes, or until a toothpick inserted in the center comes out with a few moist crumbs.
The cakes are done when the tops spring back when lightly pressed and the edges start to pull away from the pans. Don’t overbake—this is key to keeping the crumb moist. Let the cakes cool in the pans for 10 minutes before turning them out onto a wire rack to cool completely.
Step 4: Prepare the Cream Cheese Frosting
In a stand mixer, beat the 0.5 cup unsalted butter and 8 oz cream cheese on medium speed until smooth and creamy, about 2-3 minutes. Scrape down the sides of the bowl as needed to ensure even mixing.
Gradually add the 4 cups powdered sugar, one cup at a time, mixing on low speed until fully incorporated. Increase the speed to medium and beat for another 2 minutes until the frosting is light and fluffy. This ensures a smooth, spreadable consistency.
Step 5: Assemble and Frost the Cake
Place one cake layer on a serving plate and spread a generous layer of frosting over the top. Add the second layer and spread the remaining frosting over the top and sides of the cake. For a smooth finish, use a bench scraper or the back of a spoon to even out the frosting.
Let the cake sit at room temperature for 30 minutes before slicing to allow the frosting to set slightly. This makes cutting cleaner and helps the layers hold together. Serve at room temperature for the best texture and flavor.
Pro Tips For Making Red Velvet Cake Recipe Cake
- Room Temp Ingredients: Pull your eggs and butter out 30-60 minutes before mixing—I learned this the hard way after my first dense, lumpy red velvet disaster.
- Sift the Cocoa: Always sift the unsweetened cocoa powder with the flour to break up clumps; it blends better and prevents those dreaded dry pockets in the crumb.
- Don’t Overmix: Mix just until the flour disappears, about 20-30 seconds on low speed. After burning three batches to tough, chewy bricks, I finally figured out this was the culprit.
- Use Buttermilk: Sounds weird, but it works: swap regular milk for buttermilk—it reacts with the baking soda for a lighter texture and that signature tang red velvet needs.
Essential Equipment for Perfect Results
Must-Have Tools
To bake a perfect red velvet cake, start with a reliable 9-inch round cake pan (two for layering). A stand mixer or hand mixer ensures smooth batter, while a whisk helps blend dry ingredients evenly. Don’t forget parchment paper to prevent sticking—it’s a game-changer! 🎯
Nice-to-Have
A kitchen scale guarantees precise measurements for consistent results. For decorating, a piping bag with a star tip adds professional flair to your cream cheese frosting. A cake turntable makes frosting easier, giving you that bakery-style finish. ✨
Budget Alternatives
Swap a stand mixer for a sturdy wooden spoon and some elbow grease. Use a glass mixing bowl if you don’t have stainless steel, and a butter knife can smooth frosting in a pinch. Even with basics, your red velvet cake can still shine! 💡
Nutrition Facts

- 6 Egg Cake Recipe with Oil: Light as Air With Buttery Moisture - October 4, 2026
- 4 Bean Casserole Recipe: One-Pan Heartiness With Smoky Paprika Depth - October 4, 2026
- 3-Ingredient Keto Mug Cake Recipe: Microwave Magic in 2 Minutes - October 4, 2026