
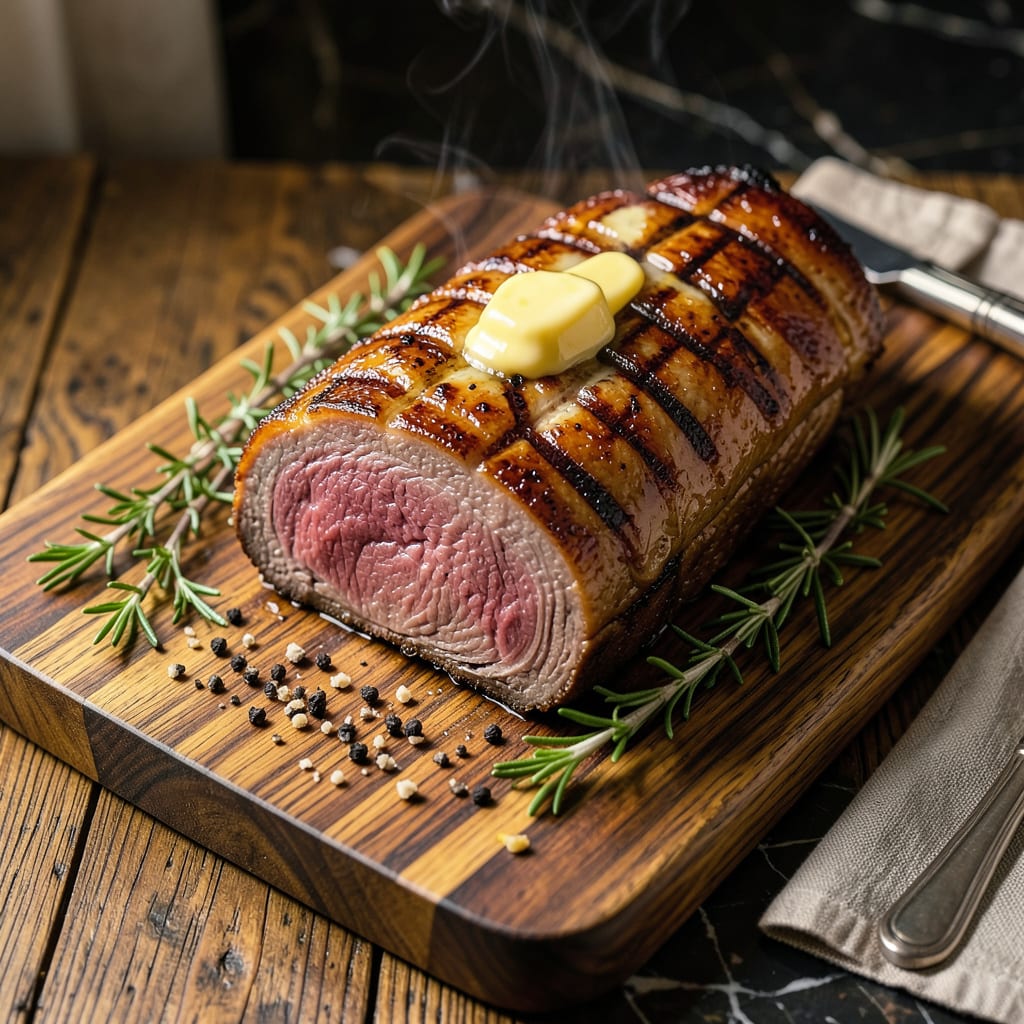
The reverse sear method transforms beef tenderloin into a perfectly cooked, restaurant-quality centerpiece with unmatched precision. This technique begins with a slow, low-temperature oven phase that gently brings the meat to the ideal internal temperature, ensuring edge-to-edge tenderness without overcooking.
Finishing with a high-heat sear creates a deeply caramelized crust while maintaining the tender, juicy interior. The result is steakhouse-level beef tenderloin—consistently perfect every time—with minimal effort and maximum control over doneness. No specialized equipment required, just patience and attention to temperature.
Ingredients for Reverse Sear Beef Tenderloin
Six premium ingredients form the foundation of this restaurant-quality beef tenderloin, with supporting aromatics for precision basting and finishing.
| Ingredient | Amount | Notes |
|---|---|---|
| Whole Beef Tenderloin 🥩 | 4 lb | Center-cut, trimmed of excess fat |
| Kosher Salt 🧂 | 2 tbsp | Diamond Crystal preferred for precision |
| Freshly Ground Black Pepper 🌶️ | 1 tbsp | Coarse grind for optimal crust |
| Unsalted Butter 🧈 | 4 tbsp | European-style preferred for basting |
| Fresh Thyme Sprigs 🌿 | 6 whole | For aromatic basting |
| Fresh Rosemary Sprigs 🌿 | 3 whole | Woody stems removed post-basting |
| Garlic Cloves 🧄 | 4 cloves | Lightly crushed for basting |
| Extra-Virgin Olive Oil 🫒 | 2 tbsp | High smoke point required |
| Neutral-Flavored Oil 🫒 | 1 tbsp | Avocado or grapeseed for searing |
| Flaky Sea Salt 🧂 | 1 tsp | Maldon or Jacobsen for finishing |
| Dijon Mustard 🟡 | 1 tbsp | Optional for crust enhancement |
| Red Wine 🍷 | ¼ cup | Dry variety for deglazing |
The beef tenderloin quality is paramount for optimal results. USDA Prime grade delivers superior marbling and tenderness, though Choice grade performs admirably when properly sourced. For consistent thickness, request a center-cut portion from your butcher—this ensures even cooking during the reverse sear process. Whole Foods and Costco offer reliable options, with the latter providing excellent value for larger cuts. The kosher salt specification matters: Diamond Crystal‘s flake structure allows for precise seasoning control without over-salting.
Substitutions must maintain the recipe’s precision requirements. Ghee can replace butter for a higher smoke point during basting, though it alters the flavor profile slightly. Fresh herbs are non-negotiable for basting—dried alternatives lack the necessary aromatic intensity. The neutral oil for searing must withstand 450°F+ temperatures; refined coconut oil works in a pinch. For wine alternatives, beef stock reduced with balsamic vinegar provides comparable depth without alcohol. Always verify your meat thermometer’s accuracy—±2°F precision is essential for perfect doneness.
Storage considerations prioritize food safety and quality preservation. The raw tenderloin maintains optimal freshness for 3-5 days when vacuum-sealed, or 6-12 months when properly frozen. Post-cooking, carved tenderloin keeps for 4 days refrigerated or 3 months frozen—though texture degrades slightly upon thawing. Compound butter made from leftovers (mixed with herbs) extends utility to 1 week when refrigerated. Always bring refrigerated meat to room temperature (about 1 hour) before beginning the reverse sear process for even cooking.
Why You’ll Love This Recipe
- Set-It-and-Forget-It Simple: Honestly, the oven does 90% of the work here. I just salt the tenderloin, pop it in at 250°F, and walk away—no babysitting, no flipping, just perfectly even cooking while I set the table or pour a glass of wine.
- Buttery, Herby Crust: That final sear with butter and thyme? It’s what makes this ridiculous. The crust gets this deep golden-brown color, crackling with salt and pepper, while the inside stays so tender it nearly melts.
- Dinner Party MVP: I’ve served this for holiday dinners and random Sunday suppers with equal success. It’s impressive enough for guests but unfussy enough that I’m not stuck in the kitchen—just carve and let the compliments roll in.
- Leftovers You’ll Fight Over: Between us, the slices reheat beautifully for sandwiches or salads. I’ll even cold-sneak a piece straight from the fridge sometimes—yes, it’s that good the next day. Zero waste, all reward.
Step-by-Step Instructions for Reverse Sear Beef Tenderloin
This methodical approach delivers restaurant-quality results with precise temperature control and perfect doneness.
Step 1: Season and Slow-Roast the Tenderloin
Begin by patting the 4 lb whole beef tenderloin completely dry with paper towels. This ensures optimal crust development. Rub the entire surface with the 2 tbsp kosher salt and 1 tbsp freshly ground black pepper, pressing gently to adhere. Place the tenderloin on a wire rack set over a baking sheet.
Transfer to an oven preheated to 250°F and roast for 60-90 minutes until the internal temperature reaches 110-115°F on an instant-read thermometer. This low-and-slow approach creates edge-to-edge pink perfection while minimizing moisture loss. The tenderloin should feel slightly firm but still yield to gentle pressure.
Step 2: Prepare the Basting Compound
While the tenderloin roasts, combine the 4 tbsp unsalted butter, 6 whole fresh thyme sprigs, 3 whole fresh rosemary sprigs, and 4 cloves garlic cloves (lightly crushed) in a small saucepan. Melt over low heat for 3-4 minutes until the butter is infused with herb aromas. Remove from heat and keep warm.
In a separate bowl, whisk together the 2 tbsp extra-virgin olive oil and 1 tbsp Dijon mustard until emulsified. This mixture will form the base for your searing oil, adding depth to the final crust. The mustard’s acidity helps balance the richness of the beef.
Step 3: Sear for Crust Development
Remove the tenderloin from the oven when it reaches 110-115°F internally. Heat a large cast-iron skillet over high heat until smoking hot. Add the 1 tbsp neutral-flavored oil and swirl to coat. Carefully place the tenderloin in the skillet and sear for 2-3 minutes per side, basting continuously with the herb butter.
Watch for visual cues: the crust should develop a deep mahogany color and the butter should foam but not burn. Use tongs to rotate the tenderloin, ensuring all surfaces receive equal contact with the hot pan. The internal temperature should climb to 125-130°F for perfect medium-rare doneness.
Step 4: Rest and Finish with Pan Sauce
Transfer the seared tenderloin to a cutting board and tent loosely with foil. Let rest for 10-15 minutes while you prepare the pan sauce. Pour off excess fat from the skillet, then deglaze with the 0.25 cup red wine over medium-high heat. Scrape up all browned bits and reduce by half.
Swirl in any remaining herb butter from basting and simmer for 1-2 minutes until slightly thickened. The sauce should coat the back of a spoon lightly. Slice the tenderloin against the grain into 1-inch thick medallions and arrange on a platter. Drizzle with the pan sauce and finish with the 1 tsp flaky sea salt for textural contrast.
Essential Equipment for Great reverse sear beef tenderloin
Precision Thermometer
An instant-read thermometer is your most critical tool for reverse searing. I swear by the ThermoWorks Thermapen ONE—it reads temperatures in 1 second with ±0.5°F accuracy. The thin probe lets you check multiple spots without creating large holes. Trust me, guessing temperatures ruins expensive tenderloin. 🌡️
Wire Rack Setup
Proper airflow is essential during the low-temperature phase. Use a heavy-duty wire rack (like the OXO Good Grips model) placed over a rimmed baking sheet. This elevates the meat, allowing heat to circulate evenly and preventing steaming. The rack should have ½-inch spacing between wires for optimal heat distribution.
Cast Iron Skillet
A 12-inch cast iron skillet is non-negotiable for the searing phase. I recommend Lodge for its heat retention and even heating. Preheat it until smoking hot—about 5 minutes on high—before adding oil. The skillet should be large enough to accommodate the entire tenderloin without crowding, which would lower the searing temperature.
High-Smoke Point Oil
For searing, you need an oil that won’t burn at 450°F+. I keep avocado oil (like Chosen Foods) on hand for its 520°F smoke point. Grapeseed oil works too, but avoid olive oil—it smokes at 375°F and will create bitter flavors. Use just enough to coat the pan—about 1 tbsp.
Basting Tools
A large metal spoon and heat-resistant silicone brush are essential for continuous basting. I prefer the OXO silicone brush because it won’t melt and cleans easily. Keep your herb butter warm but not boiling—maintain it at about 160°F in a small saucepan. Baste every 30 seconds during searing for maximum flavor infusion.
Resting Setup
After searing, transfer the tenderloin to a wooden cutting board and tent loosely with foil. The wood helps maintain temperature while the foil traps just enough steam. Let it rest for 10-15 minutes—this allows juices to redistribute. I use a meat fork to test doneness during resting; it should slide in with minimal resistance. 💡
Nutrition Facts

- 6 Egg Cake Recipe with Oil: Light as Air With Buttery Moisture - October 4, 2026
- 4 Bean Casserole Recipe: One-Pan Heartiness With Smoky Paprika Depth - October 4, 2026
- 3-Ingredient Keto Mug Cake Recipe: Microwave Magic in 2 Minutes - October 4, 2026