
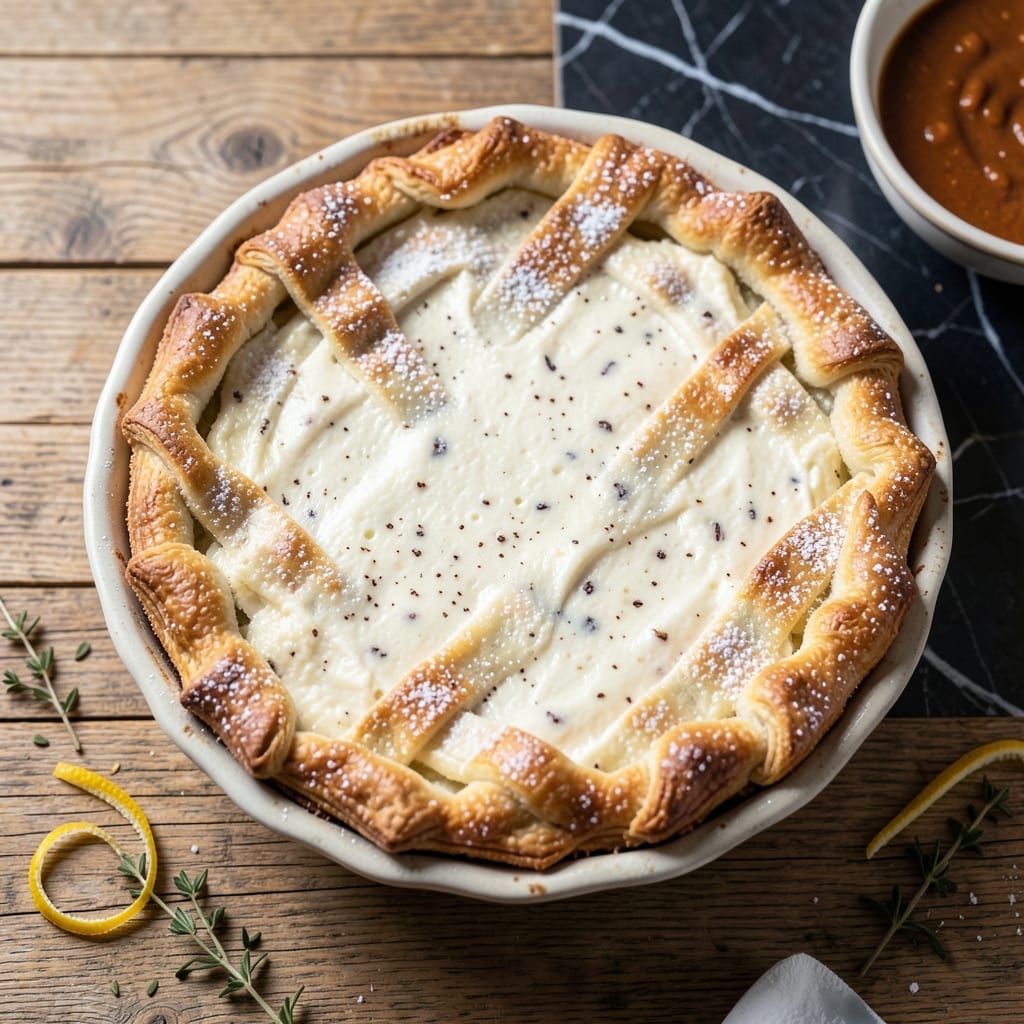
This Italian ricotta pie delivers the light, fluffy texture that made Lidia famous. The secret lies in properly draining the ricotta and folding in whipped eggs for maximum airiness.
Unlike heavy cheesecakes, this version uses a simple shortcrust base that stays crisp against the creamy filling. A touch of citrus zest brightens the rich ricotta without overpowering it.
The result is a sliceable dessert that’s creamy yet light, with a delicate sweetness that lets the ricotta shine. It bakes to a golden top with a custard-like center.
Serve it chilled with fresh berries or a dusting of powdered sugar for an authentic Italian finish.
Ingredients for Ricotta Pie Recipe Lidia
A dozen simple ingredients create this iconic Italian dessert with signature lightness.
| Ingredient | Amount | Notes |
|---|---|---|
| All-Purpose Flour 🌾 | 2 cups | Plus extra for dusting |
| Granulated Sugar 🍚 | ¼ cup | Divided for crust and filling |
| Unsalted Butter 🧈 | ½ cup | Cold, cubed for crust |
| Ice Water 💧 | 6 tbsp | For shortcrust dough |
| Whole Milk Ricotta Cheese 🧀 | 2 lb | Well-drained overnight |
| Large Eggs 🥚 | 4 whole | Separated, whites whipped |
| Granulated Sugar 🍚 | ¾ cup | For filling sweetness |
| Pure Vanilla Extract 🌿 | 1 tsp | For aromatic depth |
| Lemon Zest 🍋 | 1 tbsp | Freshly grated for brightness |
| Orange Zest 🍊 | 1 tsp | Freshly grated for complexity |
| Salt 🧂 | ¼ tsp | Fine sea salt preferred |
| Powdered Sugar 🍬 | 2 tbsp | For dusting before serving |
The ricotta is non-negotiable here—whole milk from a trusted brand like BelGioioso or Calabro gives that authentic texture. Most grocery stores carry these, but Italian specialty shops often have fresher options. Drain it overnight in a cheesecloth-lined strainer (don’t skip this step) to remove excess moisture. For the crust, European-style butter with higher fat content makes all the difference in flakiness.
No lemon or orange zest? Lime zest works in a pinch, though the flavor profile shifts slightly. Out of ricotta? Cottage cheese blended smooth is the closest substitute, but texture won’t be identical. For a gluten-free crust, almond flour at a 1:1 ratio works surprisingly well—just press it in rather than rolling. The sugar can be reduced by 25% if you prefer less sweetness.
The pie keeps beautifully in the fridge for 4-5 days—actually improves as flavors meld. Freeze slices for up to 2 months, wrapped tightly. Bring to room temperature before serving for best texture. That overnight draining? Worth every minute.
Why You’ll Love This Recipe
- Minimal Fuss: The crust comes together in minutes with just flour, butter, and ice water—no fancy techniques.
- Creamy Dream: Whole milk ricotta makes the filling so rich and smooth, it tastes like dessert but feels light.
- Feeds a Crowd: One pie serves 8-10, so it’s my go-to for potlucks or Sunday dinner with the family.
- Budget Friendly: Ricotta is affordable, and a little goes a long way in this showstopper dessert.
Step-by-Step Instructions for Ricotta Pie
Here is the authentic method for achieving that signature light, airy texture every time.
Step 1: Prepare the Shortcrust Dough
In a food processor, pulse the 2 cups All-Purpose Flour, 0.25 cup Granulated Sugar, and 0.25 tsp Salt until combined. Add the 0.5 cup Unsalted Butter (cold and cubed) and pulse until the mixture resembles coarse crumbs with pea-sized butter pieces visible.
With the processor running, slowly drizzle in the 6 tbsp Ice Water, one tablespoon at a time, until the dough just begins to come together. You should see it start to clump but still appear slightly crumbly. This prevents overworking the gluten, ensuring a tender crust.
Turn the dough out onto a lightly floured surface and gently knead just until it forms a smooth ball. Divide it into two equal portions, flatten into discs, wrap in plastic, and refrigerate for 1 hour to relax the gluten.
Step 2: Create the Ricotta Filling
In a large bowl, whisk together the 2 lb Whole Milk Ricotta Cheese, 0.75 cup Granulated Sugar, 4 whole Large Eggs, 1 tsp Pure Vanilla Extract, 1 tbsp Lemon Zest, and 1 tsp Orange Zest until completely smooth. I use a rubber spatula to scrape the bowl frequently, ensuring no lumps remain.
The filling should be silky with no graininess. If your ricotta is watery, you didn’t drain it sufficiently overnight—this step is crucial for the right texture. Let the filling rest at room temperature for 15 minutes while you roll out the dough.
Step 3: Assemble and Pre-Bake the Crust
On a floured surface, roll one dough disc into a 12-inch circle and transfer it to a 9-inch pie dish. Press it gently into the bottom and up the sides without stretching. Trim the edges, leaving a ½-inch overhang, then crimp decoratively.
Prick the bottom all over with a fork to prevent air bubbles. Line with parchment paper, fill with pie weights or dried beans, and blind bake at 375°F for 15 minutes until the edges just begin to turn light golden brown.
Step 4: Fill and Bake to Perfection
Remove the weights and parchment from the crust. Pour in the ricotta filling, spreading it evenly with a spatula. Roll out the second dough disc and place it over the filling. Crimp the edges to seal, then cut several small slits in the top crust to allow steam to escape.
Bake at 350°F for 45-50 minutes until the crust is golden brown and the filling is set but still slightly jiggly in the center. The internal temperature should reach 175°F when tested with an instant-read thermometer.
Step 5: Cool and Finish
Transfer the pie to a wire rack and let it cool completely at room temperature, about 2 hours. This cooling period is essential—it allows the filling to set properly and prevents a runny texture when sliced.
Just before serving, dust the top evenly with the 2 tbsp Powdered Sugar using a fine-mesh sieve. The pie should slice cleanly with a sharp knife, revealing the creamy filling between the flaky crust layers. Serve at room temperature for the best texture.
Pro Tips For Making Ricotta Pie Recipe Lidia
- Chill the Dough: After mixing the flour, butter, and ice water, wrap the dough and refrigerate for at least 30 minutes—this prevents shrinking when it hits the hot oven. I learned this the hard way after my first few pies pulled away from the edges.
- Drain the Ricotta: Whole milk ricotta can be watery, so drain it in a fine-mesh sieve for 15-20 minutes before mixing. Sounds tedious, but it keeps your pie from turning into a soggy mess.
- Dock the Crust: Poke the rolled-out dough all over with a fork before adding the filling to stop air bubbles from forming. My grandmother swore by this, and her crusts were always perfectly flat.
- Use Cold Butter: Cut the unsalted butter into small cubes and keep it ice-cold until you mix it into the flour. This is the thing that matters most for a flaky, tender crust.
Troubleshooting This Dish
Filling Too Watery
If your pie has a runny center, you likely skipped draining the ricotta. For perfect texture, drain 2 lb whole milk ricotta in a cheesecloth-lined strainer over a bowl in the fridge for 12-24 hours. Even 4 hours of draining is better than none. 💡
Soggy Bottom Crust
Blind baking is non-negotiable. After rolling out your crust, dock it with a fork, line with parchment, and fill with pie weights. Bake at 375°F for 15 minutes until edges start to color. This creates a moisture barrier before adding the filling.
Cracked Top Crust
If your top crust develops cracks, it’s usually from overhandling the dough. Keep everything cold—use ice water and cold butter. If cracks appear, patch with extra dough and crimp the edges. A light egg wash before baking helps seal small cracks.
Filling Won’t Set
Underbaked filling often stems from pulling the pie too soon. Bake until the center reaches 175°F—it should still jiggle slightly. Then let it cool completely for 2 hours at room temperature. The residual heat finishes setting the custard. 🌡️
Dense Filling Texture
For that signature lightness, whip the 4 egg whites to stiff peaks before folding into the ricotta mixture. This incorporates air for a fluffier result. Be gentle when folding to maintain those air bubbles.
Overbrowning Crust
If your crust darkens too quickly, tent the pie with aluminum foil after 30 minutes of baking. Also, ensure your oven is properly calibrated—a 350°F setting should maintain even heat throughout the baking process.
Nutrition Facts
Frequently Asked Questions
Why drain ricotta overnight?
Draining removes excess moisture for a firmer, creamier filling. Skip this and you risk a watery pie. 12-24 hours in cheesecloth over a bowl works best.
Can I make this crust ahead?
The dough keeps in the fridge for 2 days or freezes for 1 month. Let it warm slightly before rolling to prevent cracking.
What if my crust browns too fast?
Tent with foil after 30 minutes at 350°F. Check oven calibration if browning is uneven.

- 6 Egg Cake Recipe with Oil: Light as Air With Buttery Moisture - October 4, 2026
- 4 Bean Casserole Recipe: One-Pan Heartiness With Smoky Paprika Depth - October 4, 2026
- 3-Ingredient Keto Mug Cake Recipe: Microwave Magic in 2 Minutes - October 4, 2026