
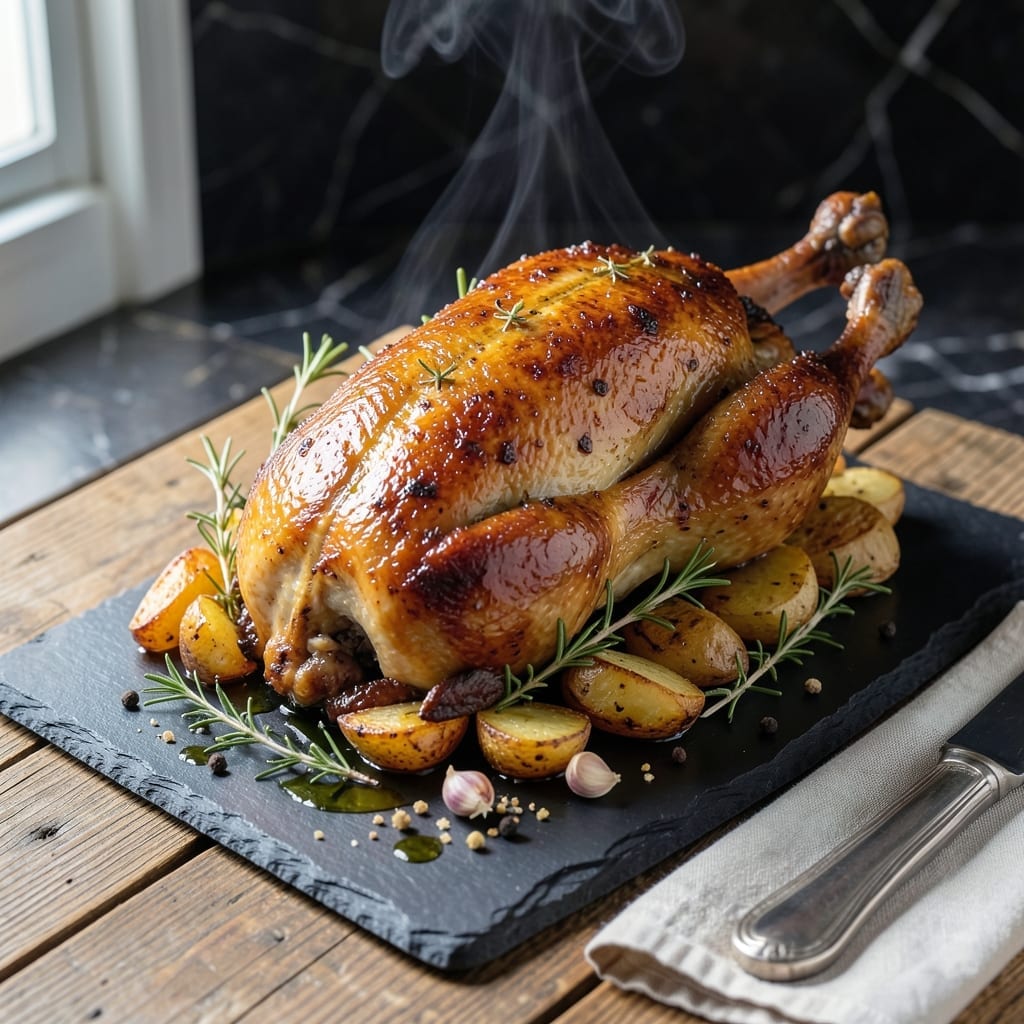
Achieving crispy duck skin with tender meat requires precision and patience. This method delivers both with a simple dry-brine technique and careful roasting.
I developed this approach after years of trial and error, learning that scoring the skin and rendering the fat gradually creates the perfect texture. The result is meat that falls off the bone with a golden, shatteringly crispy exterior.
Roasting at high heat ensures even browning while keeping the inside juicy. The fat rendered during cooking can be saved for potatoes or other dishes.
This dish transforms a special occasion into an unforgettable meal. The rich flavor and perfect texture make every bite memorable.
Ingredients for Roast Duck
Quality ingredients ensure the perfect balance of crispy skin and tender meat every time.
| Ingredient | Amount | Notes |
|---|---|---|
| Whole Duck 🦆 | 5 lb | Pekin or Long Island variety |
| Kosher Salt 🧂 | 2 tbsp | Diamond Crystal preferred for dry-brine |
| Black Peppercorns 🌶️ | 1 tsp | Freshly cracked for best flavor |
| Fresh Thyme Sprigs 🌿 | 4 whole | Leaves stripped from stems |
| Fresh Rosemary Sprigs 🌿 | 2 whole | Leaves stripped from stems |
| Garlic Cloves 🧄 | 6 cloves | Smashed, unpeeled for cavity |
| Yellow Onion 🧅 | 1 whole | Quartered for cavity aromatics |
| Lemon 🍋 | 1 whole | Halved for cavity acidity |
| Apple Cider Vinegar 💧 | 1 tbsp | For skin crisping enhancement |
| Unsalted Butter 🧈 | 2 tbsp | Optional for additional basting richness |
| Honey 🍯 | 1 tbsp | For final glaze (optional) |
| Fresh Bay Leaves 🍃 | 2 whole | For cavity aromatics |
The duck is the foundation—Pekin or Long Island varieties offer the ideal fat-to-meat ratio for crisp skin and juicy flesh. Source from a reputable butcher or specialty grocer like Whole Foods for consistent quality. Look for birds with smooth, unblemished skin and a layer of fat beneath. Avoid pre-brined ducks, as this disrupts the dry-brine process. Fresh thyme and rosemary should be vibrant green with no wilting.
No fresh herbs? Dried thyme and rosemary at one-third the amount work, though fresh delivers superior aromatic complexity. For the cavity, celery or carrot chunks can replace onion if preferred. The apple cider vinegar enhances crisping—white vinegar or lemon juice are acceptable substitutes. Butter can be omitted for a lighter result, but it adds depth to the basting liquid.
Store the duck uncovered in the refrigerator for up to 2 days during the dry-brine process. Fresh herbs keep 1 week wrapped in damp paper towels. Rendered duck fat can be strained and stored in the fridge for 3 months—perfect for roasting potatoes or sautéing greens.
Why You’ll Love This Recipe
- Minimal Effort: I just season the duck with salt, pepper, thyme, and rosemary, then let the oven do the work.
- Crispy Perfection: The skin turns golden and crackling while the herbs infuse every bite with rich, earthy flavor.
- Sunday Showstopper: It’s my go-to for impressing guests without slaving in the kitchen all day.
- Next-Day Magic: Leftovers make the best sandwiches or fried rice—honestly, sometimes better than the first meal.
Step-by-Step Instructions for Roast Duck
This method guarantees perfectly crispy skin and rich, flavorful meat with every bite.
Step 1: Dry-Brine and Season the Duck
Pat the 5 lb whole duck completely dry inside and out with paper towels. This step is crucial for achieving crispy skin, as moisture is the enemy of proper browning. I always take extra time to dry the cavity thoroughly.
Rub the duck all over with the 2 tbsp kosher salt, including inside the cavity. Add the 1 tsp black peppercorns, freshly cracked, to the exterior. Place the duck uncovered on a wire rack set over a baking sheet and refrigerate for 12-24 hours to allow the salt to penetrate and dry the skin.
Step 2: Prepare Aromatics and Begin Roasting
Preheat your oven to 300°F. Remove the duck from the refrigerator and let it sit at room temperature for 30 minutes. Meanwhile, stuff the cavity with the 4 whole fresh thyme sprigs, 2 whole fresh rosemary sprigs, 6 cloves garlic cloves, 1 whole yellow onion (quartered), 1 whole lemon (halved), and 2 whole fresh bay leaves.
Place the duck breast-side up on a roasting rack in a pan. Prick the skin all over with a sharp knife, being careful not to pierce the meat. This allows fat to render out more efficiently. Roast for 2 hours at 300°F, flipping halfway through to ensure even cooking.
Step 3: Crisp the Skin and Glaze
Increase the oven temperature to 375°F. Flip the duck breast-side up and brush the skin with a mixture of the 1 tbsp apple cider vinegar and 2 tbsp unsalted butter. This enhances browning and adds richness to the skin.
Roast for another 45-60 minutes until the skin is deep golden brown and crispy. For the final touch, brush the skin with the 1 tbsp honey (optional) and return to the oven for 5-10 minutes to caramelize. The internal temperature should reach 165°F in the thickest part of the thigh.
Step 4: Rest and Serve
Transfer the duck to a cutting board and let it rest for 15-20 minutes before carving. This resting period allows the juices to redistribute, ensuring moist, tender meat. I always tent it loosely with foil to keep it warm.
Carve the duck by removing the legs and thighs first, then slicing the breast meat on the bias. Serve immediately with your favorite sides, making sure to drizzle some of the rendered fat over the meat for extra flavor. The skin should shatter when cut, revealing succulent meat beneath.
Pro Tips For Making Roast Duck
- Dry the Skin: Pat the duck completely dry with paper towels before seasoning—I learned this the hard way after my first two attempts came out soggy instead of crisp.
- Score the Fat: Use a sharp knife to score the duck skin in a crosshatch pattern, cutting just through the fat but not into the meat, to render the fat and crisp the skin.
- Rest Before Roasting: Let the seasoned duck sit uncovered in the fridge for at least 4 hours, or ideally overnight, so the skin dries out and the salt penetrates deeply.
- Start Hot, Finish Low: Roast at 425°F for the first 30 minutes to render fat and crisp the skin, then drop to 350°F to cook through without burning the herbs.
Essential Equipment for Perfect Results
Roasting Pan
A sturdy roasting pan with a rack is essential for even cooking and fat rendering. I recommend a heavy-gauge stainless steel pan like All-Clad for durability and even heat distribution. The rack elevates the duck, allowing air to circulate underneath. 💡
Sharp Knife
Use a chef’s knife or boning knife for scoring the skin and carving. A Wüsthof 8-inch works perfectly for clean cuts through both skin and meat. Dull knives crush the skin, ruining your crispy texture.
Instant-Read Thermometer
An instant-read thermometer is non-negotiable for perfect doneness. I use a ThermoWorks ThermaPen for its 3-second response time and accuracy. Check the thickest part of the thigh for 165°F.
Fat Separator
A fat separator helps collect the rendered duck fat while leaving juices behind. The OXO Good Grips model has a convenient spout for pouring. Save this liquid gold for roasting potatoes or cooking eggs.
Basting Brush
Use a silicone basting brush for applying vinegar-butter mixture and honey glaze. Silicone brushes withstand high heat better than natural bristles. Look for one with a long handle to protect your hands.
Wire Rack
During dry-brining, a wire rack over a baking sheet ensures air circulation. I prefer stainless steel racks for stability. This setup prevents the duck from sitting in its own juices, keeping the skin dry. 🔥
Nutrition Facts
Frequently Asked Questions
How do I get the skin extra crispy?
Pat the duck completely dry before seasoning and dry-brine it uncovered for 12-24 hours. Prick the skin all over and roast at 375°F for the final hour to render fat and crisp it up.
What if my duck is tough?
This usually means it was overcooked. Use a thermometer to pull it at 165°F in the thigh. Letting it rest for 15-20 minutes after cooking also keeps it juicy.
Can I use a frozen duck?
Thaw it completely in the fridge for 24-48 hours before dry-brining. Never roast from frozen—it cooks unevenly and ruins the texture.
What sides pair well with roasted duck?
Classic pairings include roasted potatoes (use the rendered fat!), braised red cabbage, or a simple green salad. The rich flavor also works with tart cherry sauce.

- 6 Egg Cake Recipe with Oil: Light as Air With Buttery Moisture - October 4, 2026
- 4 Bean Casserole Recipe: One-Pan Heartiness With Smoky Paprika Depth - October 4, 2026
- 3-Ingredient Keto Mug Cake Recipe: Microwave Magic in 2 Minutes - October 4, 2026