
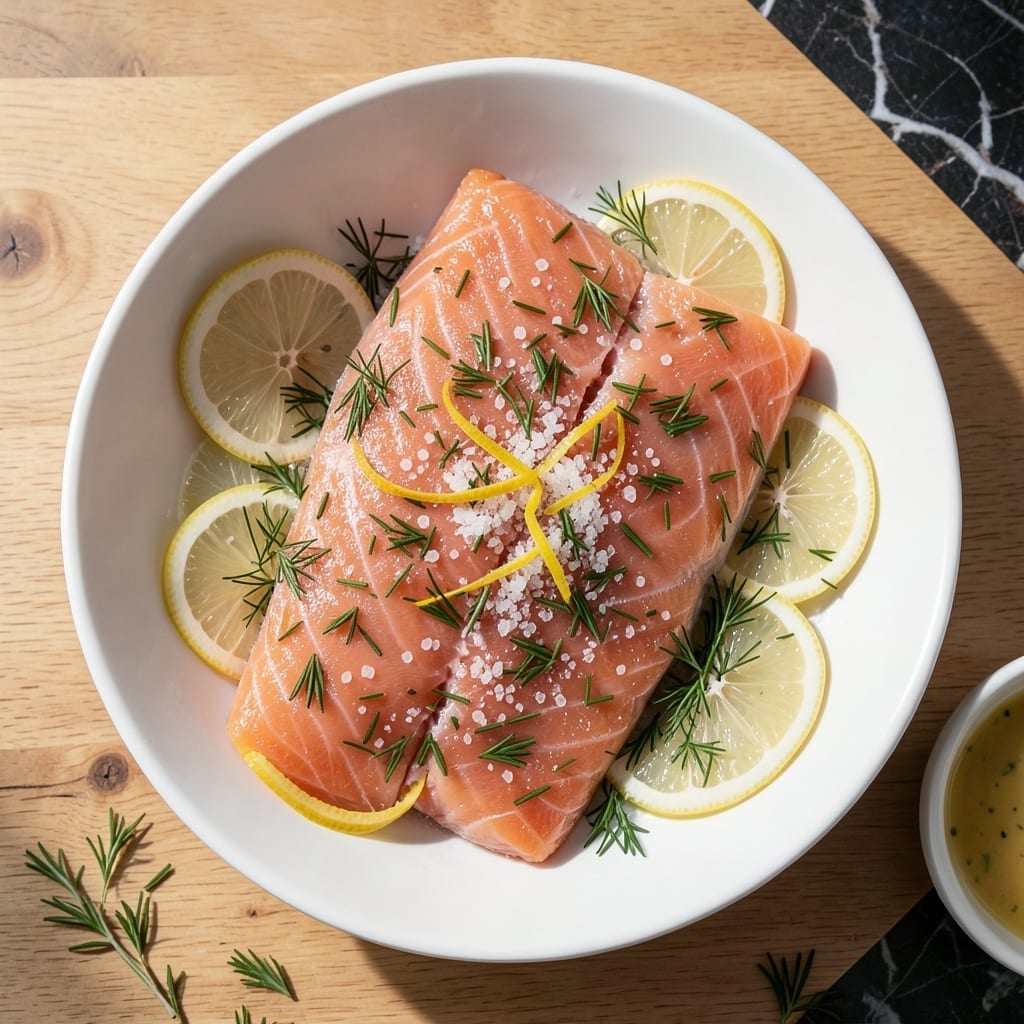
This Nordic-style gravlax transforms fresh salmon into a delicate, restaurant-quality dish with minimal effort. A simple cure of salt, sugar, and fresh dill draws out moisture while infusing flavor deep into the fish.
The process is straightforward: coat the salmon, let it cure for 48-72 hours, and slice thinly. The result is silky, lightly cured salmon with a bright citrus note and aromatic dill throughout.
Perfect for appetizers or brunch, this method requires no cooking—just patience. The cure preserves the salmon’s natural richness while adding subtle sweetness and herbaceous depth.
Serve on rye toast with mustard sauce or as part of a charcuterie board. The texture and flavor improve with each passing day in the fridge.
Ingredients for Salmon Cure
Center-cut salmon, a simple cure, and fresh herbs create this elegant Nordic dish.
| Ingredient | Amount | Notes |
|---|---|---|
| Fresh Salmon Fillet 🐟 | 1 ½ lb | Skin-on, center-cut, sushi-grade |
| Kosher Salt 🧂 | ½ cup | Diamond Crystal preferred for even curing |
| Granulated Sugar 🍚 | ¼ cup | White granulated for balance |
| Fresh Dill 🌿 | 1 cup | Loosely packed, stems removed |
| White Pepper 🌶️ | 1 tbsp | Freshly ground for subtle heat |
| Lemon Zest 🍋 | 2 tbsp | Finely grated, organic preferred |
| Lemon Juice 🍋 | 2 tbsp | Freshly squeezed for acidity |
| Vodka 🍸 | 2 tbsp | High-quality, neutral flavor |
| Honey 🍯 | 1 tbsp | Optional for slight sweetness |
| Orange Zest 🍊 | 1 tbsp | Finely grated for citrus depth |
| Freshly Ground Black Pepper 🌶️ | 1 tsp | For aromatic finish |
Salmon quality is paramount for gravlax. Sushi-grade, skin-on center-cut fillets from Whole Foods or a trusted fishmonger ensure optimal texture and safety. Look for vibrant color and a mild ocean scent—avoid anything with a fishy odor. The cure ratio balances Diamond Crystal kosher salt (lighter than table salt) with sugar; using the wrong type can over-salt the fish.
Short on fresh dill? Dried dill at one-third the amount works, though fresh delivers superior aroma. No vodka? Skip it—the citrus and sugar still create a proper cure. For a twist, substitute gin or aquavit for the vodka. Honey can be replaced with maple syrup for a vegan option, though the flavor profile will shift slightly.
The cured salmon keeps for 1 week in the fridge, tightly wrapped. For longer storage, freeze for up to 3 months—slice before freezing for easy portions. The texture firms up over time, but the flavor remains vibrant. Always use a glass or non-reactive container for curing to prevent metallic tastes.
Why You’ll Love This Recipe
- 5-Minute Prep: I just mix salt, sugar, dill, and white pepper, rub it on the salmon, and let time do the rest.
- Bright, Clean Taste: That sweet-salty crust with fresh dill makes every bite sing—no heavy sauces needed.
- Brunch Star: Honestly, it’s my go-to for bagels and cream cheese on lazy Sunday mornings.
- Stretches Far: One fillet cures into multiple meals—toss leftovers on salads or pasta all week.
Step-by-Step Instructions for Nordic-Style Salmon Cure
Follow this precise curing method for perfectly textured gravlax with balanced flavors and ideal moisture retention.
Step 1: Prepare the Salmon Fillet for Curing
Begin by examining the 1.5 lb fresh salmon fillet for any remaining pin bones. Run your fingers along the surface to detect them, then remove with fish pliers or tweezers. Leave the skin intact—it provides structural support during the curing process and makes slicing easier later.
Pat the fillet completely dry with paper towels. Any surface moisture will dilute the cure and create uneven texture. I recommend placing the fillet skin-side down on a large piece of plastic wrap, which will become your curing vessel. This preparation ensures the kosher salt and granulated sugar adhere properly to all surfaces.
Step 2: Create the Curing Mixture with Aromatics
In a bowl, combine the 0.5 cup kosher salt and 0.25 cup granulated sugar. The sugar counters the salt’s harshness while drawing out moisture at a controlled rate. Add the 1 tbsp white pepper, 1 tsp freshly ground black pepper, 2 tbsp lemon zest, 1 tbsp orange zest, and 1 cup fresh dill to the dry mix.
Pour in the 2 tbsp vodka, 2 tbsp lemon juice, and 1 tbsp honey. The vodka helps dissolve the sugar and salt for even distribution, while the citrus and honey create the signature Nordic balance of bright and subtle sweetness. Stir until the mixture resembles wet sand with visible herb flecks.
Step 3: Apply the Cure and Begin the Curing Process
Spread half of the curing mixture evenly over the flesh side of the salmon, pressing it into the surface with your hands. The mixture should adhere completely, with no bare spots. Flip the fillet and apply the remaining cure to the skin side, though you can use slightly less here as the skin acts as a natural barrier.
Wrap the fillet tightly in the plastic wrap, creating a snug package. Place it in a shallow dish—this will catch any liquid that accumulates during curing. Position a second dish or a weight on top to apply gentle, even pressure. This step ensures the cure penetrates uniformly and the fillet retains its shape.
Step 4: Cure and Flip for Even Texture
Refrigerate the salmon for 12 hours. After this initial period, you’ll notice liquid has begun to pool—a sign the cure is working. Carefully unwrap the fillet and pour off the accumulated liquid. Flip the fillet over and rewrap it tightly in fresh plastic wrap.
Return it to the refrigerator with the weight on top for another 12-24 hours, depending on your preferred texture. For a firmer, more traditional gravlax, extend to the full 24 hours. The fillet is fully cured when the flesh feels firm to the touch and has developed a slightly translucent appearance at the edges.
Step 5: Rinse and Prepare for Serving
Unwrap the salmon and gently rinse off the curing mixture under cold running water. Pat it dry with paper towels, then transfer to a cutting board. The surface should appear slightly dried but still glossy, with the dill and citrus zest visibly embedded in the flesh.
Using a sharp, thin-bladed knife, slice the gravlax against the grain into thin pieces, starting from the tail end. The ideal slice should be nearly translucent with a marbled pattern from the cure. Serve immediately or store wrapped in the refrigerator for up to 5 days, where the flavors will continue to develop.
Pro Tips For Making Salmon Cure
- Pat It Dry: Use paper towels to thoroughly dry the salmon fillet before applying the cure—any moisture left on the surface will dilute the salt and sugar, making the cure uneven.
- Use Equal Parts: Mix the kosher salt and granulated sugar in a 1:1 ratio by volume; this balance ensures proper curing without making the salmon too salty or too sweet.
- Skip the Skin: I learned this the hard way—leave the skin on during curing but score it lightly first, or the cure won’t penetrate evenly and you’ll end up with uneven texture.
- Wait 12 Hours: Give the salmon a full 12 hours in the fridge under the cure—rushing it even by a few hours leaves the center under-cured and the texture mushy.
Make-Ahead Tips for This Recipe
Pre-Cure Prep
I always start by prepping all my curing ingredients the night before. Measure out your 0.5 cup kosher salt, 0.25 cup granulated sugar, and aromatics, then store them in separate containers. This saves time and ensures you won’t forget anything during the actual curing process.
Partial Curing
If you’re short on time, you can begin the cure in the morning and finish in the evening. Apply the cure mixture as directed, but only refrigerate for 12 hours before flipping. The texture will be slightly softer, but still delicious. Just be sure to slice and serve within 24 hours for best results.
Storage Tips
Once fully cured, wrap the salmon tightly in plastic wrap and then in aluminum foil for extra protection. This double-layer approach prevents freezer burn and keeps the fish fresh for up to 1 week in the fridge or 3 months in the freezer. 💡
Slicing Ahead
For easy serving, slice the entire fillet into thin pieces before storing. Lay the slices between sheets of parchment paper in an airtight container. This way, you can grab just what you need without thawing the entire batch. The slices will keep their shape and texture beautifully.
Flavor Development
I’ve found that the flavor of gravlax deepens after a day or two in the fridge. If you’re making this for a special occasion, prepare it 2-3 days in advance. The dill and citrus notes become more pronounced, and the texture firms up perfectly for slicing.
Quick Thawing
To thaw frozen gravlax, transfer it to the fridge 12-24 hours before serving. For a faster method, submerge the sealed package in cold water, changing the water every 30 minutes until thawed. Never thaw at room temperature, as this can compromise texture and safety. ❄️
Nutrition Facts
Frequently Asked Questions
Can I use regular table salt instead of kosher?
No, table salt is much denser and will over-salt your fish. Stick with Diamond Crystal kosher salt for the proper cure ratio. If you must substitute, reduce the amount by 40% and mix well.
How thin should I slice the cured salmon?
For best texture and presentation, slice as thinly as possible—about 1/8 inch thick. Use a sharp knife and slice against the grain for smooth, even pieces. The thinner the slice, the more elegant the result.
What if my salmon isn’t sushi-grade?
Avoid using non-sushi-grade salmon for gravlax, as the curing process doesn’t eliminate all bacteria. For safety, always start with the freshest, highest-quality salmon you can find.
Can I reuse the curing liquid?
No, the liquid that accumulates during curing contains raw fish proteins and should be discarded. Always use fresh cure for each batch to prevent contamination and ensure consistent results.

- 6 Egg Cake Recipe with Oil: Light as Air With Buttery Moisture - October 4, 2026
- 4 Bean Casserole Recipe: One-Pan Heartiness With Smoky Paprika Depth - October 4, 2026
- 3-Ingredient Keto Mug Cake Recipe: Microwave Magic in 2 Minutes - October 4, 2026