
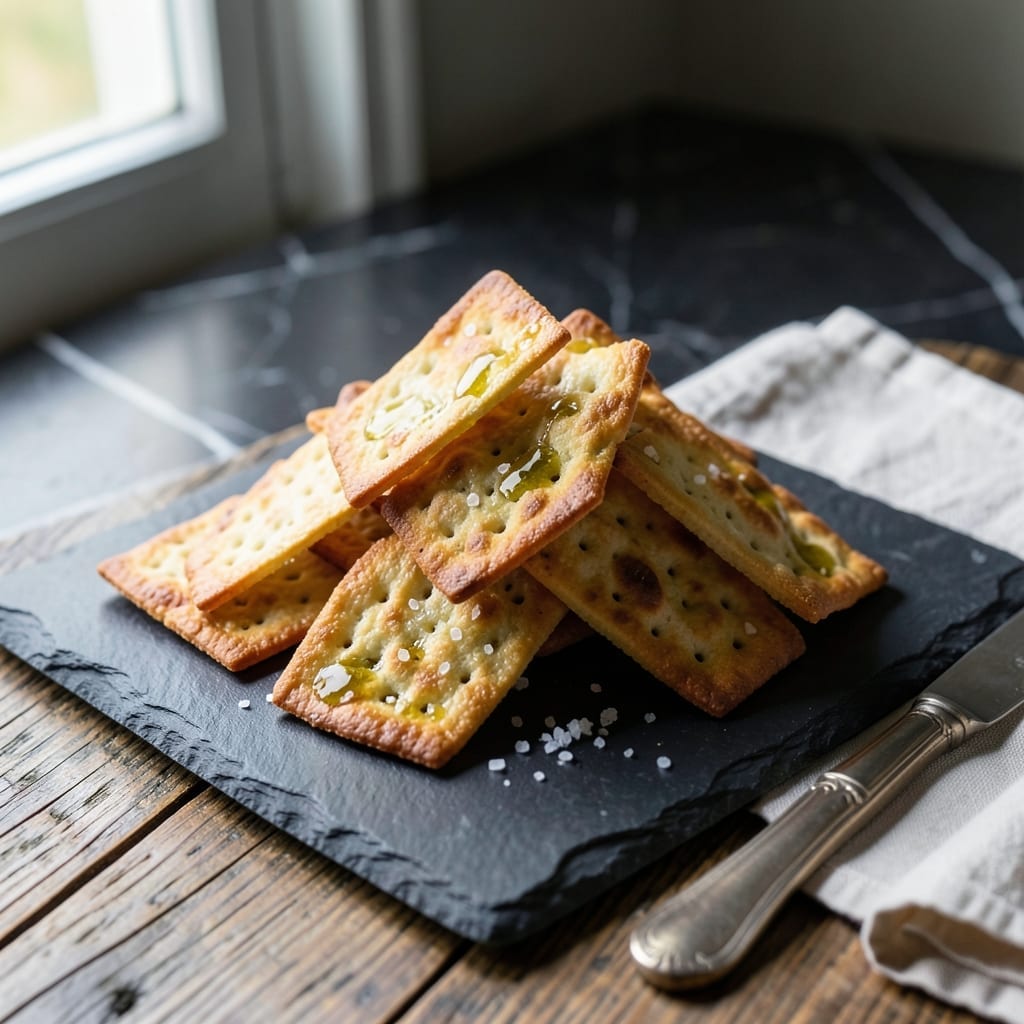
There’s something deeply satisfying about making crackers from scratch, especially when they turn out perfectly crisp and buttery. This method delivers homemade results that rival any store-bought version, with a light, flaky texture and rich flavor.
The dough comes together quickly with simple ingredients, then rolls out thin for maximum crunch. A brief bake transforms it into golden, buttery squares that shatter with every bite—just like the classic you know and love.
What you’ll get is a batch of crackers with the ideal balance of salt and richness, plus the pride of knowing you made them yourself. They’re perfect for snacking, soup toppers, or pairing with cheese.
No special equipment needed—just a rolling pin and a little patience for the best results.
Ingredients for Saltine
Seven simple ingredients transform into crisp, golden squares with that classic buttery shatter.
| Ingredient | Amount | Notes |
|---|---|---|
| All-Purpose Flour 🌾 | 2 cups | Plus extra for rolling surface |
| Unsalted Butter 🧈 | ½ cup | Cold, cut into small cubes |
| Fine Sea Salt 🧂 | 1 ½ tsp | Divided for dough and topping |
| Baking Powder 🧂 | ½ tsp | For slight lift without yeast |
| Ice Cold Water 💧 | ⅓ cup | About 5-6 tbsp total |
| Olive Oil 🫒 | 1 tbsp | For brushing before baking |
| Coarse Salt 🧂 | ½ tsp | For sprinkling on top |
The butter is everything here. Use European-style if you can find it—higher fat content means flakier layers. Land O’Lakes or Kerrygold are solid supermarket picks. Keep it ice cold, and don’t even think about softening it first (the cold bits create those perfect pockets of air). All-purpose flour works just fine, but White Lily gives them an extra-delicate crunch if you’re feeling fancy.
No all-purpose? Bread flour at half the amount mixed with cake flour gets you close—just don’t go full bread or they’ll be too chewy. Short on time? Food processor cuts the butter into flour in seconds (pulse until pea-sized). If you’re out of baking powder, baking soda plus cream of tartar in equal parts works, but the flavor’s a touch different.
Dough keeps in the fridge for 2 days—just let it warm slightly before rolling. Baked crackers stay crisp in an airtight container for about 1 week (if they last that long). Freeze the dough for 3 months if you want to make a double batch.
Why You’ll Love This Recipe
- 5-Ingredient Magic: I love that it only takes flour, butter, salt, baking powder, and water—no fancy ingredients.
- Buttery Crunch: The rich unsalted butter and fine sea salt make them irresistibly crispy and flavorful.
- Snack or Side: They’re just as good with soup as they are straight from the oven for a quick snack.
- Budget Stretch: A batch costs pennies and uses pantry staples I always have on hand.
Step-by-Step Instructions for Homemade Saltines
This method delivers crisp, flaky crackers with that signature buttery crunch you know and love.
Step 1: Combine Dry Ingredients and Cold Butter
In a food processor, pulse the 2 cups All-Purpose Flour, 1.5 tsp Fine Sea Salt, and 0.5 tsp Baking Powder until combined. The baking powder creates tiny air pockets that give these crackers their light, crisp texture without yeast.
Add the 0.5 cup Unsalted Butter (cold and cubed) and pulse in 1-second bursts until the mixture resembles coarse crumbs with pea-sized butter pieces. This is the foundation of your flaky layers. Don’t over-process—you want visible butter flecks for that perfect texture.
Step 2: Form the Dough and Chill
With the processor running, slowly drizzle in the 0.33 cup Ice Cold Water through the feed tube. The dough will come together in 20-30 seconds into a shaggy ball. If it’s too dry, add water 1 teaspoon at a time until it just holds together.
Turn the dough onto a lightly floured surface and knead gently 3-4 times just until smooth. I’ve found that overworking the dough makes the crackers tough rather than tender. Wrap the dough in plastic and refrigerate for 30 minutes—this chilling step relaxes the gluten and makes rolling easier.
Step 3: Roll and Cut the Dough
Preheat your oven to 375°F. On a floured surface, roll the chilled dough into a rectangle about ⅛-inch thick. Use a rolling pin and roll from the center outward in all directions, turning the dough 90 degrees every few rolls to maintain even thickness.
Trim the edges to create a clean rectangle, then use a pizza cutter or sharp knife to cut into 1.5-inch squares. Transfer the squares to a parchment-lined baking sheet, spacing them ½-inch apart. They won’t spread much, but this gives them room to crisp up evenly.
Step 4: Dock, Brush, and Season
Using a fork, dock each square 2-3 times to prevent air pockets from forming during baking. This classic technique ensures your crackers stay perfectly flat with that signature saltine appearance.
Lightly brush the tops with 1 tbsp Olive Oil—this gives them that beautiful golden sheen. Then sprinkle evenly with the remaining fine sea salt and all of the 0.5 tsp Coarse Salt. The combination of fine and coarse salt creates that perfect salty bite in every cracker.
Step 5: Bake to Golden Perfection
Bake on the middle rack for 12-15 minutes until the edges are just beginning to turn light golden brown. Rotate the pan halfway through for even browning—your oven likely has hot spots that could cause uneven baking.
The crackers should be crisp and dry to the touch when done. Let them cool completely on the baking sheet—they’ll continue to crisp up as they cool. Store in an airtight container for up to 1 week, though I doubt they’ll last that long!
Pro Tips For Making Saltine
- Chill the Dough: After mixing, refrigerate the dough for at least 30 minutes—I learned this the hard way when my first batch spread into a single, sad sheet.
- Roll It Thin: Use a rolling pin to get the dough paper-thin, about 1/16 inch. Any thicker and you’ll end up with crackers that are more like biscuits.
- Prick the Surface: Dock the dough with a fork before baking to prevent puffy crackers. My grandmother swore by this, and she was right.
- Use Cold Butter: Cut the unsalted butter into small cubes and keep it ice-cold. Sounds weird, but it works: flaky layers instead of greasy blobs.
Storing and Reheating This saltine
Room Temperature Storage
Once completely cooled, transfer your crackers to an airtight container or zip-top bag. They’ll stay crisp at room temperature for up to 1 week. I use a glass jar with a tight lid to keep them fresh and visible on my counter. 💪
Refrigerator Storage
For longer freshness, store in the fridge for up to 2 weeks. Place crackers in a sealed container with a silica gel packet to absorb any moisture. Let them sit at room temperature for 10 minutes before serving to restore full crispness.
Freezing the Dough
Wrap the chilled dough tightly in plastic wrap and place in a freezer bag. It keeps well for 3 months. Thaw overnight in the fridge before rolling and baking as usual. This is perfect for making fresh batches on demand.
Freezing Baked Crackers
Baked crackers can be frozen for up to 1 month. Layer them between parchment paper in an airtight container to prevent breaking. Reheat directly from frozen in a 300°F oven for 5 minutes to revive crispness.
Reheating Tips
If your crackers lose their crunch, pop them in a 350°F oven for 3-5 minutes. Spread them in a single layer on a baking sheet. This works wonders for reviving day-old crackers. ❄️
Avoid Moisture
Never store crackers in a humid environment. Even a little moisture turns them soggy. If your kitchen is humid, add an extra silica packet or a small piece of bread to the container to absorb excess moisture.
Nutrition Facts
Frequently Asked Questions
Why do I need to use cold butter?
Cold butter creates flaky layers in the dough. As it melts during baking, it releases steam that separates the layers, giving you that classic crisp texture. Warm butter would make the crackers dense instead.
Can I make these without a food processor?
Use a pastry cutter or two forks to cut the cold butter into the flour until pea-sized crumbs form. It takes about 5 minutes of elbow grease but works just as well.
What if my crackers aren’t crispy?
They likely need more baking time or weren’t rolled thin enough. Try baking for an extra 2-3 minutes or rolling the dough to 1/16-inch thickness next time. Cool completely on the pan.
How thin should I roll the dough?
Aim for ⅛-inch thickness for perfect crispness. Use a ruler to check if needed. Any thicker and they won’t get that classic snap.

- 6 Egg Cake Recipe with Oil: Light as Air With Buttery Moisture - October 4, 2026
- 4 Bean Casserole Recipe: One-Pan Heartiness With Smoky Paprika Depth - October 4, 2026
- 3-Ingredient Keto Mug Cake Recipe: Microwave Magic in 2 Minutes - October 4, 2026