
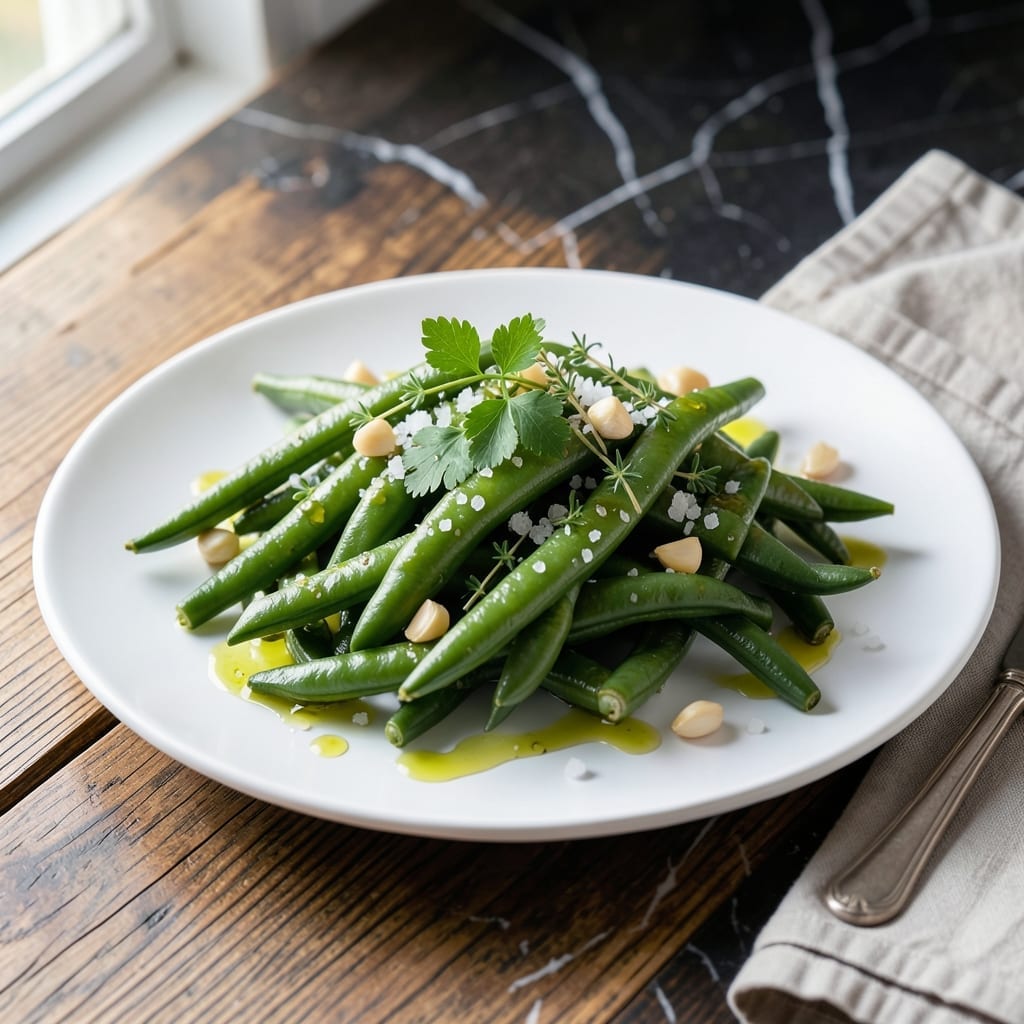
This seasoned green beans recipe delivers crisp-tender perfection with minimal effort. The simple combination of garlic and herbs transforms fresh beans into a side dish that complements any meal.
I developed this method to preserve the beans’ natural texture while adding layers of flavor. A quick sauté in olive oil brings out their sweetness, while garlic and herbs create an aromatic finish.
You’ll achieve tender yet firm beans with a glossy, flavorful coating. The recipe works with fresh or frozen green beans, making it versatile for any season.
Ready in under 15 minutes, this dish proves that simple ingredients can create extraordinary results. The technique ensures consistent quality every time.
Ingredients for Seasoned Green Beans
Eleven ingredients create this vibrant, crisp-tender side dish with bold garlic-herb flavor.
| Ingredient | Amount | Notes |
|---|---|---|
| Fresh Green Beans 🌱 | 1 ½ lb | Trimmed, ends removed |
| Extra-Virgin Olive Oil 🫒 | 3 tbsp | Divided for cooking and finishing |
| Garlic Cloves 🧄 | 4 cloves | Minced finely for even distribution |
| Fresh Parsley 🌿 | ¼ cup | Chopped, for garnish and flavor |
| Fresh Thyme Sprigs 🌿 | 4 sprigs | Leaves stripped from stems |
| Sea Salt 🧂 | ¾ tsp | Fine grain, or to taste |
| Freshly Ground Black Pepper 🌶️ | ½ tsp | Adjust to preference |
| Lemon Zest 🍋 | 1 tsp | From one medium lemon |
| Red Pepper Flakes 🔥 | ¼ tsp | Optional, for subtle heat |
| Shallot 🧅 | 1 whole | Finely diced for sweetness |
| Vegetable Broth 🥫 | ¼ cup | Low-sodium for controlled seasoning |
The green beans are the foundation—choose firm, bright green pods with no wilting. Whole Foods or a local farmers market will have the freshest selection, but most supermarkets work fine. The thyme and parsley should be vibrant and aromatic; if they smell like nothing, they’ll taste like nothing. For the olive oil, spring for high-quality extra-virgin—it’s doing heavy lifting here.
Short on fresh herbs? Dried thyme at one-third the amount works in a pinch, but fresh is ideal. No shallots? Substitute with half a small red onion for similar sweetness. For a nutty twist, toast sliced almonds and sprinkle on top before serving. The vegetable broth can be swapped with water, but the broth adds depth.
This keeps well in the fridge for 3-4 days, though it’s best served fresh. Store leftovers in an airtight container. To reheat, warm gently in a skillet with a splash of water or broth. Freezing isn’t recommended—green beans turn mushy when thawed.
Why You’ll Love This Recipe
- One Pan Wonder: I toss the green beans with olive oil, garlic, and herbs, then roast—no fancy techniques, just big flavor with minimal cleanup.
- Garlic Herb Magic: That first bite with crisp-tender beans coated in fragrant garlic, parsley, and thyme? Ridiculously good.
- Pairs With Anything: Honestly, it works next to roast chicken, steak, or even as a snack straight from the pan.
- Budget-Friendly Side: A pound of fresh green beans and a few pantry staples stretch into a dish that feels special without the cost.
Step-by-Step Instructions for Seasoned Green Beans
Here’s the method. Straightforward, tested, works every time.
Step 1: Blanch the Green Beans for Vibrant Color
Bring a large pot of salted water to a rolling boil. Add the 1.5 lb Fresh Green Beans and cook for 2-3 minutes until bright green and just tender. This blanching step preserves their color and begins the cooking process without over-softening.
Drain immediately and transfer to an ice bath to stop the cooking. Once cool, drain again and pat dry. This shock treatment locks in the vibrant color and ensures the beans retain a slight crispness. I always use this method for professional-quality results.
Step 2: Sauté Aromatics Until Fragrant
Heat 2 tbsp Extra-Virgin Olive Oil in a large skillet over medium heat. Add the finely diced Shallot and cook for 2-3 minutes until translucent and sweet-smelling. Then add the 4 cloves minced Garlic Cloves and cook for 30 seconds until fragrant.
Add the stripped leaves from 4 sprigs Fresh Thyme Sprigs and the 0.25 tsp Red Pepper Flakes to the skillet. Stir constantly to prevent the garlic from burning—this builds a flavorful foundation for the dish. The aromas should be intoxicating at this stage.
Step 3: Combine and Season to Perfection
Add the blanched Fresh Green Beans to the skillet, tossing to coat them in the aromatic oil. Pour in the 0.25 cup Vegetable Broth and let it simmer for 2-3 minutes until the liquid has mostly evaporated.
Season with 0.75 tsp Sea Salt and 0.5 tsp Freshly Ground Black Pepper. Toss well to distribute the seasoning evenly. The green beans should be tender-crisp and coated with the flavorful oil and herbs.
Step 4: Finish with Fresh Herbs and Lemon
Remove the skillet from heat. Drizzle the remaining 1 tbsp Extra-Virgin Olive Oil over the green beans. Add the 0.25 cup chopped Fresh Parsley and 1 tsp Lemon Zest, tossing gently to combine.
The parsley adds a fresh, bright note, while the lemon zest provides a subtle citrus aroma that enhances the overall flavor. Taste and adjust seasoning if needed. The beans should have a glossy finish and a perfect balance of flavors.
Pro Tips For Making Seasoned Green Beans
- Blanch First: Toss the green beans in boiling salted water for 2-3 minutes before sautéing—they’ll stay crisp and pick up the garlic and herbs better. I learned this the hard way after serving sad, limp beans to dinner guests.
- Slice Garlic Thin: Mince the garlic cloves paper-thin so they melt into the olive oil without burning. Sounds fussy, but it makes a real difference in flavor distribution.
- Skip the Crowding: Don’t dump all the beans in the pan at once—cook in batches if needed. Steaming them in a crowded pan turns them dull and soggy, and nobody wants that.
- Use the Stems: If the thyme sprigs are fresh, strip the leaves but toss the stems in whole—they’ll infuse the oil as they cook. Waste not, want not, as my grandmother swore by.
Troubleshooting This Dish
Mushy Beans Problem
If your green beans turn out mushy, you likely over-cooked them during the blanching step. Stick to exactly 2-3 minutes in boiling water, then immediately shock in ice water. This preserves their crisp-tender texture perfectly. 💡
Bitter Flavor Issues
Bitterness often comes from under-cooked shallots or garlic. Sauté them until fully translucent (about 2-3 minutes) before adding garlic. The natural sweetness should balance any bitterness in the beans themselves.
Soggy Herbs
Fresh herbs like parsley and thyme lose their vibrancy if added too early. Always stir them in at the very end, off heat. This maintains their bright color and fresh flavor while preventing wilting.
Uneven Seasoning
To avoid bland bites, toss the beans thoroughly after adding salt and pepper. I use a tongs technique to ensure every pod gets coated. Taste test a bean from different areas of the pan before serving.
Burnt Garlic
Garlic burns easily over medium heat. Keep it moving constantly and remove from heat immediately if it starts browning. Burnt garlic creates a harsh, acrid flavor that ruins the dish.
Dry Beans Solution
If your beans seem dry, add an extra 1-2 tbsp of vegetable broth during the final sauté. The liquid will create steam to rehydrate without making them mushy. Finish with a drizzle of olive oil for gloss. ✨
Nutrition Facts
Frequently Asked Questions
Can I use frozen green beans instead?
Yes, but skip the blanching step. Thaw and pat them completely dry first to prevent a watery result.
How do I make them extra crispy?
After blanching, spread on a baking sheet and roast at 425°F for 10-12 minutes before adding to the skillet. This intensifies the texture.
Can I prep this ahead of time?
Blanch and shock the beans up to 1 day ahead. Store in the fridge, then reheat in the skillet with aromatics when ready to serve.
What if I don’t have shallots?
Substitute with 1/4 cup finely diced red onion. Cook slightly longer until softened for similar sweetness.

- 6 Egg Cake Recipe with Oil: Light as Air With Buttery Moisture - October 4, 2026
- 4 Bean Casserole Recipe: One-Pan Heartiness With Smoky Paprika Depth - October 4, 2026
- 3-Ingredient Keto Mug Cake Recipe: Microwave Magic in 2 Minutes - October 4, 2026