
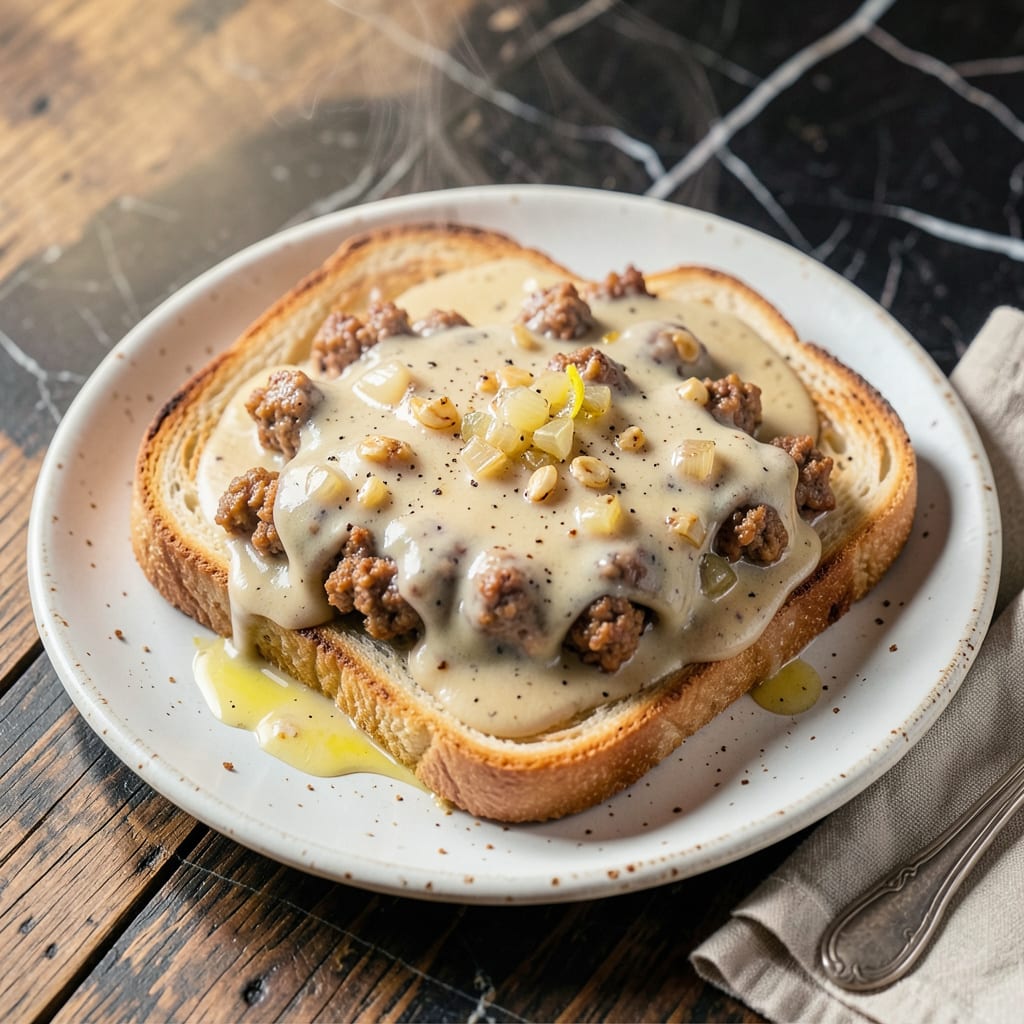
This classic comfort dish traces its origins to military mess halls, where resourceful cooks transformed simple ingredients into something deeply satisfying. The name might raise eyebrows, but the combination of creamy, peppery sausage gravy over crisp buttered toast has stood the test of time for good reason.
The secret lies in a proper roux-based gravy—smooth, rich, and perfectly seasoned—poured generously over golden toast. While traditionally made with chipped beef, modern versions often use ground sausage for added flavor. This recipe delivers that nostalgic, hearty breakfast experience in under 30 minutes with minimal effort.
Ingredients for Shit on a Shingle
This nostalgic breakfast requires pantry staples and fresh sausage for its signature creamy gravy over crisp toast.
| Ingredient | Amount | Notes |
|---|---|---|
| Breakfast sausage 🥓 | 1 lb | Mild or spicy, removed from casings |
| All-purpose flour 🌾 | ⅓ cup | For roux thickening |
| Whole milk 🥛 | 2 ½ cups | Full-fat for creaminess |
| Unsalted butter 🧈 | 4 tbsp | Divided for gravy and toast |
| Yellow onion 🧅 | ½ whole | Finely diced for flavor base |
| Garlic cloves 🧄 | 2 cloves | Minced for aromatic depth |
| Diamond Crystal kosher salt 🧂 | 1 ½ tsp | Adjust to taste preference |
| Freshly ground black pepper 🌶️ | 1 tsp | Coarse grind preferred |
| Worcestershire sauce 💧 | 1 tsp | Lea & Perrins recommended |
| Dried rubbed sage 🌿 | ½ tsp | Ground sage works too |
| White sandwich bread 🍞 | 8 slices | Texas toast preferred |
| Cayenne pepper 🔥 | ¼ tsp | Optional for heat |
[recipeingredientscaler]
The sausage selection determines flavor profile. Jimmy Dean or Jones Dairy Farm breakfast sausage provides optimal fat-to-meat ratio for gravy richness. For the roux, King Arthur Flour yields consistent thickening without lumps. Whole milk is non-negotiable—2% or skim produces watery results. The butter should be European-style (like Plugrá) for superior mouthfeel in both gravy and toast application.
Dietary modifications require careful adjustments. For gluten-free versions, rice flour at 1:1 ratio replaces all-purpose flour. Dairy-free adaptations use unsweetened almond milk with 1 tbsp nutritional yeast for depth. Vegetarian options substitute Beyond Meat crumbles for sausage, though texture varies. The Worcestershire sauce can be omitted, but 1 tsp soy sauce maintains umami balance. Sage may be replaced with 1 tsp poultry seasoning if unavailable.
Gravy maintains quality refrigerated in airtight containers for 3 days. Reheat gently with 2 tbsp milk to restore creaminess. Toast is best served immediately but may be kept warm in 200°F oven for 15 minutes. For make-ahead convenience, prepare gravy completely (without toast) and refrigerate. The flour-sausage mixture benefits from overnight resting to develop flavors before milk addition.
Why You’ll Love This Recipe
- One-Pan Magic: I love that this comes together in a single skillet—brown the sausage, sauté the onions, then whisk in the flour and milk right there. No extra bowls, no fuss, just a spatula and 20 minutes between you and a hot meal.
- That Creamy-Savory Kick: The combo of crispy breakfast sausage and the velvety gravy (thanks to whole milk and a touch of butter) hits just right. Honestly, the way the caramelized onions melt into the sauce? I’d eat this with a spoon.
- Breakfast-for-Dinner Hero: This is my go-to when I need to feed a crowd fast—brunch with friends, lazy Sundays, or even a quick weeknight dinner. Serve it over toast, biscuits, or even hash browns, and everyone’s happy.
- Budget Stretch: A pound of sausage, pantry staples, and maybe $5 total? It’s my secret for feeding four (with leftovers) without breaking the bank. Between us, the gravy thickens up even better the next day—if it lasts that long.
Step-by-Step Instructions for Creamy Sausage Gravy Over Buttery Toast
Master the technique for velvety gravy and perfectly toasted bread with this foolproof method.
Step 1: Brown the Breakfast Sausage and Build Flavor Base
Remove the breakfast sausage from its casings and crumble it into a large skillet over medium heat. Cook for 8-10 minutes, breaking it apart with a wooden spoon, until the meat develops a deep golden-brown color and crispy edges. The sausage should be fully cooked through with no pink remaining.
Once browned, transfer the sausage to a paper towel-lined plate using a slotted spoon, leaving the rendered fat in the skillet. This fat serves as the flavor foundation for your roux. Add the finely diced yellow onion to the skillet and sauté for 4-5 minutes until translucent and softened.
Stir in the minced garlic cloves and cook for an additional 30 seconds until fragrant. Be careful not to let the garlic brown, as it can become bitter. The combination of sausage fat, onions, and garlic creates a rich aromatic base that will infuse your gravy with depth.
Step 2: Create the Roux and Develop the Creamy Gravy
Add the 0.33 cup all-purpose flour to the skillet with the onion mixture, stirring constantly to form a roux. Cook over medium heat for 2-3 minutes until the mixture turns a light golden color. This step removes the raw flour taste and builds the thickening power for your gravy.
Gradually whisk in the 2.5 cups whole milk, starting with small additions to prevent lumps from forming. Once incorporated, add the remaining milk in a steady stream while whisking continuously. Stir in the 1.5 tsp Diamond Crystal kosher salt, 1 tsp freshly ground black pepper, 1 tsp Worcestershire sauce, 0.5 tsp dried rubbed sage, and 0.25 tsp cayenne pepper.
Return the cooked sausage to the skillet and reduce the heat to medium-low. Simmer the gravy for 8-10 minutes, stirring frequently, until it reaches your desired consistency. The gravy should coat the back of a spoon and have a velvety texture. If it becomes too thick, thin it with additional milk, 1 tablespoon at a time.
Step 3: Prepare the Buttery Toast for Serving
While the gravy simmers, toast the 8 slices white sandwich bread to your preferred level of browning. For best results, use a toaster set to medium-high or toast in a 350°F oven for 3-4 minutes per side until golden brown and crisp.
Immediately after toasting, spread each slice with the remaining unsalted butter while still warm. The butter should melt slightly into the toast, creating a rich, flavorful base for the gravy. Arrange the toasted slices on a serving platter or individual plates.
Step 4: Assemble and Serve Immediately
Taste the gravy and adjust the seasoning if needed, adding more salt or pepper to suit your preference. The gravy should have a balanced flavor with a slight peppery kick from the black pepper and a subtle warmth from the cayenne.
Ladle the creamy sausage gravy generously over the buttered toast, ensuring each slice is completely covered. For optimal texture contrast, serve immediately while the gravy is still hot and the toast remains crisp. The gravy should be thick enough to cling to the toast without making it soggy.
Garnish with an additional sprinkle of freshly ground black pepper if desired. This dish is best enjoyed fresh, as the contrast between the creamy gravy and crisp toast is most pronounced when served immediately after preparation.
Make-Ahead Tips for This Dish
Overnight Gravy Prep
You can prepare the entire gravy base (through the roux stage) the night before. After browning the sausage and making the roux, let it cool completely, then transfer to an airtight container and refrigerate. The next morning, simply reheat the mixture over medium-low heat, then whisk in the milk and seasonings as directed. This actually improves the flavor as the spices meld overnight. 💡
Toast Storage Hack
If you need to prep toast ahead, bake your bread slices at 300°F for 8-10 minutes until lightly toasted but not fully crisp. Store in a ziplock bag at room temperature. When ready to serve, finish toasting in a 350°F oven for 2-3 minutes to revive crispness, then butter immediately. This prevents that sad, soggy toast scenario we all dread.
Gravy Reheating Trick
When reheating refrigerated gravy, use a double boiler method to prevent scorching. Place the gravy in a heatproof bowl over 1 inch of simmering water, stirring occasionally until warmed through. Add 2-3 tbsp milk to restore creaminess. I’ve found this gentler approach maintains that velvety texture better than direct heat.
Freezer-Friendly Option
The fully prepared gravy freezes beautifully for up to 2 months. Portion into 1-cup containers for easy thawing. When ready to use, defrost overnight in the fridge, then reheat gently with ¼ cup milk per portion. The toast is always best fresh, but having the gravy ready makes weekday breakfasts feel like a luxury.
Make-Ahead Assembly
For stress-free mornings, prepare everything except toasting. Store the chilled gravy and untoasted bread separately. In the morning, reheat the gravy while toasting the bread. This 15-minute assembly gives you that just-made taste without the early morning rush. I do this every Sunday for our busy weekday breakfasts.
Seasoning Boost
If prepping ahead, hold back ½ tsp of the sage and cayenne until reheating. These spices lose potency over time, so adding them fresh during reheating keeps the flavors vibrant. A final sprinkle of freshly ground black pepper just before serving makes all the difference in that first bite. ✨
Nutrition Facts

- 6 Egg Cake Recipe with Oil: Light as Air With Buttery Moisture - October 4, 2026
- 4 Bean Casserole Recipe: One-Pan Heartiness With Smoky Paprika Depth - October 4, 2026
- 3-Ingredient Keto Mug Cake Recipe: Microwave Magic in 2 Minutes - October 4, 2026