
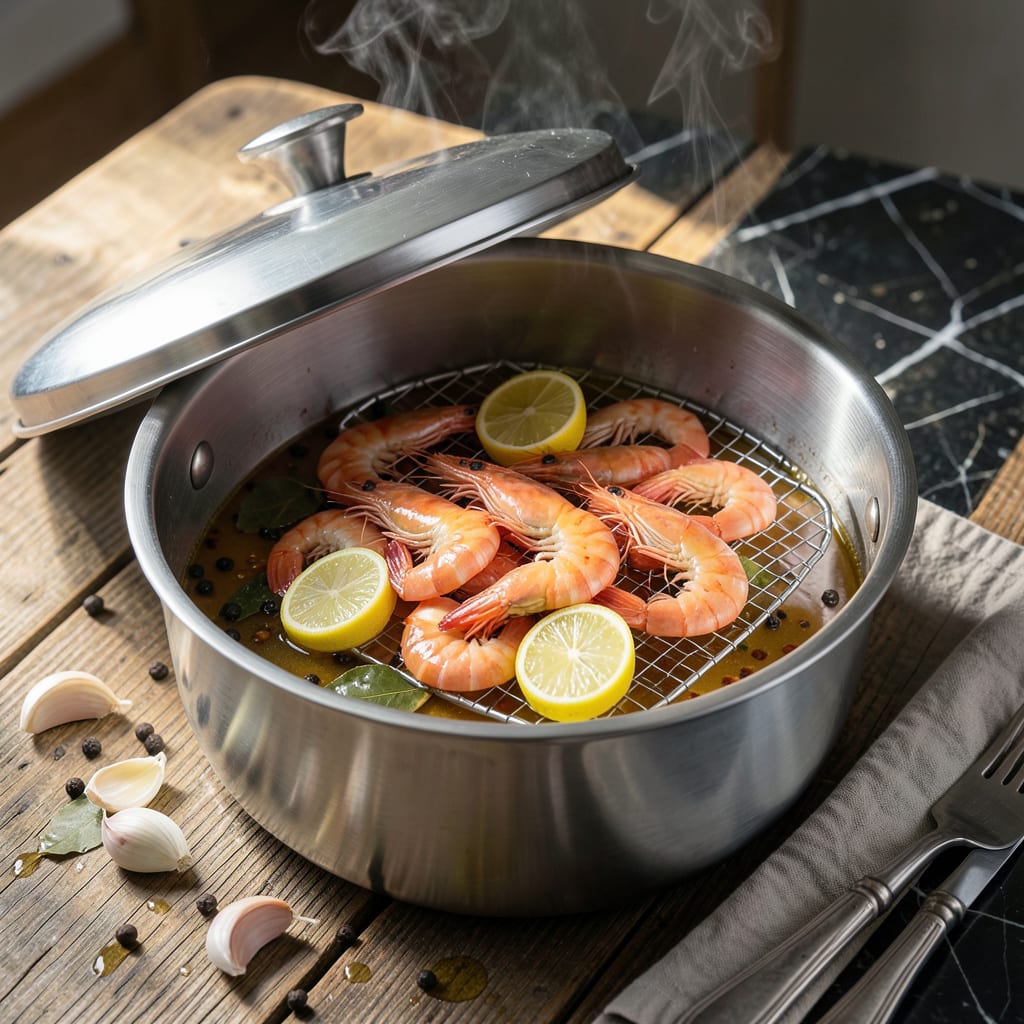
This one-pot method delivers perfectly cooked shrimp every time. The steamer pot locks in fresh, briny flavor while keeping the texture tender and juicy.
With minimal effort and 20 minutes, you’ll have a coastal feast. The beauty lies in its simplicity—just shrimp, water, and seasoning create a restaurant-quality result.
Ingredients for Shrimp Steamer Pot
Fresh shrimp, bold seasoning, and a steamer pot unlock coastal flavors with minimal effort.
| Ingredient | Amount | Notes |
|---|---|---|
| Large Shrimp 🦐 | 2 lb | Peeled, deveined, tails on |
| Water 💧 | 4 cups | For steaming liquid |
| Old Bay Seasoning 🌶️ | 2 tbsp | Classic seafood seasoning blend |
| Sea Salt 🧂 | 1 tbsp | Coarse grain preferred |
| Fresh Lemon 🍋 | 1 whole | Cut into wedges for serving |
| Garlic Cloves 🧄 | 4 cloves | Smashed, not minced |
| Bay Leaves 🍃 | 2 pieces | Dried, whole |
| Black Peppercorns 🌶️ | 1 tsp | Whole, lightly crushed |
| Fresh Parsley 🌿 | ¼ cup | Chopped, for garnish |
| Unsalted Butter 🧈 | 4 tbsp | For serving, optional |
| Beer 🍺 | 1 cup | Light lager preferred, optional |
| Red Pepper Flakes 🔥 | ½ tsp | For heat, optional |
The shrimp quality is non-negotiable. Wild-caught Gulf or Pacific shrimp deliver the best flavor and texture. Look for 16-20 count per pound—large enough to stand up to steaming but not so big they turn rubbery. Most seafood counters will peel and devein for you (just ask to leave tails on). Whole Foods and local fishmongers are reliable sources for fresh, never-frozen stock.
No Old Bay? Combine paprika, salt, black pepper, cayenne, and celery salt for a DIY blend. Beer can be swapped for white wine or additional water with a splash of vinegar. For a richer finish, drawn butter (melted butter with lemon juice) is traditional. The parsley garnish adds freshness, but cilantro or chives work too. Use what you have—this method is forgiving.
Serve immediately for best texture. Leftovers (peeled shrimp only) keep in the fridge for 1-2 days in an airtight container. Reheat gently in a skillet with a splash of water to prevent drying. The seasoned steaming liquid makes an excellent base for seafood stock—strain and freeze for up to 3 months.
Why You’ll Love This Recipe
- 20-Minute Feast: I can have this on the table faster than takeout arrives—just shrimp, water, and Old Bay in a pot.
- Old Bay Magic: That first bite with the zesty Old Bay and bright lemon makes me forget it took almost no effort.
- Weeknight Hero: Honestly, it’s my Tuesday dinner MVP, but fancy enough for company.
- Budget-Friendly Luxury: I get restaurant-quality shrimp for a fraction of the price, and leftovers (if there are any) taste even better cold.
Step-by-Step Instructions for Shrimp Steamer Pot
Master this single-pot technique for perfectly cooked shrimp with bold coastal flavor.
Step 1: Prepare the Steaming Liquid Base
In a large pot with a tight-fitting lid, combine the 4 cups Water, 2 tbsp Old Bay Seasoning, 1 tbsp Sea Salt, 4 cloves Garlic Cloves, 2 pieces Bay Leaves, and 1 tsp Black Peppercorns. The water should be deep enough to submerge about 2 inches of a steamer basket when inserted.
Add the 1 cup Beer and 0.5 tsp Red Pepper Flakes if using. The beer contributes a subtle malt sweetness that complements the seafood, while the red pepper flakes add a gentle heat. Bring this aromatic liquid to a full rolling boil over high heat.
Step 2: Arrange the Shrimp for Even Cooking
While the liquid heats, inspect the 2 lb Large Shrimp to ensure they’re properly peeled and deveined with tails on. The tail helps seal in moisture during steaming and makes for an attractive presentation. If any shrimp have lingering vein fragments, remove them with the tip of a sharp knife.
Once the liquid reaches a vigorous boil, reduce the heat to medium-high to maintain a steady simmer. Place a steamer basket or insert into the pot, ensuring it sits above the liquid level. Arrange the shrimp in a single layer in the basket, leaving a little space between each piece for steam circulation.
Step 3: Steam the Shrimp to Perfection
Cover the pot with the lid and steam the shrimp for 4-6 minutes. The exact time depends on the size of your shrimp—watch for the flesh to turn from translucent to opaque and the shrimp to curl into a loose “C” shape. This visual transformation signals they’re nearly done.
The shrimp are finished when they float to the surface and their internal temperature reaches 145°F. Avoid overcooking, as shrimp become rubbery quickly. Use tongs to transfer the shrimp to a serving platter, leaving the steaming liquid in the pot.
Step 4: Serve with Traditional Accompaniments
Cut the 1 whole Fresh Lemon into wedges and scatter them around the platter. The acidity brightens the rich, spiced flavors of the shrimp. Sprinkle the 0.25 cup Fresh Parsley over the top for a fresh, vibrant finish.
For an indulgent touch, melt the 4 tbsp Unsalted Butter in a small dish and serve it on the side for dipping. The butter enhances the shrimp’s natural sweetness and provides a luxurious contrast to the zesty Old Bay seasoning. Serve immediately while hot.
Pro Tips For Making Shrimp Steamer Pot
- Boil Water First: Start with a rolling boil before adding shrimp—I learned this the hard way after ending up with rubbery shrimp that simmered too long in lukewarm water.
- Don’t Crowd the Pot: Spread shrimp in a single layer so they steam evenly; pile them up and you’ll get uneven cooking, with some overdone while others stay undercooked.
- Use Cold Water Rinse: After peeling, give shrimp a quick cold water rinse to remove any grit—sounds simple, but it actually changes the outcome by keeping flavors clean.
- Add Lemon Last: Toss in lemon wedges only after the shrimp are cooked to avoid bitterness; the bright acidity shines best when it hits hot, finished seafood.
Essential Equipment for shrimp steamer pot
Steamer Pot Essentials
For perfect shrimp, a stainless steel steamer pot with a tight-fitting lid is non-negotiable. I recommend the Cuisinox 8-quart—it’s durable, heats evenly, and has a removable insert. The pot must hold enough water to generate steam without touching the shrimp. 🔥
Steamer Basket Options
A bamboo steamer basket works beautifully if you’re steaming in a wok, but for this recipe, a metal insert fits better in Western-style pots. Look for perforated stainless steel with feet to elevate food above the liquid. OXO’s Good Grips basket has handy handles for easy removal.
Ensure your basket is large enough to hold 2 lbs of shrimp in a single layer for even cooking. Crowding leads to uneven doneness.
Thermometer for Precision
An instant-read thermometer guarantees perfectly cooked shrimp. I use the ThermoWorks Thermapen—it’s accurate to ±0.7°F and gives readings in 2-3 seconds. Check internal temp at the thickest part of the shrimp. 🌡️
Tongs for Handling
12-inch locking tongs are essential for safely transferring hot shrimp from the steamer. I prefer OXO’s silicone-tipped version—they grip well and won’t scratch your pot. Avoid wooden utensils as they can harbor bacteria from seafood.
Optional Butter Warmer
For melted butter, a small ceramic ramekin works perfectly. I microwave 4 tbsp butter in 15-second bursts until just melted. A double boiler method on the stovetop gives you more control for larger batches.
Nutrition Facts
Frequently Asked Questions
What’s the best liquid for steaming shrimp?
Water works, but beer or white wine adds depth. Use 1 cup light beer with 3 cups water for subtle malt sweetness. The alcohol cooks off, leaving rich flavor behind.
How do I know when shrimp are done?
They turn opaque and curl into a “C” shape in 4-6 minutes. Use a thermometer to confirm 145°F internal temp. Overcooked shrimp become rubbery quickly.
Can I reuse the steaming liquid?
Strain and freeze the seasoned broth for up to 3 months. It makes an excellent base for seafood stock or risotto.
Why leave tails on during steaming?
Tails seal in moisture and enhance presentation. They also make handling easier when serving with dipping sauces. Just remove before eating.

- 6 Egg Cake Recipe with Oil: Light as Air With Buttery Moisture - October 4, 2026
- 4 Bean Casserole Recipe: One-Pan Heartiness With Smoky Paprika Depth - October 4, 2026
- 3-Ingredient Keto Mug Cake Recipe: Microwave Magic in 2 Minutes - October 4, 2026