
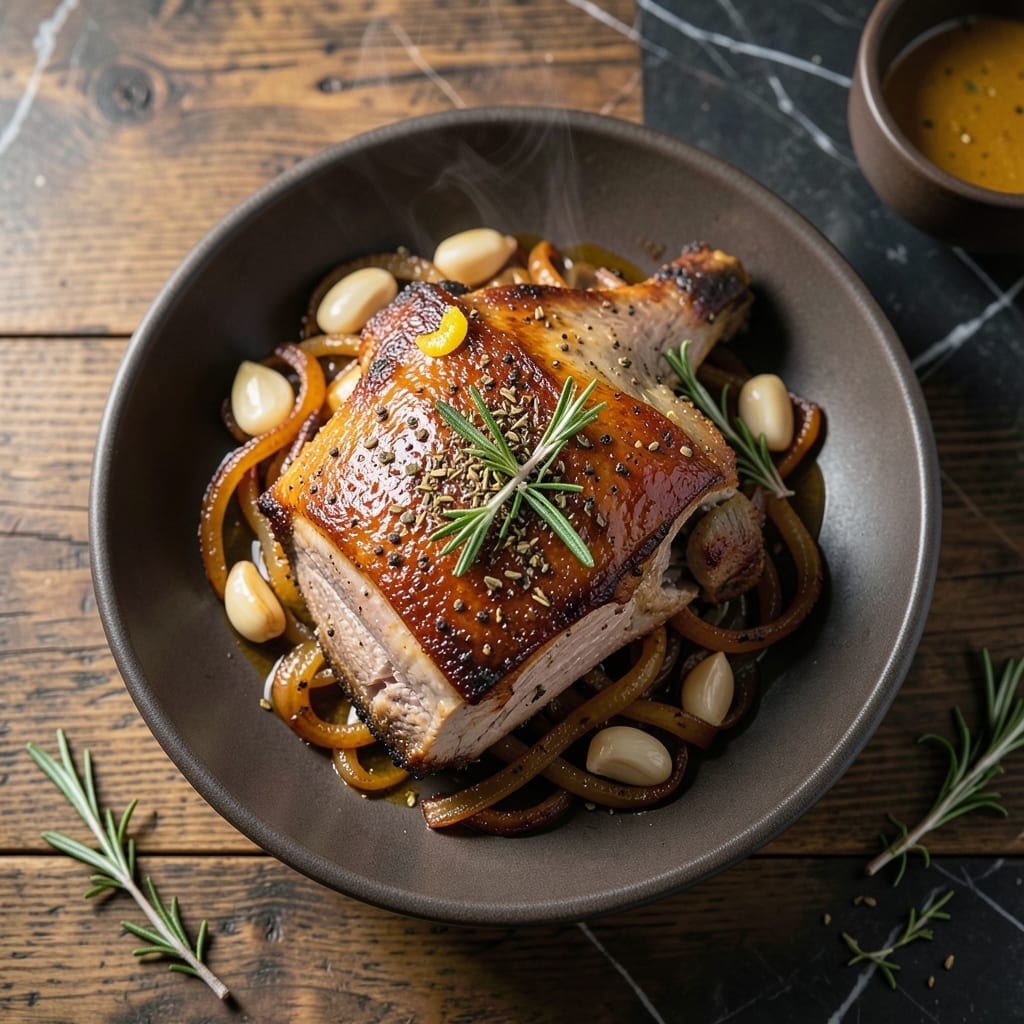
I still remember the first time I pulled this pork shoulder from the oven—it practically fell apart at the touch of a fork. That melt-in-your-mouth moment changed how I cook pork forever.
This method is all about patience. Low heat, long cooking time, and simple seasonings transform tough cuts into something magical. No fancy techniques, just tender results every single time.
The meat emerges so soft it shreds effortlessly, with a rich crust that locks in every bit of juicy flavor. It’s the kind of dish that makes your kitchen smell like a BBQ joint.
Perfect for sandwiches, tacos, or just eating straight from the pan. Here’s how to nail it.
Ingredients for Slow-roasted Pork Shoulder
A handful of bold spices and one incredible cut of meat. That is all.
| Ingredient | Amount | Notes |
|---|---|---|
| Bone-In Pork Shoulder 🐖 | 5 lb | Also called pork butt, with fat cap |
| Kosher Salt 🧂 | 2 tbsp | Diamond Crystal preferred for even seasoning |
| Coarse Black Pepper 🌶️ | 1 tbsp | Freshly ground for best flavor |
| Garlic Cloves 🧄 | 8 cloves | Peeled and smashed, not minced |
| Dried Oregano 🍃 | 1 tbsp | Mediterranean variety preferred |
| Ground Cumin 🌿 | 1 tbsp | Toasted for deeper aroma |
| Smoked Paprika 🌶️ | 1 tbsp | Adds subtle smokiness |
| Apple Cider Vinegar 🍏 | ¼ cup | Balances richness of pork |
| Brown Sugar 🍚 | ¼ cup | Light or dark variety |
| Olive Oil 🫒 | 2 tbsp | For searing the pork |
| Yellow Onion 🧅 | 2 whole | Quartered with skin on |
| Carrots 🥕 | 4 whole | Peeled and cut into chunks |
| Celery Stalks 🌿 | 4 whole | Cut into large pieces |
| Chicken Stock 🍲 | 2 cups | Low-sodium preferred for control |
The pork shoulder is the star—look for bone-in with a thick fat cap (that’s flavor insurance). Costco and Whole Foods have great options, but any supermarket will do. Ask the butcher for a 5-pound piece if you’re serving a crowd. Don’t trim the fat; it renders down into the meat, keeping it moist. If you see pork labeled as ‘picnic shoulder,’ that works too (just a different part of the same cut).
No smoked paprika? Regular paprika plus a pinch of cayenne gets you close. Out of apple cider vinegar? White wine or rice vinegar in a pinch. The brown sugar can be swapped for honey or maple syrup, but the molasses notes in brown sugar really complement the pork. If you’re short on time, pre-minced garlic from a jar works (just use double the amount).
This reheats like a dream—shred it, then warm in its juices. Keeps in the fridge for 4-5 days or freezes beautifully for 3 months. I always make extra; it’s even better the second day once the flavors meld (trust me on this).
Why You’ll Love This Recipe
- Hands-Off Cooking: I just season, pop it in the oven, and let the pork shoulder do its thing for hours—no babysitting required.
- Garlic-Herb Magic: The garlic cloves and oregano melt into the meat, creating this rich, savory depth that’s honestly hard to beat.
- Feeds a Hungry Crowd: One pork shoulder stretches across tacos, sandwiches, and rice bowls for days—my family’s new weekend staple.
- Budget-Friendly Luxury: A big cut like this costs less per serving than pricier meats, and the leftovers taste even better the next day.
Step-by-Step Instructions for Slow-Roasted Pork Shoulder
This method delivers fall-apart tenderness with a rich, caramelized crust every time.
Step 1: Season the Pork Shoulder Generously
Pat the 5 lb Bone-In Pork Shoulder dry with paper towels—this ensures the seasoning sticks. In a small bowl, mix the 2 tbsp Kosher Salt, 1 tbsp Coarse Black Pepper, 1 tbsp Dried Oregano, 1 tbsp Ground Cumin, and 1 tbsp Smoked Paprika. Rub this blend all over the pork, pressing it into the fat cap and crevices.
I like to let the seasoned pork sit at room temperature for 30 minutes while the oven preheats. This takes the chill off the meat, helping it cook more evenly. You’ll notice the fat cap start to glisten—that’s your sign the seasoning is adhering properly.
Step 2: Sear and Deglaze for Maximum Flavor
Heat the 2 tbsp Olive Oil in a large Dutch oven over medium-high heat. Sear the pork on all sides for 3-4 minutes per side until deeply browned. Don’t rush this step—the fond (browned bits) left in the pot will dissolve into the braising liquid, adding incredible depth.
Once the pork is seared, remove it from the pot and set it aside. Pour in the 0.25 cup Apple Cider Vinegar and scrape the bottom of the pot with a wooden spoon to release all those flavorful bits. This deglazing step is non-negotiable for the best results.
Step 3: Add Aromatics and Begin Slow Roasting
Return the pork to the Dutch oven. Scatter the 8 cloves Garlic Cloves, 2 whole Yellow Onion, 4 whole Carrots, and 4 whole Celery Stalks around the meat. Pour in the 2 cups Chicken Stock and sprinkle the 0.25 cup Brown Sugar over the top of the pork.
The liquid should come about halfway up the pork. If it doesn’t, add a splash of water to reach that level. Cover the pot tightly with a lid and transfer it to a preheated 325°F oven. This low temperature is key for breaking down the connective tissue slowly.
Step 4: Roast Until Fork-Tender
Roast the pork for 5-6 hours, flipping it halfway through the cooking time. You’ll know it’s done when a fork slides in and out of the meat with absolutely no resistance. The internal temperature should reach at least 195°F, but I rely more on the fork test than the thermometer.
During the last hour, I remove the lid to let the top crisp up slightly. The brown sugar will caramelize, creating a sticky, flavorful crust. If the liquid reduces too much, add a bit more chicken stock to keep the pan from drying out.
Step 5: Rest and Shred for Serving
Carefully transfer the pork to a cutting board and tent it loosely with foil. Let it rest for 20-30 minutes—this allows the juices to redistribute, ensuring every bite is moist. The vegetables and braising liquid left in the pot can be mashed or blended into a quick pan sauce if you like.
Shred the pork using two forks, discarding any large pieces of fat or bone. The meat should pull apart effortlessly, with a perfect balance of tender and slightly crispy edges. Serve it warm with the pan juices spooned over the top for maximum flavor.
Pro Tips For Making Slow-Roasted Pork Shoulder
- Dry the Skin: Pat the pork shoulder completely dry before seasoning—this guarantees a better crust. I learned this the hard way after ending up with soggy skin my first three attempts.
- Season Overnight: Rub the salt, pepper, garlic, and oregano into the pork the night before. After burning a few batches by rushing, I finally figured out this makes the flavors penetrate deep.
- Low and Slow: Keep the oven at 275°F and give it at least 6 hours. My grandmother swore by this, and she was right—any hotter and the meat gets tough.
- Let It Rest: Pull it out when it hits 195°F internal temp, tent it with foil, and rest for 30 minutes. Sounds weird, but it works—the juices redistribute and the pork stays moist.
Perfect Pairings for slow-roasted pork shoulder
Classic Sides
I love serving this with creamy coleslaw—the cool crunch cuts through the richness perfectly. Toss 6 cups shredded cabbage with ½ cup mayo and 2 tbsp apple cider vinegar for balance. 🥗
Bread Options
Soft brioche buns make incredible pulled pork sandwiches. Toast them lightly and pile high with the meat. For a heartier option, try cornbread—the sweetness complements the smoky pork flavors beautifully.
Fresh Accompaniments
Pickled red onions add a bright, tangy contrast that wakes up every bite. Thinly slice 1 red onion, soak in ½ cup apple cider vinegar with 1 tbsp sugar for 30 minutes. The pink color looks stunning on the plate.
Starchy Sides
Roasted sweet potatoes bring earthy sweetness that pairs wonderfully. Toss 2 lb cubed sweet potatoes with 2 tbsp olive oil and roast at 400°F for 25 minutes until caramelized.
Beverage Pairings
A cold craft IPA with citrus notes cuts through the fat beautifully. For non-drinkers, sparkling apple cider offers the same crisp acidity. I always keep a 6-pack of Sierra Nevada in my fridge for pork nights. 🍺
Extra Toppings
Set out sliced jalapeños and fresh cilantro for customization. A squeeze of lime right before serving brightens all the flavors. The acidity makes the pork taste even more tender.
Nutrition Facts
Frequently Asked Questions
What’s the ideal cooking temperature?
Use a 325°F oven for perfect results. This low, steady heat breaks down the connective tissue slowly, ensuring fork-tender meat every time.
Can I cook it faster at a higher temperature?
Not recommended. Higher heat can dry out the meat before it becomes tender. Patience is key—stick to 5-6 hours at 325°F for melt-in-your-mouth texture.
How do I know when it’s done?
Check with a fork—it should slide in and out with no resistance. Aim for an internal temp of 195°F, but the fork test is the real indicator of perfect doneness.
Does the fat cap need trimming?
Never trim the fat cap! It renders down during cooking, basting the meat and keeping it moist. The result is richer flavor and incredible tenderness.

- 6 Egg Cake Recipe with Oil: Light as Air With Buttery Moisture - October 4, 2026
- 4 Bean Casserole Recipe: One-Pan Heartiness With Smoky Paprika Depth - October 4, 2026
- 3-Ingredient Keto Mug Cake Recipe: Microwave Magic in 2 Minutes - October 4, 2026