
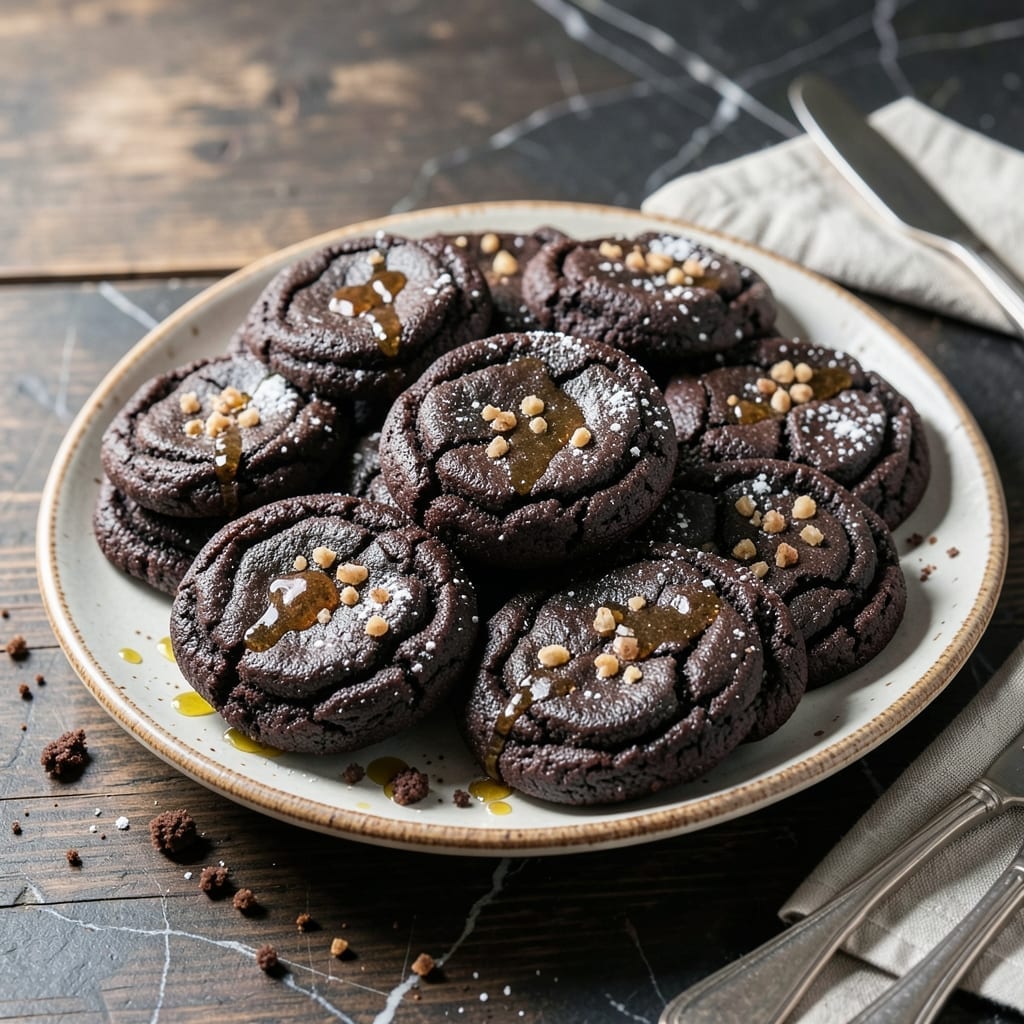
These devil’s food cookies deliver the perfect balance of fudgy centers and crackly tops that make them irresistible. I’ve refined this recipe to capture that signature depth of flavor with a texture that’s rich yet light.
The secret lies in the combination of Dutch-process cocoa and a touch of coffee, which enhances the chocolate without overpowering it. A brief chilling period ensures the cookies maintain their shape while baking, creating those characteristic cracked surfaces.
What emerges from the oven are cookies with intense chocolate flavor, slightly crisp edges, and a dense, moist interior. They’re the kind of treat that satisfies even the most serious chocolate cravings.
Perfect for afternoon snacks or dessert, these cookies keep well for days if stored properly. Here’s how to make them at home.
Ingredients for Snackwell’s Devil’s Food Cookies
Rich cocoa, coffee, and chocolate create these indulgent cookies with signature texture.
| Ingredient | Amount | Notes |
|---|---|---|
| All-Purpose Flour 🌾 | 1 ½ cups | Sifted for even texture |
| Dutch-Process Cocoa Powder 🍫 | ¾ cup | Essential for depth of flavor |
| Granulated Sugar 🍚 | 1 ¼ cups | Fine grain for even distribution |
| Light Brown Sugar 🟤 | ¾ cup | Packed, for moisture and chew |
| Unsalted Butter 🧈 | 1 cup | Room temperature, for creaming |
| Large Eggs 🥚 | 2 whole | Room temperature for even mixing |
| Vanilla Extract 🌿 | 2 tsp | Pure extract for best flavor |
| Instant Coffee Granules ☕ | 1 tsp | Enhances chocolate without bitterness |
| Baking Soda 🧂 | ¾ tsp | For rise and crackly tops |
| Salt 🧂 | ½ tsp | Fine sea salt preferred |
| Semi-Sweet Chocolate Chunks 🍫 | 1 ½ cups | High-quality for rich pockets |
| Hot Water 💧 | 1 tbsp | Dissolves coffee granules |
The Dutch-process cocoa is non-negotiable—Hershey’s Special Dark or Valrhona are ideal for that deep, smooth chocolate flavor. King Arthur Flour or Gold Medal all-purpose flour provides consistent results. For the coffee, any instant granules work, but Folgers or Maxwell House dissolve reliably. Use high-quality chocolate chunks like Ghirardelli or Guittard for those melty pockets.
No Dutch-process cocoa? Natural cocoa plus 1/4 tsp baking powder gets you close, but the color and flavor won’t be quite the same. Substitute espresso powder for the coffee granules—use half the amount. Brown sugar can be swapped for all granulated sugar, but you’ll lose some moisture and chew. For a gluten-free version, 1:1 gluten-free flour blend works well, but texture may vary slightly.
Store cookies in an airtight container at room temperature for up to 5 days. Dough can be refrigerated for 3 days or frozen for 2 months (portion and freeze, then bake from frozen, adding 1-2 extra minutes. The flavors deepen after 24 hours, making them even better the next day.
Why You’ll Love This Recipe
- One Bowl Wonder: I mix everything in a single bowl—no fancy equipment, just a whisk and a little elbow grease.
- Deep Chocolate Crave: That Dutch-process cocoa gives these cookies a rich, velvety chocolate punch that’s hard to resist.
- Weeknight Hero: Honestly, these are my go-to for last-minute school events or when the kids demand cookies on a whim.
- Stays Soft for Days: Between us, they taste just as good on day three, if they even last that long.
Step-by-Step Instructions for Devil’s Food Cookies
Master the technique for rich, fudgy cookies with signature crackly tops.
Step 1: Cream Butter and Sugars to Aerate
In a stand mixer with paddle attachment, beat the 1 cup unsalted butter with the 1.25 cups granulated sugar and 0.75 cup light brown sugar on medium speed for 3-4 minutes. The mixture should become pale and nearly double in volume.
This creaming process incorporates air, creating the foundation for those coveted crackly tops. The butter must be at room temperature—about 65-68°F—to emulsify properly with the sugars. Stop to scrape the bowl occasionally for even mixing.
Step 2: Incorporate Eggs, Vanilla, and Coffee Mixture
Add the 2 whole large eggs, one at a time, mixing on low for 30 seconds after each. Then add the 2 tsp vanilla extract. In a small cup, dissolve the 1 tsp instant coffee granules in the 1 tbsp hot water and add to the mixture.
The coffee enhances the chocolate flavor without adding bitterness. Mix just until combined—the batter will look slightly curdled at this stage, but will smooth out once the dry ingredients are added. Avoid overmixing to prevent tough cookies.
This liquid base should be glossy and well_emulsified before proceeding. The coffee’s deep notes will bloom as it melts into the warm liquid, creating a complex flavor base for your dough.
Step 3: Combine Dry Ingredients and Create Dough
In a separate bowl, whisk together the 1.5 cups all-purpose flour, 0.75 cup Dutch-process cocoa powder, 0.75 tsp baking soda, and 0.5 tsp salt. With the mixer on low, gradually add the dry ingredients to the wet mixture until just combined.
Fold in the 1.5 cups semi-sweet chocolate chunks by hand using a spatula. The dough will be thick and slightly sticky. The Dutch-process cocoa provides the deep, dark color and smooth flavor characteristic of devil’s food.
Step 4: Chill and Portion the Dough
Cover the dough and refrigerate for at least 30 minutes (or up to 24 hours). This resting period allows the flour to hydrate and the flavors to meld. Chilled dough also prevents excessive spreading in the oven.
When ready to bake, preheat the oven to 350°F and line baking sheets with parchment paper. Scoop the dough into 2-tablespoon portions, rolling each into a ball. Place them 2 inches apart on the prepared sheets.
Step 5: Bake to Crackly Perfection
Bake for 10-12 minutes until the edges are set but the centers still look slightly underdone. The tops should be crackly with a glossy sheen. Do not overbake—the cookies will continue to set as they cool on the baking sheet.
Let the cookies cool on the baking sheets for 5 minutes before transferring to a wire rack. The centers should be fudgy with rich chocolate pockets throughout. For the best texture, enjoy them the same day they’re baked.
Pro Tips For Making Snackwell’S Devil’S Food Cookies
- Chill the Dough: After mixing, refrigerate the dough for at least 30 minutes—this prevents the cookies from spreading too thin and helps the flavors meld. I learned this the hard way after my first batch turned into a chocolate pancake.
- Use Room-Temp Butter: Make sure your unsalted butter is truly soft but not melted, around 65-68°F. Sounds picky, but it creams properly with the sugars for that classic devil’s food texture.
- Measure Cocoa Correctly: Spoon the Dutch-process cocoa into your measuring cup and level it off—don’t scoop directly from the container. It packs down easily, and too much will make your cookies dry and bitter.
- Rotate the Pans: Halfway through baking, switch the trays top to bottom and front to back. This guarantees even baking, especially if your oven has hot spots like mine does.
Essential Equipment for Perfect Results
Stand Mixer Essential
A stand mixer with paddle attachment is non-negotiable for proper creaming. I use my KitchenAid Artisan—it handles the thick dough without straining. The paddle incorporates air better than hand mixing, creating that perfect crackly top texture. 💪
Accurate Measuring Tools
Precision matters with baking. I rely on OXO Good Grips measuring cups and spoons for dry ingredients. For the 1.5 cups flour, use the spoon-and-level method to avoid compacting. A kitchen scale (I prefer Escali Primo) ensures perfect cocoa measurements.
Quality Baking Sheets
Invest in half-sheet pans (13×18 inches) with a light color—dark pans can cause over-browning. Nordic Ware or USA Pan are my go-tos. Always line with parchment paper for easy release and cleanup. The 2-inch spacing between dough balls prevents merging during baking.
Cooling Racks
Proper cooling prevents soggy bottoms. I use stackable wire cooling racks—they allow air circulation on all sides. Transfer cookies after 5 minutes on the baking sheet. This stops the cooking process while maintaining that fudgy center we all love.
Dough Scoop
A cookie scoop ensures uniform portions. I use a 2-tablespoon (#20) scoop for consistent 2-tablespoon portions. Spring-loaded scoops from OXO or Wilton make portioning quick and mess-free.
Chilling Equipment
For the 30-minute chill, cover your dough with plastic wrap or transfer to an airtight container. I often use my Cambro food storage containers. This rest period is crucial for flavor development and preventing excessive spreading in the oven.
Nutrition Facts
Frequently Asked Questions
Why use Dutch-process cocoa instead of natural?
Dutch-process cocoa has a smoother, richer flavor and darker color, which is essential for that signature depth. It also reacts differently with baking soda, helping create those perfect crackly tops.
Can I skip the chilling step?
Skipping the 30-minute chill risks excessive spreading and flat cookies. Chilling helps the dough hold its shape and intensifies the flavors. Always refrigerate for best results.
How do I know when they’re done baking?
Look for set edges with slightly underdone centers at 10-12 minutes. The tops should be glossy and crackly. They’ll finish setting while cooling on the baking sheet.
What’s the best way to store them?
Keep cookies in an airtight container at room temperature for up to 5 days. For longer storage, freeze baked cookies for up to 2 months.

- 6 Egg Cake Recipe with Oil: Light as Air With Buttery Moisture - October 4, 2026
- 4 Bean Casserole Recipe: One-Pan Heartiness With Smoky Paprika Depth - October 4, 2026
- 3-Ingredient Keto Mug Cake Recipe: Microwave Magic in 2 Minutes - October 4, 2026