
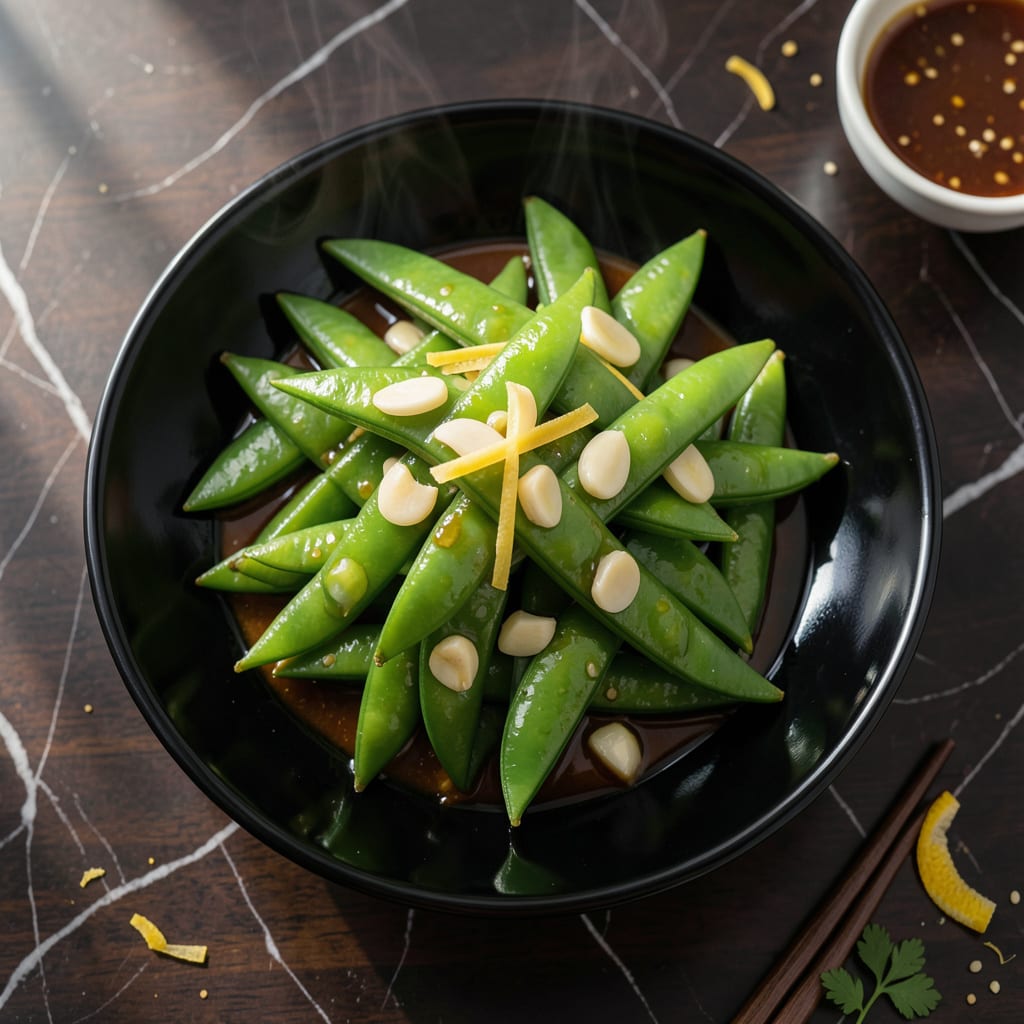
This wok-tossed dish brings vibrant Asian flavors to your table with minimal effort. The combination of fresh snow peas, aromatic garlic, and pungent ginger creates a simple yet flavorful side that pairs perfectly with any main course.
The high-heat stir-fry method locks in crisp texture while allowing the peas to absorb the savory sauce. Ready in 10 minutes, it’s an easy way to add authentic taste to your meal without complicated techniques.
Ingredients for Snow Peas Asian
Bright, crisp snow peas meet bold garlic and ginger for a quick side.
| Ingredient | Amount | Notes |
|---|---|---|
| Snow Peas 🌱 | 12 oz | Fresh, strings removed |
| Garlic Cloves 🧄 | 4 cloves | Minced finely |
| Fresh Ginger Root 🌿 | 1 tbsp | Grated or minced |
| Soy Sauce 🥢 | 3 tbsp | Low-sodium preferred |
| Rice Vinegar 🍚 | 1 tbsp | Unseasoned variety |
| Sesame Oil 🫒 | 1 tsp | Toasted for depth |
| Vegetable Oil 🫒 | 2 tbsp | High smoke point |
| Red Pepper Flakes 🌶️ | ¼ tsp | Adjust to taste |
| Brown Sugar 🍚 | 1 tsp | Light or dark |
| Cornstarch 🌾 | 1 tsp | Mixed with water |
| Green Onions 🧅 | 3 whole | Thinly sliced on bias |
| Sesame Seeds 🌰 | 1 tsp | Toasted for garnish |
The snow peas are the star here—look for vibrant green pods with no wilt at Whole Foods or your local farmers market. Freshness is key since they cook so quickly. Ginger and garlic should be firm, not shriveled. I grab mine from the produce section at Trader Joe’s (their ginger is always plump). The soy sauce? Kikkoman low-sodium is my go-to, but any brand works if it’s not ancient.
No rice vinegar? Apple cider vinegar at half the amount gets you close enough. Out of sesame oil? Toasted peanut oil adds a similar nuttiness. Brown sugar can be swapped for maple syrup or agave—1 for 1 ratio. If you’re missing green onions, a sprinkle of dried chives works in a pinch (though fresh is always better). The cornstarch slurry? Don’t skip it—this thickens the sauce perfectly.
This keeps 3-4 days in the fridge, but honestly it’s best fresh. Reheat quickly in a hot pan—microwave turns the peas soggy. Freezing isn’t ideal (they lose that crisp texture), but if you must, blanch first. I usually make a double batch since it disappears fast at my place (worth the extra minute).
Why You’ll Love This Recipe
- One Pan Wonder: I’m in and out of the kitchen in 15 minutes—just a quick sear with garlic and ginger, then a splash of soy and vinegar.
- Umami Bomb: The combo of fresh ginger and soy sauce hits that sweet-savory spot I crave every time.
- Meal Prep Hero: Stays crisp for days in the fridge, so I can toss it into lunches or serve it as a last-minute side.
- Budget Stretcher: A pound of snow peas costs pennies and feeds my family of four with leftovers for my lunch tomorrow.
Step-by-Step Instructions for Wok-Tossed Snow Peas With Garlic and Ginger
Here’s the method I rely on for crisp-tender snow peas with bold Asian flavors.
Step 1: Prep Snow Peas and Aromatics
Start by trimming the ends of the 12 oz Snow Peas and removing any strings. I prefer to do this on a diagonal for better presentation. Rinse and pat them completely dry—this prevents splattering when they hit the hot wok.
Mince the 4 cloves Garlic Cloves finely and grate or mince the 1 tbsp Fresh Ginger Root. Thinly slice the 3 whole Green Onions on a bias for visual appeal. Having everything prepped and within reach is crucial because this dish comes together quickly.
Step 2: Make the Sauce and Slurry
In a small bowl, whisk together the 3 tbsp Soy Sauce, 1 tbsp Rice Vinegar, 1 tsp Brown Sugar, and 0.25 tsp Red Pepper Flakes until the sugar dissolves. This creates a balanced sauce with sweet, salty, and spicy notes.
In a separate tiny bowl, mix the 1 tsp Cornstarch with 1 tablespoon of water to create a smooth slurry. This will thicken the sauce slightly and give it a glossy finish. Set both mixtures aside until ready to use.
Step 3: Stir-Fry Snow Peas Until Crisp-Tender
Heat the 2 tbsp Vegetable Oil in a wok or large skillet over high heat until it shimmers. Add the minced garlic and ginger, stirring constantly for 15-20 seconds until fragrant but not browned. Be careful not to burn them—garlic turns bitter quickly.
Immediately add the snow peas and stir-fry for 2-3 minutes until they turn bright green and develop slight blistering. They should remain crisp-tender, not mushy. This high-heat cooking preserves their vibrant color and texture.
Step 4: Combine with Sauce and Finish
Pour the soy sauce mixture over the snow peas and toss to coat evenly. Stir in the cornstarch slurry and cook for an additional 30-45 seconds until the sauce thickens slightly and glazes the vegetables.
Remove from heat and drizzle with the 1 tsp Sesame Oil. This adds a nutty aroma that rounds out the dish. Toss once more to distribute the sesame oil evenly throughout the snow peas.
Step 5: Garnish and Serve Immediately
Transfer the snow peas to a serving platter and sprinkle with the sliced green onions and 1 tsp Sesame Seeds. The green onions add freshness while the sesame seeds provide a subtle crunch and visual contrast.
Serve immediately while hot. The snow peas should glisten with sauce and maintain their snap. This dish pairs perfectly with steamed rice or as part of a larger Asian-inspired meal. The flavors are best when enjoyed fresh from the wok.
Pro Tips For Making Snow Peas Asian
- Flash the Peas: Cook snow peas over high heat for only 1-2 minutes—they should stay bright green and slightly crisp. I learned this the hard way after turning them to mush with slower cooking.
- Mince the Aromatics: Finely mince the garlic and ginger so they distribute evenly and cook quickly without burning. Sounds tedious, but it actually changes the outcome.
- Skip the Overcrowding: Stir-fry in batches if needed—too many peas in the pan at once will steam instead of sear. Your future self will thank you.
- Bloom the Sauce: Add soy sauce and rice vinegar at the end of cooking, not the beginning, to preserve their bright flavors. I was skeptical until I tried it.
Creative Variations of These Flavors
Thai Basil Twist
Add ½ cup fresh Thai basil leaves during the final toss for an aromatic Thai-inspired version. The basil’s anise-like flavor pairs beautifully with the garlic and ginger. I tear the leaves just before adding to preserve their delicate structure. 🌿
Spicy Sichuan Style
Increase the heat by adding 1 tsp Sichuan peppercorns (lightly crushed) with the garlic and ginger. Add 1 tbsp chili oil at the end for numbing spice. This version brings serious heat—adjust chili oil to taste.
Sweet Chili Glaze
Replace the soy sauce mixture with ¼ cup sweet chili sauce and 1 tbsp lime juice for a tangy-sweet glaze. The sauce reduces quickly, so keep the heat at medium-high to prevent burning.
Cashew Crunch
Toast ¼ cup raw cashews in a dry pan over medium heat for 2-3 minutes until golden. Add them with the sauce for texture. I use raw cashews from Trader Joe’s for this.
Mushroom Medley
Add 1 cup sliced shiitake mushrooms when stir-frying the snow peas. Their meaty texture soaks up the sauce beautifully. Sauté them first for 1 minute to release their moisture before adding peas.
Honey-Sesame Variation
Swap the brown sugar for 1 tbsp honey and add an extra ½ tsp sesame oil at the end. This creates a slightly sweeter, nuttier profile that kids especially love. 💛
Nutrition Facts
Frequently Asked Questions
Can I use frozen snow peas instead of fresh?
Fresh is ideal for texture, but frozen works in a pinch. Thaw and pat them completely dry first to prevent steaming. Stir-fry an extra 1-2 minutes to evaporate excess moisture.
What can I substitute for soy sauce?
Use tamari for gluten-free or coconut aminos for a milder taste. Both work at a 1:1 ratio. Avoid regular salt—it lacks the umami depth needed for Asian flavors.
Why did my snow peas turn mushy?
Overcrowding the pan or using low heat causes steaming instead of stir-frying. Cook in batches if needed and keep heat at high. They should blister, not boil.
How do I make this dish ahead of time?
Prep all ingredients but keep them separate. Store cut snow peas in icy water to maintain crispness. Cook just before serving—this dish loses texture if reheated.

- 6 Egg Cake Recipe with Oil: Light as Air With Buttery Moisture - October 4, 2026
- 4 Bean Casserole Recipe: One-Pan Heartiness With Smoky Paprika Depth - October 4, 2026
- 3-Ingredient Keto Mug Cake Recipe: Microwave Magic in 2 Minutes - October 4, 2026