
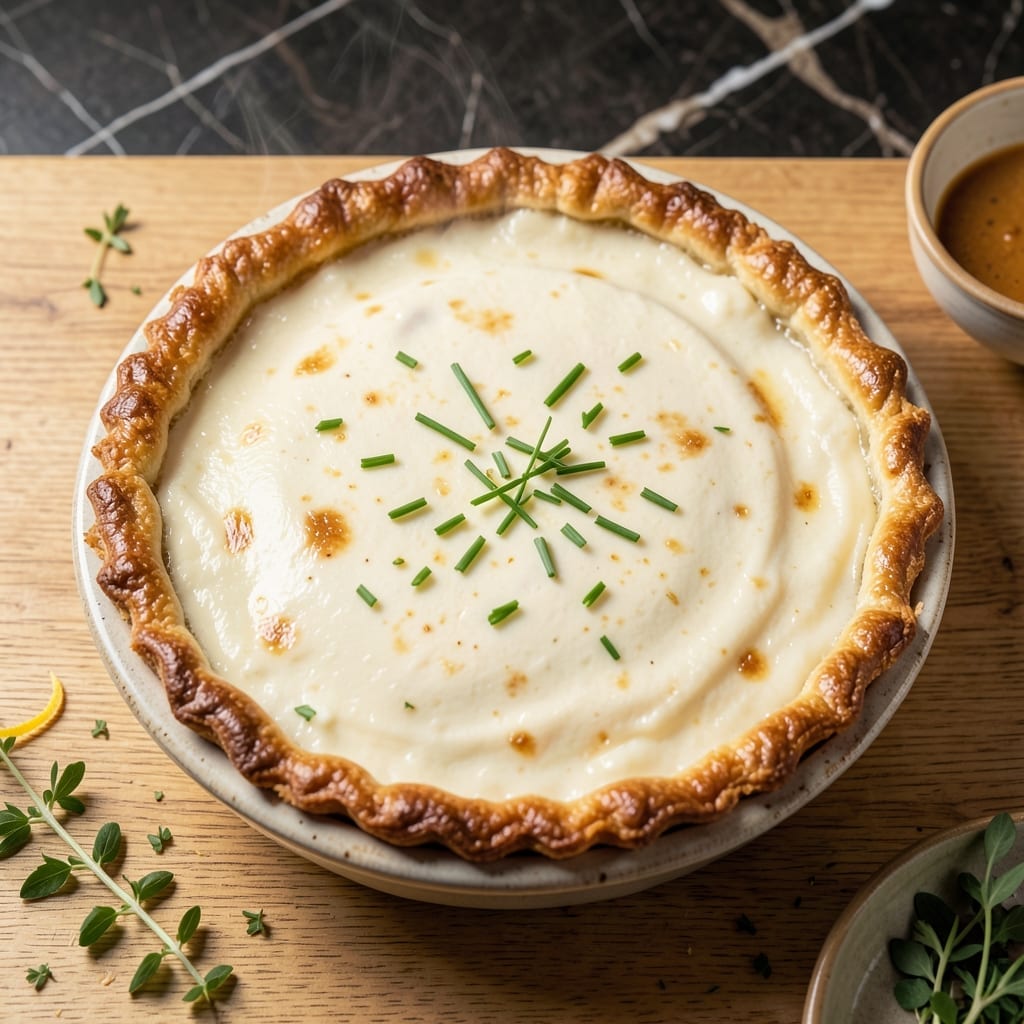
This sour cream quiche delivers the flakiest crust and most creamy custard center you’ll ever make at home. The secret lies in blind-baking the crust to prevent sogginess and using full-fat sour cream for that signature velvety texture.
The filling comes together quickly with eggs, milk, and your choice of mix-ins, creating a rich but balanced custard. A preheated oven ensures even cooking and a golden finish that’s as beautiful as it is delicious.
What you’ll get is a quiche with a buttery, shatteringly crisp base and a center so smooth it melts on the tongue. It’s perfect for brunches, light dinners, or even meal prep.
Bake it once, and this will become your go-to recipe for impressive, foolproof results every time.
Ingredients for Sour Cream Quiche
Flaky crust meets creamy custard with these simple quality ingredients for your next brunch star.
| Ingredient | Amount | Notes |
|---|---|---|
| All-Purpose Flour 🌾 | 1 ½ cups | Plus extra for dusting |
| Salt 🧂 | ½ tsp | Divided for crust and filling |
| Unsalted Butter 🧈 | ½ cup | Cold, cubed for crust |
| Ice Water 💧 | 6 tbsp | For pie crust dough |
| Large Eggs 🥚 | 4 whole | Room temperature preferred |
| Full-Fat Sour Cream 🥛 | 1 cup | For signature velvety texture |
| Whole Milk 🥛 | ½ cup | Or half-and-half for extra richness |
| Shredded Gruyere Cheese 🧀 | 1 cup | Or Swiss cheese as substitute |
| Shredded Sharp Cheddar Cheese 🧀 | ½ cup | For depth of flavor |
| Dijon Mustard 🟡 | 1 tsp | Smooth variety recommended |
| Black Pepper 🌶️ | ¼ tsp | Freshly ground preferred |
| Nutmeg 🌰 | 0.125 tsp | Freshly grated if possible |
| Chopped Fresh Chives 🌿 | 2 tbsp | For garnish and flavor |
| Cooked Crumbled Bacon 🥓 | ½ cup | Optional vegetarian bacon substitute |
The crust hinges on cold butter—European-style from Whole Foods gives the best flakiness. I always use King Arthur Flour for consistency, but any all-purpose works. For the sour cream, full-fat Daisy or Breakstone’s (the good stuff, not light) is non-negotiable for that velvety texture. The cheese? Gruyere at the deli counter—ask them to shred it fresh so it melts beautifully.
No Gruyere? Swiss or Emmental work great. Out of whole milk? Half-and-half at half the amount keeps it rich. Want to skip the bacon (or keep it veg)? Sautéed mushrooms or spinach at 1 cup chopped are perfect. The Dijon can be swapped for whole-grain mustard (same amount), but don’t skip it—it adds depth without overpowering.
Blind-baked crusts keep 2 days at room temp, wrapped tight. The filling? Prep it the night before and store in the fridge. Leftovers taste great cold or warmed for 3-4 days (cover with foil). Freeze slices for up to 2 months—perfect for busy mornings.
Why You’ll Love This Recipe
- No-Fuss Crust: I just pulse flour, butter, and a pinch of salt in the food processor, add ice water, and it’s ready to roll. Honestly, it’s simpler than calling for takeout.
- Rich and Creamy: The sour cream in the filling makes the texture so velvety it almost melts in your mouth.
- Brunch or Dinner: I’ve served this for lazy Sunday mornings and quick weeknight dinners—it works for both.
- Leftovers for Days: It keeps beautifully in the fridge, so I get a solid three meals out of one batch.
Step-by-Step Instructions for Sour Cream Quiche
Here’s how to get that flaky crust and creamy filling with every bite.
Step 1: Prepare the Flaky Pie Crust
In a large bowl, combine the 1.5 cups all-purpose flour and 0.5 tsp salt. Cut in the 0.5 cup cold unsalted butter using a pastry cutter or your fingers until the mixture resembles coarse crumbs with pea-sized butter pieces.
Gradually add the 6 tbsp ice water, one tablespoon at a time, mixing just until the dough comes together. Don’t overwork it—you want visible butter flakes for that flaky texture. Form into a disk, wrap in plastic, and chill for 30 minutes.
Step 2: Blind Bake the Crust
Roll out the chilled dough on a lightly floured surface to fit a 9-inch pie dish. Crimp the edges, then prick the bottom all over with a fork. Freeze for 15 minutes to prevent shrinking.
Preheat oven to 375°F. Line the crust with parchment paper, fill with pie weights or dried beans, and bake for 15 minutes. Remove weights and bake 5-8 minutes more until lightly golden. Cool slightly.
Step 3: Make the Creamy Custard Filling
In a large bowl, whisk together the 4 whole large eggs, 1 cup full-fat sour cream, and 0.5 cup whole milk until smooth. Stir in the 1 tsp Dijon mustard, 0.25 tsp black pepper, and 0.125 tsp nutmeg.
Add the 1 cup shredded Gruyere cheese and 0.5 cup shredded sharp cheddar cheese, then fold in the 0.5 cup cooked crumbled bacon and 2 tbsp chopped fresh chives. This creates a rich, velvety base with perfect seasoning.
Step 4: Bake to Golden Perfection
Pour the filling into the pre-baked crust. Bake at 375°F for 35-40 minutes until the center is just set with a slight jiggle and the top is golden brown. Don’t overbake—the custard continues to set as it cools.
Let rest for 10-15 minutes before slicing. This allows the filling to firm up while staying creamy. Serve warm or at room temperature for the best texture and flavor.
Pro Tips For Making Sour Cream Quiche
- Chill the Dough: After mixing your flour, salt, butter, and ice water, let the dough rest in the fridge for at least 30 minutes—I learned this the hard way when my crust shrank in the pan.
- Blind Bake First: Pre-bake your crust for 10-12 minutes at 375°F before adding the filling to avoid a soggy bottom, which ruins even the creamiest quiche.
- Room Temp Eggs: Take your large eggs out of the fridge 20-30 minutes before mixing—cold eggs don’t incorporate as smoothly into the sour cream base.
- Dock the Crust: Use a fork to poke small holes all over the rolled-out dough before blind baking; this prevents air bubbles that can make your crust uneven.
Essential Equipment for Great sour cream quiche
Pie Dish Selection
I always use a 9-inch glass pie dish like Pyrex for even heat distribution and easy monitoring of the crust’s browning. Metal pans work too, but may require 2-3 minutes less baking time. Avoid dark-colored pans which can overbrown the bottom. 💡
Pastry Tools
A pastry cutter makes quick work of cutting butter into flour, but two forks work in a pinch. I love my OXO Good Grips cutter for comfort. For rolling, a marble rolling pin stays cool, preventing butter from melting prematurely.
Blind Baking Essentials
Pie weights are non-negotiable for a crisp crust. I use ceramic pie weights from RSVP International, but dried beans work too. Parchment paper prevents sticking—cut a 12-inch square for full coverage. Always preheat your oven for 15 minutes.
Mixing Bowls
A set of nested stainless steel bowls (I use Cuisinox) makes whisking the custard effortless. A large 3-quart bowl gives enough room for all ingredients. For the dough, a wide, shallow bowl helps cut in the butter evenly.
Precision Measurement
Accurate measurements matter for both crust and filling. I swear by my OXO stainless steel measuring cups and adjustable measuring spoon. For the nutmeg, a microplane grater gives the perfect fine texture. 🔥
Cooling Rack
Let your quiche cool properly on a wire rack to prevent sogginess. I use a foldable silicone-coated rack from Checkered Chef. This allows air circulation underneath, keeping the crust crisp while the filling sets.
Nutrition Facts
Frequently Asked Questions
Can I make the crust ahead of time?
Yes! The dough can be prepared and refrigerated for up to 2 days or frozen for 1 month.
Why did my filling turn out watery?
Overmixing the eggs or underbaking can cause this. Bake until just set with a slight jiggle in the center, then let rest for 10-15 minutes before slicing.
Can I use a store-bought crust?
Choose a pre-baked 9-inch crust and skip the blind-baking step. Look for all-butter varieties for best flavor.
What mix-ins work best?
Vegetables like spinach or mushrooms add great texture. For protein, try 0.5 cup cooked ham or 0.5 cup crumbled sausage.

- 6 Egg Cake Recipe with Oil: Light as Air With Buttery Moisture - October 4, 2026
- 4 Bean Casserole Recipe: One-Pan Heartiness With Smoky Paprika Depth - October 4, 2026
- 3-Ingredient Keto Mug Cake Recipe: Microwave Magic in 2 Minutes - October 4, 2026