
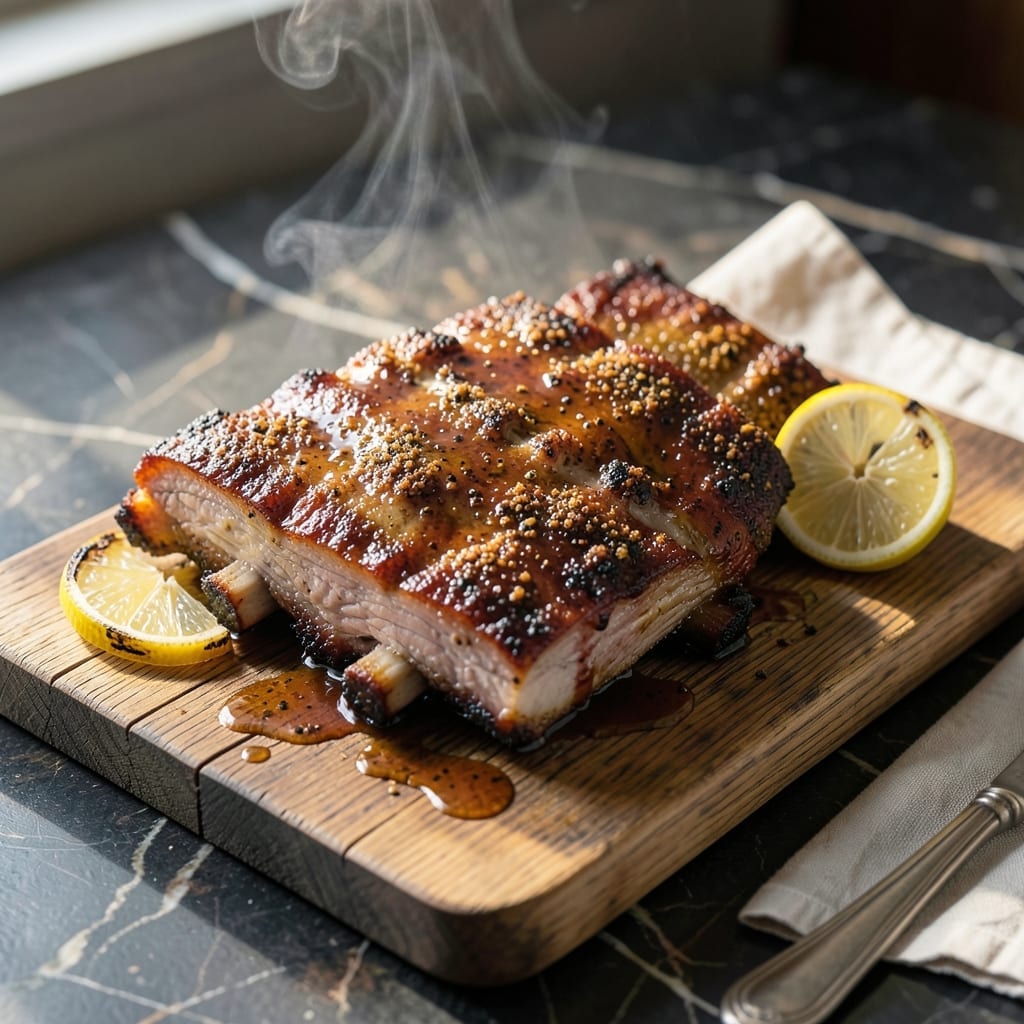
Achieving fall-off-the-bone ribs without a smoker is possible with sous vide precision. This method delivers tender meat with deep smoky flavor, all from your kitchen countertop.
The process begins with a long, controlled cook in the water bath, allowing collagen to break down perfectly. A finishing step adds the signature BBQ bark and caramelized sauce we all crave.
What emerges is rib meat so tender it nearly dissolves, yet retains its shape and rich pork flavor. The sous vide ensures consistent results that rival traditional smoking methods.
This technique works with any rib cut and delivers professional-quality results every time. The secret is patience and precise temperature control.
Ingredients for Sous Vide Bbq Ribs
Sous vide precision transforms these ribs into tender, smoky perfection without a grill.
| Ingredient | Amount | Notes |
|---|---|---|
| Pork Baby Back Ribs 🥩 | 2 lb | Full rack, membrane removed |
| BBQ Dry Rub 🌶️ | ¼ cup | Store-bought or homemade blend |
| Kosher Salt 🧂 | 1 tbsp | Diamond Crystal preferred |
| Ground Black Pepper 🌶️ | 1 tbsp | Freshly cracked for best flavor |
| Brown Sugar 🍚 | ¼ cup | Light or dark variety |
| Smoked Paprika 🌶️ | 2 tsp | Adds depth of smoky flavor |
| Garlic Powder 🧄 | 1 tbsp | Not garlic salt |
| Onion Powder 🧅 | 1 tbsp | Enhances savory profile |
| Apple Cider Vinegar 🍏 | 2 tbsp | Balances sweetness in rub |
| BBQ Sauce 🍅 | 1 ½ cups | Thick, smoky variety preferred |
| Liquid Smoke 💨 | 1 tsp | Optional for enhanced smokiness |
| Olive Oil 🫒 | 2 tbsp | For searing finish |
| Butter 🧈 | 2 tbsp | Unsalted, for finishing |
The ribs are the foundation—baby back ribs offer the best tenderness for sous vide. Source from a reputable butcher or high-turnover grocery store like Whole Foods. Look for racks with good marbling and uniform thickness. The membrane must be removed (a butter knife helps lift it) for the rub to penetrate properly. Diamond Crystal kosher salt is ideal for its clean flavor and texture.
No BBQ dry rub? Combine equal parts brown sugar, smoked paprika, garlic powder, and onion powder. Liquid smoke at half the amount intensifies smokiness if needed. For the BBQ sauce, Stubb’s Original or Sweet Baby Ray’s work well, but any thick, smoky sauce will do. Apple cider vinegar can be swapped with white vinegar in a pinch, but it adds a fruitier tang.
Ribs can be prepped and seasoned 12 hours ahead—store covered in the fridge. Cooked ribs keep in the fridge for 3-4 days or freeze for 3 months. Reheat gently in the sous vide bath or oven to maintain tenderness.
Why You’ll Love This Recipe
- Set It and Forget: The sous vide does all the work—just season the ribs, seal, and let the water bath work its magic for hours.
- Fall-Off-The-Bone Tender: That brown sugar in the rub caramelizes just enough to create a sticky, finger-licking crust around meat so tender it nearly melts.
- Crowd-Pleasing Feast: I’ve served these at backyard BBQs and casual weeknight dinners—everyone from picky kids to foodie friends goes back for seconds.
- Leftovers? Even Better: Honestly, the flavors deepen overnight, and reheating in the oven brings back that just-cooked texture.
Step-by-Step Instructions for Sous Vide BBQ Ribs
This precise technique ensures tender, smoky ribs with minimal effort and maximum flavor control.
Step 1: Season and Vacuum-Seal the Ribs
Combine the 0.25 cup BBQ dry rub, 1 tbsp kosher salt, 1 tbsp ground black pepper, 0.25 cup brown sugar, 2 tsp smoked paprika, 1 tbsp garlic powder, and 1 tbsp onion powder. Rub this mixture evenly over all surfaces of the 2 lb pork baby back ribs, pressing firmly to adhere.
Place the seasoned ribs in a vacuum-seal bag. Add the 2 tbsp apple cider vinegar and 1 tsp liquid smoke to the bag. Seal under full vacuum pressure, ensuring the ribs are in a single layer for even cooking and maximum contact with the seasoning.
Step 2: Sous Vide at Precise Temperature
Preheat your sous vide water bath to 165°F. This temperature breaks down collagen without drying out the meat, achieving that coveted fall-off-the-bone texture. Submerge the sealed bag of ribs, ensuring they’re fully immersed.
Cook for 24 hours undisturbed. This extended time allows the connective tissue to fully render while the spices deeply penetrate the meat. Maintain consistent water temperature throughout—the precision of sous vide eliminates the risk of overcooking.
Step 3: Finish with a Sear for Texture
Remove the ribs from the bag and pat them completely dry with paper towels. This step is crucial for achieving a proper sear. Heat the 2 tbsp olive oil in a large skillet over high heat until shimmering.
Sear the ribs for 2-3 minutes per side until deeply browned and slightly caramelized. The sugar in the rub will create a beautiful crust. Work quickly to avoid over-browning the exterior before the interior cools.
Step 4: Glaze and Rest Before Serving
Reduce heat to medium and add the 1.5 cups BBQ sauce to the skillet. Coat the ribs thoroughly in the sauce, turning them to ensure even coverage. Let them simmer in the sauce for 3-4 minutes until the glaze thickens slightly.
Transfer the ribs to a cutting board and add the 2 tbsp butter to the remaining sauce, stirring until melted and fully incorporated. Let the ribs rest for 5 minutes to allow the glaze to set before slicing between the bones. Serve immediately with the enriched sauce spooned over the top.
Pro Tips For Making Sous Vide Bbq Ribs
- Set Temp to 165°F: I learned this the hard way—any higher and the ribs turn tough instead of fall-off-the-bone tender. 165°F for 24 hours guarantees perfect texture.
- Pat Ribs Dry: Sounds weird, but it works: dry the ribs thoroughly before seasoning so the rub sticks and forms a better bark during finishing.
- Skip the Overcrowding: After ruining a batch with uneven cooking, I finally figured out to arrange ribs in a single layer in the sous vide bag with space between them.
- Finish with Sauce: About 5 minutes on a hot grill or under the broiler with BBQ sauce adds that sticky, caramelized crust you’re craving.
Storing and Reheating sous vide bbq ribs
Refrigerator Storage
Let your ribs cool for no more than 2 hours before storing. Place them in an airtight container or vacuum-seal bag with their juices. They’ll keep in the fridge at 40°F or below for up to 4 days. ❄️
Freezer Storage
For longer storage, freeze ribs in their cooking juices for up to 3 months. Use heavy-duty freezer bags or vacuum-sealed bags to prevent freezer burn. Label with the date and reheating instructions for future reference.
Sous Vide Reheating
This is my favorite method because it preserves texture perfectly. Set your sous vide to 165°F and submerge the sealed ribs for 1-2 hours. This gently warms them without drying out the meat. 🔥
Oven Reheating
Preheat oven to 300°F. Wrap ribs in aluminum foil with 2 tbsp BBQ sauce and warm for 20-25 minutes. Unwrap and broil for 3-4 minutes to restore that caramelized bark.
Microwave Option
For quick meals, place ribs on a microwave-safe dish with 1 tbsp water. Cover with a damp paper towel and heat on 50% power for 2-3 minutes, checking frequently to avoid overcooking.
Nutrition Facts
Frequently Asked Questions
Do I need to remove the membrane from the ribs?
Yes, always remove the membrane first. It prevents the rub from penetrating and can create a chewy texture. Slide a butter knife under it at one end, lift, then pull it off with a paper towel for grip.
Can I use a different temperature for sous vide?
165°F is ideal for tender ribs, but you can go up to 170°F for slightly firmer texture. Avoid going below 160°F or the collagen won’t break down properly.
What if my bags float during cooking?
Use a sous vide weight or a heavy spoon to keep them submerged. Floating can expose parts of the ribs to lower temperatures, leading to uneven cooking.
Can I skip the searing step?
Skipping the sear means missing the caramelized bark. For the best texture, always sear for 2-3 minutes per side in a hot pan before glazing.

- 6 Egg Cake Recipe with Oil: Light as Air With Buttery Moisture - October 4, 2026
- 4 Bean Casserole Recipe: One-Pan Heartiness With Smoky Paprika Depth - October 4, 2026
- 3-Ingredient Keto Mug Cake Recipe: Microwave Magic in 2 Minutes - October 4, 2026