
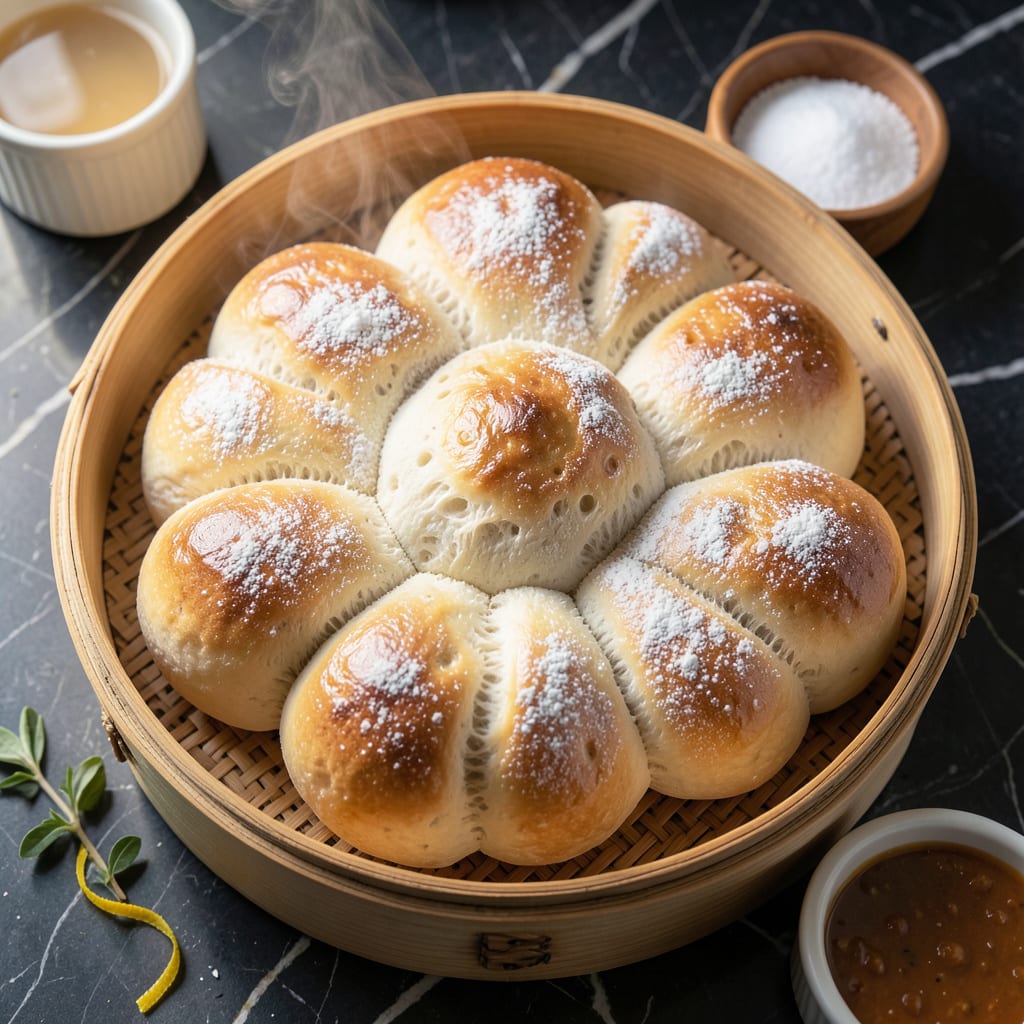
This steamed bread delivers pillowy soft texture with a method that couldn’t be simpler. No yeast, no kneading—just a straightforward process that yields perfect results every time.
What makes this recipe special is the steam cooking, which creates a light, airy interior with a slightly chewy exterior. It’s the kind of bread that disappears quickly from the basket.
Ingredients for Steam Bread
Pantry staples come together for a light, airy steamed bread everyone will love.
| Ingredient | Amount | Notes |
|---|---|---|
| All-Purpose Flour 🌾 | 4 cups | Sifted for lighter texture |
| Granulated Sugar 🍚 | ¼ cup | Balances the flavor |
| Active Dry Yeast 🍞 | 1 tsp | Instant yeast works too |
| Baking Powder 🧂 | 2 tsp | Ensures proper rise |
| Salt 🧂 | 1 tsp | Fine sea salt preferred |
| Warm Water 💧 | 1 ¼ cups | About 110°F for yeast |
| Vegetable Oil 🫒 | 2 tbsp | Neutral flavor preferred |
| Large Egg 🥚 | 1 whole | Room temperature |
| Butter 🧈 | 2 tbsp | Melted, for brushing |
| Honey 🍯 | 1 tbsp | Optional for sweetness |
[recipeingredientscaler]
The flour is the foundation here. King Arthur or Gold Medal all-purpose give consistent results. Don’t overmeasure—spoon into cups and level off. Yeast freshness matters, so check the expiration date or proof it in warm water with a pinch of sugar. The baking powder adds extra lift, so make sure it’s not expired. Most grocery stores carry these basics, but bulk bins are great for buying just what you need.
No yeast? Instant yeast at the same amount works fine—just skip the proofing step. Out of honey? Maple syrup or sugar can stand in. If you’re avoiding eggs, 1/4 cup yogurt or applesauce maintains moisture. The oil can be swapped for melted butter (cool slightly first). For a richer flavor, substitute half the water with milk.
Store flour in an airtight container for up to 6 months. Yeast keeps in the fridge for 1 year unopened, 3 months once opened. Baked bread stays fresh for 2-3 days in a sealed bag—reheat by steaming again for best texture.
Why You’ll Love This Recipe
- No-Fuss Mixing: I just dump the flour, sugar, yeast, and salt in a bowl—no kneading, no fancy steps.
- Soft and Sweet: The steam locks in moisture, giving it that pillowy texture with just a hint of sugar.
- Breakfast or Snack: Honestly, it’s as good with jam at dawn as it is with soup at dinner.
- Pantry Staples: Between us, I always have these ingredients on hand, so it’s my last-minute lifesaver.
Step-by-Step Instructions for Steam Bread
This method delivers soft, fluffy bread with a tender crumb using a straightforward process.
Step 1: Activate the Yeast and Mix Wet Ingredients
In a large mixing bowl, combine the 1.25 cups warm water, 0.25 cup granulated sugar, and 1 tsp active dry yeast. Stir gently and let sit for 5-7 minutes until the mixture becomes frothy and bubbly—this confirms the yeast is active.
Once the yeast is activated, add the 2 tbsp vegetable oil, 1 whole large egg, and 1 tbsp honey. Whisk the wet ingredients together until smooth and well combined. The honey adds subtle sweetness that complements the steam cooking process.
Step 2: Combine Dry Ingredients and Form the Dough
In a separate bowl, sift together the 4 cups all-purpose flour, 2 tsp baking powder, and 1 tsp salt. Sifting ensures a lighter texture, which is essential for achieving that pillowy softness.
Gradually add the dry ingredients to the wet mixture, stirring with a wooden spoon or dough whisk until a shaggy dough forms. The dough will be slightly sticky but should pull away from the sides of the bowl. Avoid overmixing at this stage—just combine until no dry spots remain.
Step 3: Shape and First Rise
Turn the dough onto a lightly floured surface and knead gently for 3-5 minutes until smooth and elastic. The dough should be soft but not sticky—add a little more flour if needed, but keep it minimal to maintain tenderness.
Divide the dough into equal portions (for 4 servings, I shape it into 4 round balls) and place them into greased or parchment-lined steam bread molds or small bowls. Cover with a damp cloth and let rise in a warm place for 1 hour or until doubled in size.
Step 4: Steam the Bread to Perfection
Bring 2 inches of water to a boil in a large pot fitted with a steamer rack. Once boiling, reduce heat to maintain a steady, rolling simmer. Place the risen dough portions onto the steamer rack, leaving 1-2 inches of space between them for expansion.
Cover the pot with a tight-fitting lid and steam for 20-25 minutes. Avoid lifting the lid during the first 15 minutes to prevent sudden temperature drops. The bread is done when a toothpick inserted into the center comes out clean and the tops are firm to the touch.
Step 5: Finish and Serve Warm
Remove the bread from the steamer and place on a wire rack. While still hot, brush the tops with the 2 tbsp melted butter to add richness and a subtle sheen. This step enhances flavor and keeps the crust soft.
Let the bread cool for 5-10 minutes before serving. The texture should be light, airy, and slightly springy when pressed. Serve warm for the best experience, as the steam process locks in moisture that’s most noticeable when freshly made.
Pro Tips For Making Steam Bread
- Test Your Yeast: I learned this the hard way—always dissolve your active dry yeast in warm water with a pinch of sugar first. If it doesn’t foam within 5 minutes, your bread won’t rise, no matter how long you wait.
- Skip Cold Flour: Using flour straight from the fridge or a cold pantry can slow down the proofing. Let it sit at room temperature for 30 minutes before mixing—your dough will rise faster and more evenly.
- Don’t Overfill the Steamer: Resist the urge to cram all the bread in at once. Leave at least an inch between each piece so the steam circulates properly, or you’ll end up with dense, gummy spots.
- Use a Damp Towel: Sounds weird, but it works: cover the steamer lid with a damp kitchen towel to catch condensation drips. Otherwise, water will drip back onto the bread and create sad, soggy patches.
Essential Equipment for This Recipe
Steamer Setup
You’ll need a large pot with a tight-fitting lid and a steamer rack or basket. I use a 12-quart stockpot with a bamboo steamer basket from OXO—it fits perfectly and allows for even steam circulation. Ensure the rack sits at least 1 inch above the water to prevent boiling.
Mixing Tools
A large mixing bowl and wooden spoon are essential for combining ingredients. I prefer stainless steel bowls from Winco—they’re durable and won’t react with acidic components. A dough whisk makes mixing easier but isn’t mandatory.
Measuring Accuracy
Precise measurements matter for consistent results. I rely on dry measuring cups for flour and liquid measuring cups for water. A kitchen scale (like my OXO Good Grips) ensures accuracy, especially for ingredients like 2 tsp baking powder. 💡
Proofing Essentials
A damp kitchen towel is perfect for covering dough during rising. I also use a proofing basket (banneton) for shaping, but small bowls work too. Keep your rising spot warm—my oven with the light on maintains about 80°F, ideal for yeast activation.
Finishing Touches
A pastry brush is key for applying the 2 tbsp melted butter evenly. I prefer silicone brushes from Wilton—they’re heat-resistant and easy to clean. A wire cooling rack prevents soggy bottoms after steaming.
For serving, a bamboo bread basket lined with a cloth keeps the bread warm and adds a nice presentation touch. 🥖
Nutrition Facts
Frequently Asked Questions
What can I use if I don’t have a steamer basket?
Use a heatproof colander or metal rack set over a pot of boiling water. Just ensure it fits securely and keeps the bread above the water level. A bamboo basket works best, but these alternatives can save the day.
Can I make this without yeast?
Yes! Omit the yeast and double the baking powder to 4 tsp. The texture will be slightly denser but still soft and fluffy. This quick version rises faster and skips the proofing step.
Why is my bread dense instead of fluffy?
Over-kneading or expired yeast are common culprits. Use fresh yeast and knead just until smooth. Also, ensure the water is truly boiling before steaming for proper lift.
How do I store leftovers?
Keep in an airtight container at room temperature for 2-3 days. Reheat by steaming again for 5-10 minutes to restore softness. Avoid refrigerating, as it dries out the bread.

- 6 Egg Cake Recipe with Oil: Light as Air With Buttery Moisture - October 4, 2026
- 4 Bean Casserole Recipe: One-Pan Heartiness With Smoky Paprika Depth - October 4, 2026
- 3-Ingredient Keto Mug Cake Recipe: Microwave Magic in 2 Minutes - October 4, 2026