
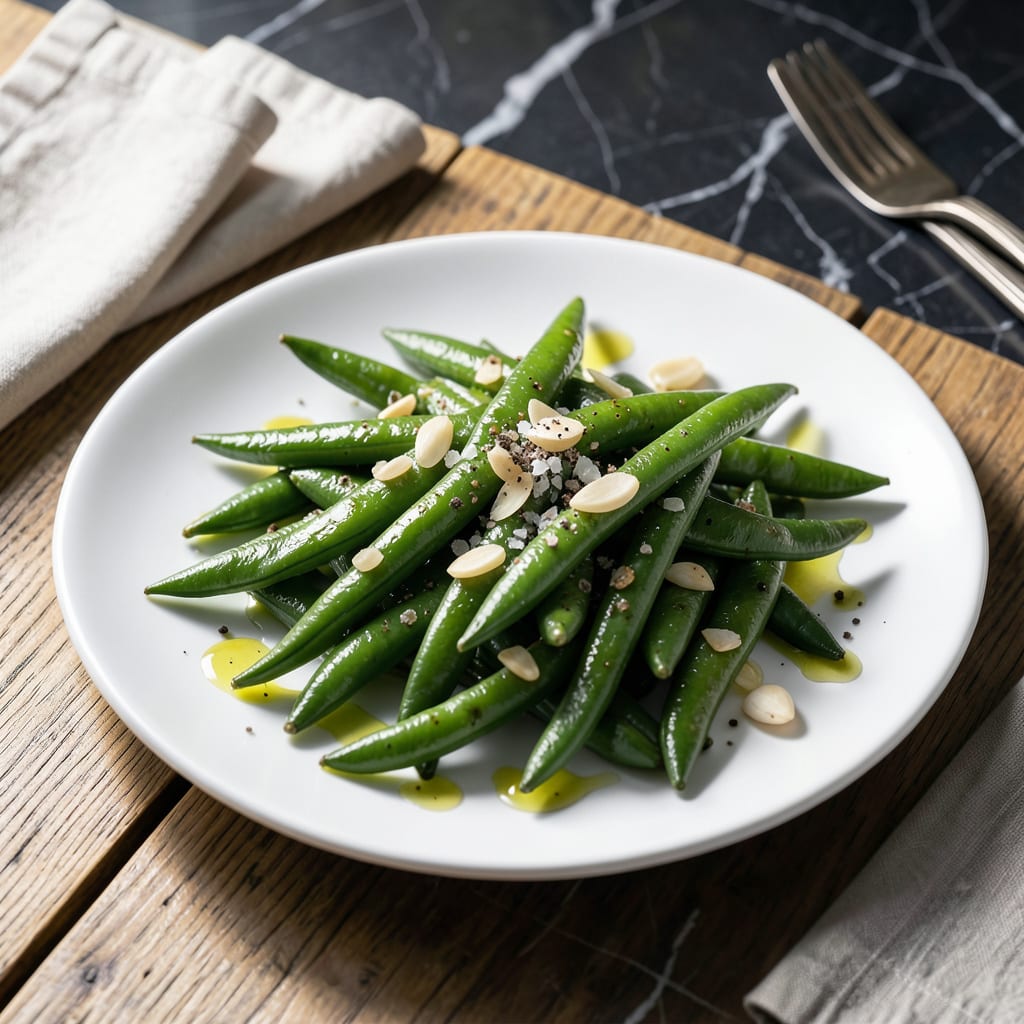
There’s a simple elegance to perfectly steamed beans that brings out their natural sweetness and vibrant color. This method preserves their tender texture while maintaining a satisfying crispness.
With just a steamer basket and fresh green beans, you can achieve restaurant-quality results in under 10 minutes. The key is timing—just long enough to soften without losing that signature bite.
Ingredients for Steamed Beans
Fresh green beans and a steamer basket are all you need for vibrant, crisp-tender results.
| Ingredient | Amount | Notes |
|---|---|---|
| Fresh Green Beans 🌱 | 1 ½ lb | Trimmed, uniform length preferred |
| Water 💧 | 2 cups | For steaming, filtered if possible |
| Sea Salt 🧂 | 1 tsp | Fine grain, adjust to taste |
| Extra-Virgin Olive Oil 🫒 | 1 tbsp | For finishing, high quality |
| Freshly Ground Black Pepper 🌶️ | ½ tsp | Coarse grind preferred |
| Garlic Cloves 🧄 | 2 cloves | Minced, optional for garnish |
| Lemon Zest 🍋 | 1 tsp | Finely grated, for brightness |
| Red Pepper Flakes 🌶️ | ¼ tsp | Optional for heat |
| Fresh Dill 🌿 | 2 tbsp | Chopped, optional garnish |
| Toasted Almond Slices 🥜 | ¼ cup | For crunch, optional topping |
[recipeingredientscaler]
The green beans are the star here. Seek out slender, vibrant pods—the thinner ones steam more evenly and retain that perfect bite. Whole Foods and Trader Joe’s consistently stock excellent options, but any market with high turnover will do. Avoid beans with brown spots or limp texture; they’ve lost their natural sweetness. Organic isn’t necessary, but freshness is non-negotiable for that restaurant-quality finish.
No green beans? Asparagus or sugar snap peas work beautifully with the same method, though timing may vary slightly. Swap sea salt for kosher salt at one-and-a-half times the amount. If you’re skipping the olive oil garnish, a drizzle of toasted sesame oil adds depth. Fresh herbs can be swapped—parsley or chives stand in nicely for dill. The lemon zest is optional but highly recommended for brightness.
Steamed beans keep well for 3-4 days in an airtight container, though they’re best served immediately. Reheat briefly in the steamer or with a splash of water in a pan. The toppings (almonds, dill) are best added fresh—store them separately and toss just before serving to preserve texture and vibrant color.
Why You’ll Love This Recipe
- 5-Minute Side: I can steam these beans faster than it takes to set the table. Honestly, just water, salt, and a pot.
- Bright & Simple: The olive oil and pepper make the fresh beans taste like they came from a garden, not a can.
- Pairs With Anything: I serve these with grilled chicken, fish, or even scrambled eggs—works every time.
Step-by-Step Instructions for Steamed Beans
Master this technique for consistently crisp-tender beans with vibrant color and flavor.
Step 1: Prepare the Green Beans for Steaming
Begin by rinsing the 1.5 lb Fresh Green Beans under cold water to remove any dirt or debris. Trim the stem ends with a sharp knife, leaving the beans whole for an elegant presentation. For uniform cooking, aim for beans of similar length and thickness.
I prefer to leave the beans whole, but you can cut them into 2-inch pieces if desired. Pat them dry with a clean kitchen towel—excess moisture can dilute the flavor and create steam that overcooks the beans before they even hit the pot.
Step 2: Steam the Beans to Crisp-Tender Perfection
In a large pot with a tight-fitting lid, bring the 2 cups Water to a rolling boil over high heat. Add the 1 tsp Sea Salt to the water—this seasons the beans as they cook and enhances their natural sweetness.
Place the beans in a steamer basket, ensuring they’re in a single layer for even cooking. Cover the pot and steam for 5-7 minutes, checking at 5 minutes for doneness. The beans are ready when they’re bright green and tender-crisp—they should yield slightly when pierced with a fork but still retain a slight bite.
Step 3: Finish with Aromatic Seasonings
Once the beans are cooked, transfer them to a serving bowl. Drizzle with the 1 tbsp Extra-Virgin Olive Oil and sprinkle with the 0.5 tsp Freshly Ground Black Pepper. Toss gently to coat the beans evenly, ensuring every bite carries the rich, fruity notes of the oil.
Add the 1 tsp Lemon Zest and toss again. The zest brightens the dish, cutting through the richness of the oil with a burst of citrus aroma. This step elevates the beans from simple to extraordinary.
Step 4: Add Optional Garnishes for Extra Flavor
For a touch of heat, sprinkle the 0.25 tsp Red Pepper Flakes over the beans. The flakes add a subtle warmth that complements the sweetness of the beans without overpowering them. Stir gently to distribute the flakes evenly.
Finish by topping with the 2 tbsp Fresh Dill and the 0.25 cup Toasted Almond Slices. The dill lends a fresh, herbaceous note, while the almonds provide a satisfying crunch. These garnishes add texture and depth, making the dish feel complete and restaurant-worthy.
Serve immediately while the beans are still warm. The contrast of tender beans, crunchy almonds, and vibrant seasonings ensures every bite is dynamic and delicious.
Pro Tips For Making Steamed Beans
- Trim the ends: Snap off the stem ends and leave the tails on—this prevents stringy bits and keeps the beans looking neat. I learned this the hard way after picking fibers out of my teeth for hours.
- Use a steamer basket: Place beans in a single layer in a steamer basket over boiling water, not submerged. Sounds basic, but it stops them turning into sad, waterlogged sticks.
- Salt the water: Add about 1 teaspoon of sea salt to the boiling water before steaming—this seasons the beans from the inside out, not just on the surface.
- Shock in ice water: Plunge the beans into ice water immediately after steaming for 30 seconds to stop the cooking and lock in that bright green color. Yes, it’s an extra step, but it actually changes the outcome.
Essential Equipment for This Recipe
Steamer Basket Essentials
For perfect results, I recommend a stainless steel steamer basket that fits snugly in your pot. The OXO Good Grips model with foldable legs works in most standard pots and has heat-resistant handles. Look for one with at least 3-quart capacity to accommodate the beans in a single layer. 💡
Pot Requirements
A heavy-bottomed pot with a tight-fitting lid is crucial. I use my 5-quart All-Clad stainless steel pot—it distributes heat evenly and the clear lid lets me monitor the water level. Avoid nonstick pots as they can’t handle the high heat needed for proper steaming.
Water Level Control
Use a pot tall enough that the steamer basket sits at least 2 inches above the water. I measure by filling the pot with 2 cups water first, then placing the basket inside to check the clearance. The water should never touch the beans during cooking.
Timer and Thermometer
A simple kitchen timer is essential—I use my iPhone’s built-in timer set for 5 minutes. For precision, a instant-read thermometer can verify your water is at a full 212°F boil before adding the beans. This ensures consistent results every time.
Serving Tools
Have a large bowl ready for transferring the hot beans. I use tongs to lift them from the steamer—this prevents piercing the beans and losing their precious juices. A microplane is perfect for zesting the lemon directly over the serving bowl.
Optional Extras
For garnishing, keep a small cutting board and chef’s knife nearby for the fresh herbs. I also recommend a toaster oven for quickly toasting almond slices if you’re adding them as a topping. These small tools make the finishing touches effortless.
Nutrition Facts
Frequently Asked Questions
Can I use frozen beans instead of fresh?
Yes, but adjust the time to 8-10 minutes since frozen beans need slightly longer. Thaw them first and pat dry to prevent excess moisture from diluting the flavor.
Why do my beans turn dull after steaming?
Overcooking or not using enough water can cause this. Steam for only 5-7 minutes and keep the lid on tight. Adding 1 tsp salt to the water also helps maintain vibrant color.
What’s the best way to store leftovers?
Keep in an airtight container for up to 3-4 days. Reheat briefly in a steamer or with a splash of water in a pan to restore crispness.

- 6 Egg Cake Recipe with Oil: Light as Air With Buttery Moisture - October 4, 2026
- 4 Bean Casserole Recipe: One-Pan Heartiness With Smoky Paprika Depth - October 4, 2026
- 3-Ingredient Keto Mug Cake Recipe: Microwave Magic in 2 Minutes - October 4, 2026