
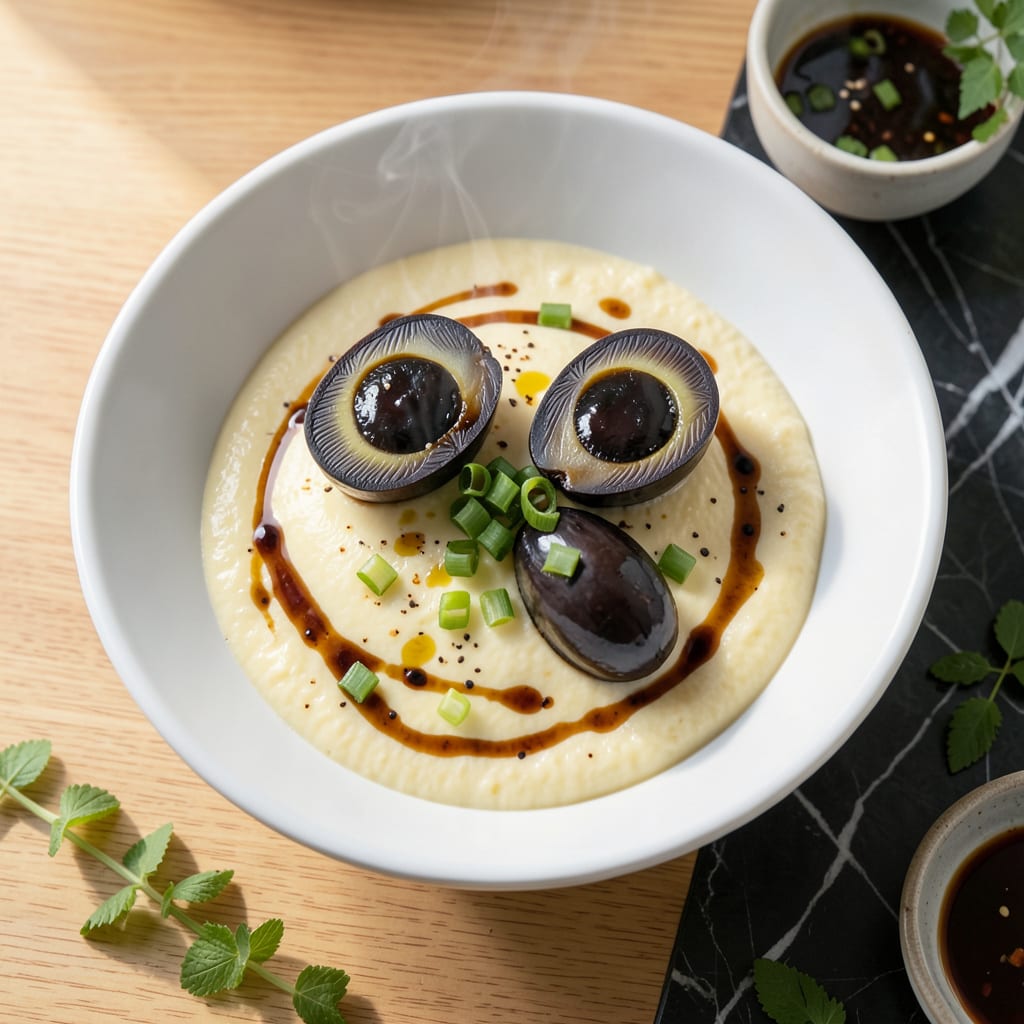
This dish transforms simple ingredients into a luxurious breakfast experience. The silky texture of steamed egg pairs perfectly with the rich, earthy depth of century egg.
What makes this special is the gentle steaming process that creates custard-like eggs every time. It’s a traditional Chinese preparation that feels indulgent yet remains surprisingly easy to master.
Ingredients for Steamed Egg with Century Egg
A handful of simple ingredients create this luxurious traditional Chinese breakfast dish.
| Ingredient | Amount | Notes |
|---|---|---|
| Large Eggs 🥚 | 6 whole | Room temperature preferred |
| Century Eggs 🥚 | 4 whole | Peeled and quartered |
| Water 💧 | 2 cups | For steaming mixture |
| Light Soy Sauce 🫒 | 2 tbsp | Low-sodium preferred |
| Sesame Oil 🫒 | 1 tsp | Toasted variety for aroma |
| Green Onions 🧅 | 3 whole | Thinly sliced for garnish |
| Fresh Ginger 🌿 | 1 tbsp | Minced or grated |
| Salt 🧂 | ½ tsp | Adjust to taste |
| White Pepper 🌶️ | ¼ tsp | Ground for subtle heat |
| Shaoxing Wine 🍶 | 1 tbsp | Optional for depth of flavor |
| Chicken Stock 🍲 | 1 cup | Low-sodium for balance |
| Neutral Oil 🫒 | 1 tsp | For greasing steaming dish |
The century eggs are non-negotiable—look for authentic Chinese brands at Asian markets like 99 Ranch or H Mart. They should have a dark, gelatinous exterior with a creamy, greenish yolk inside. Freshness matters less here since they’re preserved, but avoid any with cracked shells. The large eggs should be as fresh as possible for the silkiest texture once steamed.
No Shaoxing wine? Dry sherry works in a pinch. For a vegetarian option, swap chicken stock for mushroom or vegetable stock. Green onions can be replaced with chives if that’s what’s on hand. If you’re avoiding sesame oil, a drizzle of chili oil adds a different but equally delicious dimension.
The steamed egg mixture keeps well in the fridge for 2-3 days, but it’s best enjoyed fresh. Century eggs, once opened, should be consumed within 1 week. Store them in their original liquid in a sealed container.
Why You’ll Love This Recipe
- One-Bowl Wonder: I just crack the eggs, add water, and steam—no fancy prep or multiple pans to wash.
- Umami Bomb: The century egg’s salty richness pairs with the light soy and sesame oil for a deep, savory bite.
- Breakfast or Dinner: Honestly, it works as a quick morning protein boost or a light evening side with rice.
- Pocket-Friendly Protein: A few eggs and a century egg stretch far, feeding my family for less than a takeout meal.
Step-by-Step Instructions for Steamed Egg With Century Egg
This classic technique delivers custard-like texture with the rich, complex flavor of preserved eggs.
Step 1: Prepare the Steaming Mixture and Dish
Combine the 2 cups Water, 1 cup Chicken Stock, 2 tbsp Light Soy Sauce, 1 tbsp Shaoxing Wine, 0.5 tsp Salt, and 0.25 tsp White Pepper in a large bowl. Whisk thoroughly until the salt and pepper fully dissolve. This liquid forms the flavorful base that will infuse your dish during steaming.
Grease a shallow heatproof dish with the 1 tsp Neutral Oil, ensuring complete coverage of the bottom and sides. This prevents sticking and helps the finished dish release cleanly. I recommend a dish that’s approximately 8-9 inches in diameter to accommodate all the eggs comfortably.
Step 2: Arrange the Eggs for Steaming
Crack the 6 whole Large Eggs directly into the greased dish, spacing them evenly apart. The room temperature eggs will blend more smoothly into the hot liquid. Gently pour the prepared steaming mixture over the eggs, being careful not to disturb their placement.
Peel and quarter the 4 whole Century Eggs, arranging the pieces between the large eggs. The century eggs will soften slightly during steaming while contributing their distinctive pungent, umami-rich essence to the surrounding custard. The liquid should come about halfway up the eggs.
Step 3: Steam to Silky Perfection
Set up your steamer with water at a rolling boil. Place the dish inside, cover securely with a lid, and steam over medium-high heat for 12-15 minutes. The eggs are done when the whites are fully set but the yolks remain soft and jiggly, with the custard just beginning to pull away from the edges of the dish.
Check the water level in your steamer halfway through—add more boiling water if needed to prevent it from running dry. The gentle, consistent heat is crucial for achieving that signature silky texture without curdling.
Step 4: Finish and Garnish
Carefully remove the dish from the steamer and let it rest for 2-3 minutes. This brief pause allows the custard to set completely. Drizzle the 1 tsp Sesame Oil evenly over the surface, which adds a fragrant, nutty finish that complements the savory flavors.
Thinly slice the 3 whole Green Onions and scatter them across the dish. For an additional aromatic note, sprinkle the 1 tbsp Fresh Ginger (minced) over the top. The contrast of the bright green and golden custard makes for an appealing presentation that’s as beautiful as it is delicious.
Pro Tips For Making Steamed Egg With Century Egg
- Use Room-Temp Eggs: Crack your eggs into a bowl and let them sit for 10 minutes before adding water. I learned this the hard way—cold eggs straight from the fridge make the steamed egg texture uneven.
- Strain the Mixture: After beating the eggs and water together, strain through a fine-mesh sieve. Sounds fussy, but it removes those pesky egg strands and guarantees a silky-smooth texture.
- Skip Boiling Water: Steam over gently simmering water, not a rolling boil. After my first attempt turned into scrambled egg soup, I realized the heat needs to be low and steady for that perfect custard.
- Slice Century Egg Thin: Cut the century egg into small, even pieces and distribute them on top before steaming. My grandmother swore by this, and she was right: it spreads the flavor and looks way better than chunky, uneven bits.
Best Sauces and Condiments for These Flavors
Classic Soy-Ginger Sauce
Mix 2 tbsp light soy sauce with 1 tsp sesame oil and 1 tsp minced ginger. The soy adds saltiness that enhances the eggs’ natural umami, while the ginger provides a bright, zesty kick. I always have this combo ready for a quick drizzle. ✨
Chili Oil Drizzle
Warm 2 tbsp chili oil with 1 crushed garlic clove until fragrant. Let it cool slightly, then drizzle over the dish before serving. The heat cuts through the richness beautifully. I use Lao Gan Ma brand for consistent spice.
Pickled Garnish
Combine ¼ cup rice vinegar with 1 tsp sugar and a pinch of salt. Thinly slice 1 small red chili and let it pickle for 10 minutes. The tangy crunch contrasts perfectly with the creamy eggs.
Sesame-Garlic Paste
Toast 1 tbsp sesame seeds until golden, then grind with 1 garlic clove and 1 tsp sesame oil. Stir in ½ tsp sugar for balance. This nutty paste adds depth and texture to each bite. 💛
Scallion Oil
Heat ½ cup neutral oil until shimmering, then pour over ½ cup sliced green onions. Let steep 5 minutes before using. The aromatic oil infuses the dish with a subtle onion flavor.
Black Vinegar Dip
Whisk 2 tbsp Chinkiang black vinegar with 1 tsp honey and 1 tsp toasted sesame oil. The deep, malty vinegar complements the century eggs’ earthy notes wonderfully.
Nutrition Facts
Frequently Asked Questions
Why use room temperature eggs?
Room temperature eggs blend more smoothly with the liquid, creating a uniform custard texture. Cold eggs can cause the mixture to curdle during steaming.
Can I skip the Shaoxing wine?
Yes, dry sherry works as a substitute. For an alcohol-free version, add an extra ½ tsp soy sauce to maintain depth of flavor.
How do I know when it’s done?
The whites should be set but yolks still jiggly. The custard will pull slightly from the dish edges after 12-15 minutes of steaming.
What if my custard curdles?
Overheating or uneven steaming causes curdling. Keep heat at medium-high and check water levels frequently.

- 6 Egg Cake Recipe with Oil: Light as Air With Buttery Moisture - October 4, 2026
- 4 Bean Casserole Recipe: One-Pan Heartiness With Smoky Paprika Depth - October 4, 2026
- 3-Ingredient Keto Mug Cake Recipe: Microwave Magic in 2 Minutes - October 4, 2026