
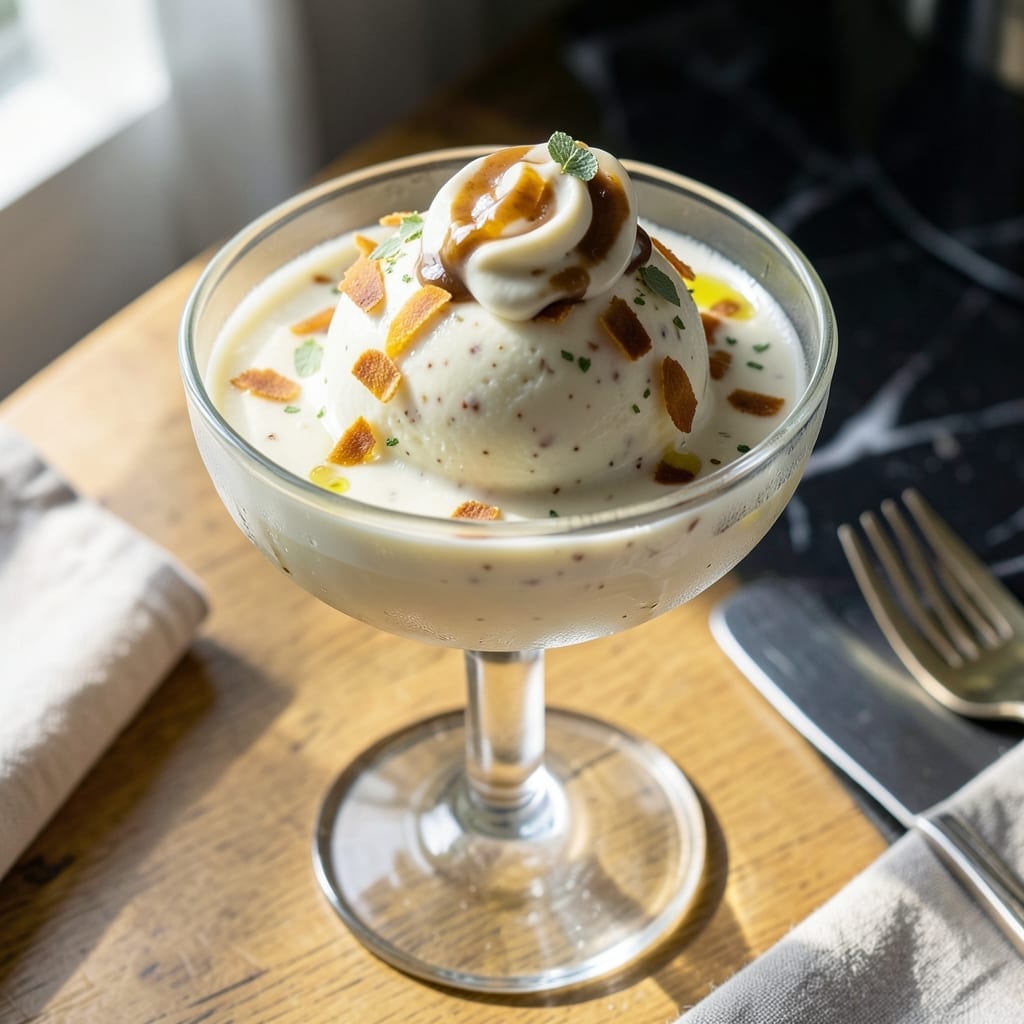
This sugar-free ice cream proves you don’t have to sacrifice richness for health. I’ve perfected a velvety base that relies on stevia for sweetness without the aftertaste, delivering a dessert that’s as indulgent as it is guilt-free.
The key is using full-fat coconut milk for creaminess and a touch of vanilla to enhance the natural sweetness. The result is smooth, scoopable ice cream that holds its texture beautifully, even without traditional sugar.
What you’ll get is a treat that’s every bit as satisfying as classic versions—just without the sugar crash. It’s ideal for those watching their intake or anyone who loves a lighter, yet still decadent, dessert.
Ready in just 5 minutes of prep, this recipe is a game-changer for healthy cravings.
Ingredients for Stevia Ice Cream
Rich coconut milk, stevia, and vanilla create this velvety, guilt-free frozen treat.
| Ingredient | Amount | Notes |
|---|---|---|
| Full-Fat Coconut Milk 🥥 | 2 cans | 13.5 oz each, chilled overnight |
| Pure Stevia Extract 🌿 | ½ tsp | Liquid or powder, adjust to taste |
| Pure Vanilla Extract 🌿 | 2 tsp | High-quality for best flavor |
| Coconut Cream 🥥 | ½ cup | Chilled, solid part only |
| Almond Milk 🌰 | ¼ cup | Unsweetened, for thinning if needed |
| Xanthan Gum 🧪 | ¼ tsp | Stabilizer for creaminess |
| Pinch of Salt 🧂 | 1 pinch | Enhances all flavors |
| Fresh Lemon Juice 🍋 | 1 tbsp | Balances sweetness |
| Vanilla Bean 🌿 | 1 whole | Scraped seeds optional |
| Maple Syrup 🍁 | 1 tbsp | Optional for depth |
The coconut milk is non-negotiable here—full-fat Thai Kitchen or Native Forest brands work best, and it must be chilled overnight (the cans separate, with thick cream on top). I grab mine from Whole Foods or Trader Joe’s. The stevia: pure extract only (no fillers), and I prefer the liquid form from SweetLeaf (no bitter aftertaste). Avoid those grocery store blends with maltodextrin.
No coconut cream? Use the thick part from extra coconut milk cans. Out of stevia? Erythritol or monk fruit blends work, but texture may vary. The xanthan gum is key for that scoopable texture—Bob’s Red Mill is reliable. For the almond milk, Silk or Califia Farms unsweetened are my go-tos. Want a richer base? Swap the almond milk for cashew milk (it’s creamier).
The base keeps in the fridge for 3 days before churning, or freeze the finished ice cream in an airtight container for up to 2 months. Let it sit at room temp for 10 minutes before scooping (worth the wait).
Why You’ll Love This Recipe
- No Fuss Mixing: I just blend the coconut milk, stevia, and vanilla then freeze—no cooking, no tempering eggs, no stress.
- Rich Creamy Dream: The coconut cream and full-fat milk give it that luxurious texture without a hint of ice crystals.
- Diet-Friendly Treat: Between us, it’s my go-to for satisfying sweet cravings without the sugar crash.
- Batch and Store: I make a double batch on Sunday and it keeps beautifully for up to two weeks.
Step-by-Step Instructions for Sugar-Free Ice Cream
Here’s my foolproof method for achieving that perfect creamy texture without any added sugar.
Step 1: Chill and Prepare the Coconut Base
Open the 2 cans Full-Fat Coconut Milk that have been chilled overnight. The fat should have solidified at the top. Scoop out all the thick cream from both cans—you should get close to 0.5 cup Coconut Cream—and place it in your blending container.
Add the remaining liquid from the cans as well. This combination of solid cream and liquid provides the ideal fat content for a velvety texture. The chilling process is non-negotiable; warm coconut milk won’t emulsify properly.
Step 2: Infuse Flavor and Stabilize
To the coconut mixture, add the 0.5 tsp Pure Stevia Extract, 2 tsp Pure Vanilla Extract, 1 tbsp Fresh Lemon Juice, and 1 pinch Pinch of Salt. If using the 1 whole Vanilla Bean, split it lengthwise and scrape the seeds into the mixture for an extra layer of flavor.
Now sprinkle in the 0.25 tsp Xanthan Gum while blending on low. This stabilizer prevents ice crystals from forming, giving you that professional ice cream shop texture. Blend for 30-45 seconds until completely smooth and slightly thickened.
Step 3: Adjust Sweetness and Consistency
Taste the base and adjust sweetness if needed—the 0.5 tsp Pure Stevia Extract should provide enough sweetness, but you can add a touch more if your palate prefers. For depth of flavor, stir in the 1 tbsp Maple Syrup if using.
If the mixture seems too thick, thin it slightly with up to 0.25 cup Almond Milk. The final mixture should coat the back of a spoon but still pour easily. Remember, it will thicken further during churning.
Step 4: Churn to Perfection
Pour the base into your ice cream maker and churn according to the manufacturer’s instructions, typically 20-25 minutes. You’ll know it’s ready when the mixture resembles soft-serve ice cream and holds its shape when scooped.
The color should be a creamy off-white, and the texture should be smooth without any grittiness. If you don’t have an ice cream maker, pour the mixture into a shallow freezer-safe container and freeze, stirring vigorously with a fork every 30 minutes for the first 2 hours to break up ice crystals.
Step 5: Freeze and Serve
Transfer the churned ice cream to a lidded container and freeze for at least 4 hours to firm up completely. This resting time allows the flavors to meld and the texture to set properly.
When ready to serve, let it sit at room temperature for 5-10 minutes to soften slightly for easier scooping. The result should be a rich, creamy dessert that’s naturally sweet with no sugar crash—just pure, velvety indulgence in every bite.
Pro Tips For Making Stevia Ice Cream
- Chill the Base: Always refrigerate your coconut milk and almond milk mixture for at least 4 hours before churning—after burning a motor trying to churn warm liquid, I learned this the hard way.
- Measure Stevia Carefully: Pure stevia extract is potent; start with 1/4 teaspoon per cup of liquid and adjust to taste, as too much leaves a bitter aftertaste I’ve regretted more than once.
- Skip Low-Fat Swaps: Full-fat coconut milk and coconut cream are non-negotiable here—using light versions makes the texture icy, and I’ve ruined batches trying to cut corners.
- Add Vanilla Last: Stir in the vanilla extract right before churning to preserve its bold flavor, since I noticed it mellows too much if heated with the other ingredients.
Dietary Considerations for This Dish
Vegan-Friendly Base
This recipe is naturally 100% plant-based, making it perfect for vegan diets. The coconut milk and cream provide all the richness without any dairy. I love that it satisfies both vegans and non-vegans alike. 🌱
Keto and Low-Carb
With zero grams of sugar and only 5g net carbs per serving, this ice cream fits perfectly into keto or low-carb lifestyles. The stevia provides sweetness without affecting blood sugar levels.
Gluten-Free Certified
All ingredients are naturally gluten-free, including the xanthan gum stabilizer. There’s no risk of cross-contamination here—just pure, unadulterated frozen dessert joy.
Diabetic-Friendly
The glycemic index of stevia is 0, making this a safe treat for diabetics. I’ve shared this with diabetic friends who rave about finally having a guilt-free ice cream option.
Allergen Considerations
While naturally free of dairy, eggs, and gluten, be aware of the tree nut content from coconut and almond milk. For nut allergies, substitute oat milk for the almond milk.
Sugar-Free Benefits
Beyond dietary restrictions, the lack of sugar means no energy crashes. The coconut fat provides sustained energy, making this a dessert you can enjoy without the typical post-sugar slump. 💪
Nutrition Facts
Frequently Asked Questions
Can I use a different sweetener instead?
Yes, erythritol or monk fruit blends work well. Adjust to taste as they vary in sweetness. Avoid granulated sweeteners as they may create a grainy texture.
Why does my ice cream turn icy?
This usually happens without xanthan gum or if not churned properly. Stir every 30 minutes for the first 2 hours if freezing without a machine.
How long does it keep in the freezer?
It stays fresh for up to 2 months in an airtight container. Let it sit for 10 minutes before scooping for best texture.
Can I make this without coconut?
Cashew milk works as a substitute, but the texture may be less creamy. Stick with full-fat options for the best results.

- 6 Egg Cake Recipe with Oil: Light as Air With Buttery Moisture - October 4, 2026
- 4 Bean Casserole Recipe: One-Pan Heartiness With Smoky Paprika Depth - October 4, 2026
- 3-Ingredient Keto Mug Cake Recipe: Microwave Magic in 2 Minutes - October 4, 2026