
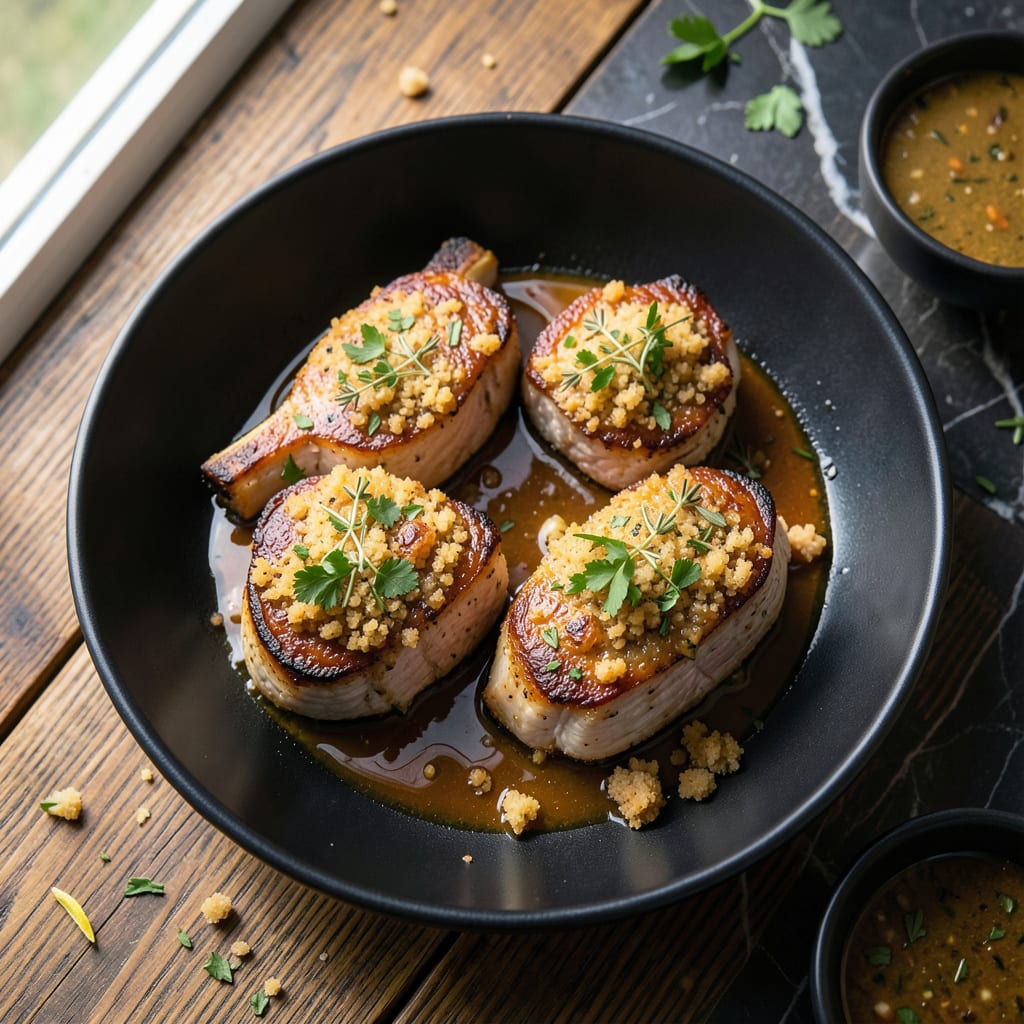
This oven-baked method guarantees juicy pork chops with a golden herb breadcrumb filling that stays perfectly moist.
By stuffing thick-cut chops with a savory mixture and searing before baking, you lock in flavor while achieving a crispy exterior and tender interior every time.
Ingredients for Stuffed Pork Chops Recipe Oven
Thick-cut bone-in pork chops and a savory herb breadcrumb filling deliver restaurant-quality results at home.
| Ingredient | Amount | Notes |
|---|---|---|
| Bone-In Pork Chops 🥩 | 4 whole | Thick-cut, about 1.5 inches |
| Olive Oil 🫒 | 2 tbsp | Divided for searing and filling |
| Unsalted Butter 🧈 | 2 tbsp | Melted for breadcrumb mixture |
| Panko Breadcrumbs 🍞 | 1 cup | Light and crispy variety |
| Fresh Parsley 🌿 | ¼ cup | Finely chopped, flat-leaf preferred |
| Fresh Thyme Leaves 🍃 | 1 tbsp | Stems removed, finely minced |
| Garlic Cloves 🧄 | 3 cloves | Minced, for breadcrumb filling |
| Shallot 🧅 | 1 whole | Finely diced, about 3 tbsp |
| Dijon Mustard 🟡 | 1 tbsp | For binding breadcrumb mixture |
| Dry White Wine 🍷 | ¼ cup | For deglazing pan, optional |
| Chicken Broth 🥣 | ¼ cup | Low-sodium preferred for pan sauce |
| Kosher Salt 🧂 | 1 ½ tsp | Divided for seasoning chops and filling |
| Freshly Ground Black Pepper 🌶️ | 1 tsp | Divided for seasoning |
| Fresh Sage Leaves 🍃 | 1 tbsp | Finely chopped for herb blend |
| Lemon Zest 🍋 | 1 tsp | For brightness in filling |
[recipeingredientscaler]
The pork chops must be thick-cut, bone-in—thin chops dry out and won’t hold the stuffing. Source from a reputable butcher or the meat counter at Whole Foods for consistent quality. Look for cuts with even marbling and a bright pink hue. Bone-in adds flavor and keeps the meat juicy. If using boneless, increase thickness to 2 inches to prevent overcooking during baking.
No white wine? Additional chicken broth works in a pinch. Shallots can be swapped for finely diced yellow onion at the same volume. For the herbs, dried at one-third the amount is acceptable, but fresh provides superior aroma. Panko is non-negotiable—regular breadcrumbs lack the necessary crispness. Gluten-free panko from brands like Kikkoman works if needed.
Prep the filling just before stuffing to maintain texture. Stuffed chops bake best immediately after assembly—don’t let them sit or the breadcrumbs absorb too much moisture. Leftovers keep 3-4 days refrigerated, though the breadcrumb topping softens. Reheat gently in a 350°F oven to crisp the exterior.
Why You’ll Love This Recipe
- One Pan Wonder: I love that everything cooks together in the oven—just stuff, bake, and serve.
- Crispy Perfection: The panko and butter create this golden, crunchy topping that’s honestly irresistible.
- Dinner Party Star: It feels fancy enough for guests but is actually low-effort. Yes, even on a Tuesday night.
- Leftovers Win: The flavors taste just as good the next day, and the chops reheat beautifully.
Step-by-Step Instructions for Stuffed Pork Chops Oven
Master the technique for perfectly juicy centers with a crispy herb breadcrumb filling every time.
Step 1: Create the Herb Breadcrumb Filling
In a medium bowl, combine the 1 cup Panko Breadcrumbs, 0.25 cup Fresh Parsley, 1 tbsp Fresh Thyme Leaves, 1 tbsp Fresh Sage Leaves, and 1 tsp Lemon Zest. Stir in the 2 tbsp Unsalted Butter until the breadcrumbs are evenly coated and the mixture resembles wet sand.
Add the 3 cloves Garlic Cloves, 1 whole Shallot, and 1 tbsp Dijon Mustard to the breadcrumb mixture. Season with ½ tsp Kosher Salt and ½ tsp Freshly Ground Black Pepper. The filling should hold together when pressed but remain crumbly—this texture ensures it stays moist during baking.
Step 2: Prepare and Stuff the Pork Chops
Pat the 4 whole Bone-In Pork Chops dry with paper towels. Using a sharp knife, cut a deep pocket horizontally into the thickest part of each chop, being careful not to cut all the way through. This creates a cavity for the filling while keeping the chop intact.
Season the chops generously with the remaining 1 tsp Kosher Salt and ½ tsp Freshly Ground Black Pepper, rubbing it into all surfaces. Spoon the breadcrumb filling into each pocket, pressing gently to pack it in without overfilling. Secure with toothpicks if needed to keep the filling in place during cooking.
Step 3: Sear the Chops for Maximum Flavor
Heat 1 tbsp Olive Oil in a large oven-safe skillet over medium-high heat until shimmering. Add the stuffed chops and sear for 2-3 minutes per side until the exterior is golden brown and a crust begins to form. The searing step locks in juices and adds depth to the pan sauce.
Watch for the edges of the breadcrumb filling to start turning golden—this indicates the filling is beginning to crisp. Avoid moving the chops too much during searing to ensure a good crust forms. Transfer the skillet to a 375°F preheated oven once both sides are seared.
Step 4: Finish in the Oven and Make the Pan Sauce
Bake the chops in the oven for 12-15 minutes or until the internal temperature reaches 145°F. The filling should be golden and bubbling at the edges, and the pork should feel firm but still slightly springy to the touch.
Remove the chops to a plate and tent with foil to rest. Place the skillet on the stovetop over medium heat. Add the remaining 1 tbsp Olive Oil, then deglaze with 0.25 cup Dry White Wine and 0.25 cup Chicken Broth, scraping up any browned bits. Simmer for 2-3 minutes until slightly reduced, then pour over the chops before serving.
Pro Tips For Making Stuffed Pork Chops Recipe Oven
- Sear First, Then Stuff: Brown the pork chops in olive oil and butter for 2-3 minutes per side before transferring to the oven—this locks in juices and prevents the stuffing from making the meat soggy.
- Dry Your Chops: Pat the bone-in pork chops completely dry with paper towels before seasoning. I learned this the hard way after my first few attempts ended up steamed instead of crispy.
- Skip Packed Breadcrumbs: Use fresh panko instead of pre-seasoned or compressed breadcrumbs for the stuffing—it holds moisture better and gives that perfect crunch without turning to mush.
- Rest Before Slicing: Let the stuffed chops rest for at least 5 minutes after baking, tented with foil. Sounds tedious, but it keeps all those delicious juices from running out onto the plate.
Pro Cooking Tips for Great stuffed pork chops recipe oven
Perfect Pocket Cutting
Use a sharp boning knife to cut the pocket, starting from the fat cap side. Angle the blade slightly upward to create a wide cavity without piercing the opposite side. I aim for a 3-inch deep pocket in 1.5-inch thick chops for maximum filling capacity. 💡
Filling Texture Trick
Toast the Panko Breadcrumbs in a dry pan for 2 minutes before mixing with butter. This prevents the stuffing from becoming soggy during baking. The filling should clump slightly when pressed but still feel crumbly.
Searing Temperature Control
Your pan must be ripping hot before adding the chops. I test by flicking water droplets—they should dance and evaporate instantly. Use medium-high heat and don’t crowd the pan to avoid steaming the chops.
Oven Transition Timing
Move the skillet to the 375°F oven immediately after searing both sides. The residual heat continues cooking while the oven finishes the job. This method ensures the breadcrumb topping crisps properly. 🔥
Resting Period Importance
Let the chops rest for 5-10 minutes after baking. The internal temperature will rise to 150°F while juices redistribute. Skipping this step means all that delicious moisture will end up on your cutting board.
Pan Sauce Pro Tip
For extra richness, whisk 1 tbsp cold butter into the pan sauce at the end. This creates a silky finish that complements the herb filling beautifully. I always use a wooden spoon to scrape up every browned bit.
Nutrition Facts
Frequently Asked Questions
How thick should pork chops be for stuffing?
Use 1.5-inch thick bone-in chops for best results. Thin cuts dry out and won’t hold the filling properly.
Can I prepare these ahead of time?
Avoid stuffing chops until ready to cook. The breadcrumbs absorb moisture and become soggy if left to sit.
What’s the best internal temperature?
Remove from oven at 145°F. The temperature will rise to 150°F during resting, ensuring juicy meat.
Why did my filling turn out mushy?
Overfilling or skipping the searing step can cause this. Toast the Panko first and pack lightly.

- 6 Egg Cake Recipe with Oil: Light as Air With Buttery Moisture - October 4, 2026
- 4 Bean Casserole Recipe: One-Pan Heartiness With Smoky Paprika Depth - October 4, 2026
- 3-Ingredient Keto Mug Cake Recipe: Microwave Magic in 2 Minutes - October 4, 2026