
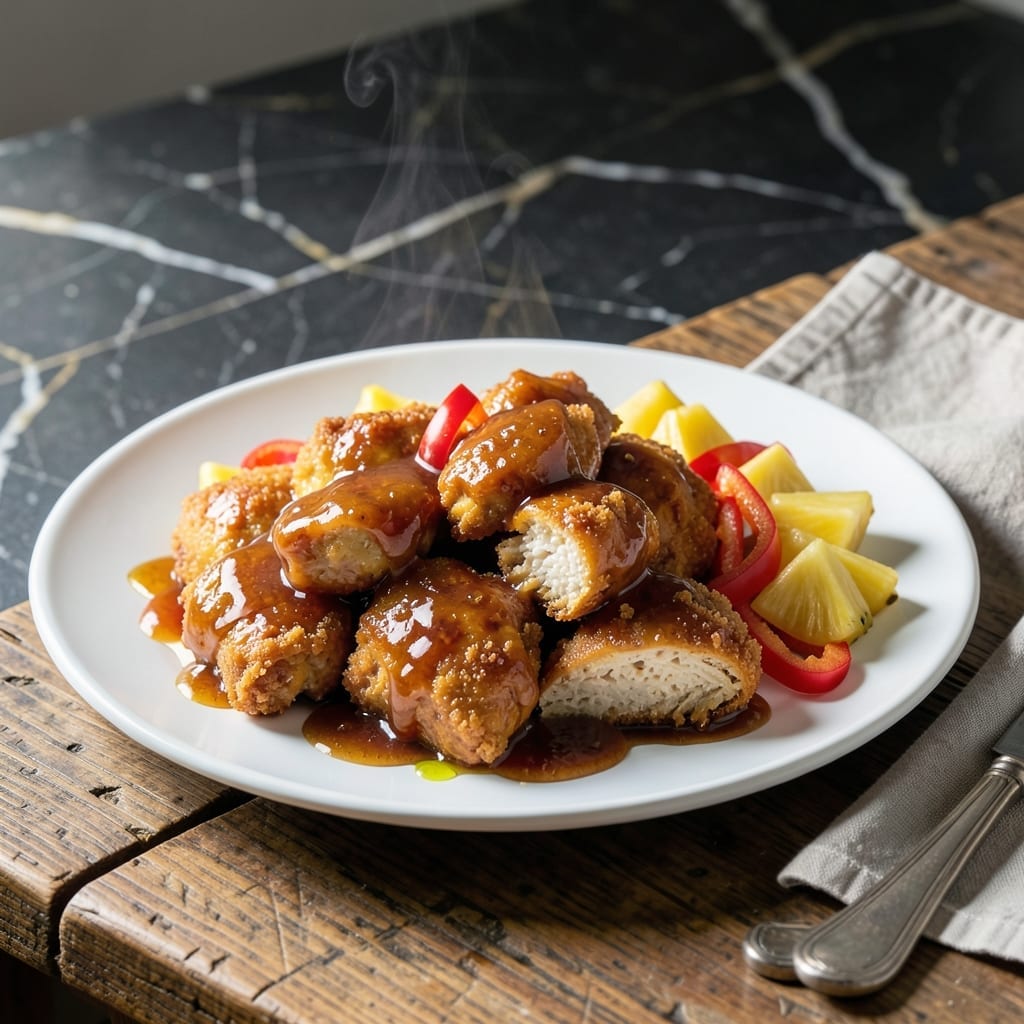
This recipe delivers crispy chicken pieces coated in a vibrant sweet and sour glaze that balances tangy and sweet flavors perfectly.
I developed this method to ensure the chicken stays crispy even after being tossed in the sauce, using a two-step frying process for maximum texture.
The sauce comes together quickly with pineapple juice, vinegar, and brown sugar, creating a glossy finish that clings to every bite.
Serve this over steamed rice for a complete meal that’s sure to satisfy any craving for takeout-style flavors at home.
Ingredients for Sweet and Sour Chicken
Crispy chicken meets tangy glaze with pantry staples and fresh veggies for takeout flavor at home.
| Ingredient | Amount | Notes |
|---|---|---|
| Boneless Chicken Breast 🍗 | 1 ½ lb | Cut into 1-inch pieces |
| Cornstarch 🌾 | ½ cup | For crispy coating |
| All-Purpose Flour 🌾 | ½ cup | Lightly seasoned for dredging |
| Large Eggs 🥚 | 2 whole | Beaten for egg wash |
| Pineapple Juice 🍍 | 1 cup | Unsweetened, for sauce base |
| White Vinegar 💧 | ¼ cup | Distilled or apple cider |
| Brown Sugar 🧈 | ½ cup | Light or dark, packed |
| Ketchup 🍅 | ¼ cup | For tangy depth |
| Soy Sauce 🫒 | 2 tbsp | Low-sodium preferred |
| Garlic Cloves 🧄 | 3 cloves | Minced for sauce |
| Fresh Ginger 🌿 | 1 tbsp | Grated, for zing |
| Vegetable Oil 🫒 | 2 cups | For deep frying |
| Red Bell Pepper 🌶️ | 1 whole | Diced, for color |
| Green Bell Pepper 🌶️ | 1 whole | Diced, for crunch |
| Salt 🧂 | 1 tsp | Kosher or sea salt |
The chicken texture hinges on the two-step frying. Boneless, skinless chicken breast stays juicy when cut into even pieces—about 1-inch cubes. Cornstarch in the coating is non-negotiable for that shatteringly crisp crust. For oil, peanut or vegetable oil handles high heat best. I source my chicken from Whole Foods for consistent quality, but any good supermarket brand works.
Short on pineapple juice? Orange juice with a splash of lemon mimics the tang. No fresh ginger? Ground ginger at one-third the amount works in a pinch. The ketchup can be swapped for tomato paste thinned with water, but the flavor won’t be identical. For gluten-free, rice flour instead of all-purpose keeps the coating light and crispy. Skip the bell peppers if you prefer, but they add a nice fresh contrast.
Fry the chicken in batches—overcrowding lowers the oil temp and makes it soggy. The sauce keeps 3-4 days in the fridge, but the chicken is best fresh. Leftover chicken reheats in a 400°F oven for 10-12 minutes to restore some crispiness. Always bring oil to 350°F before frying for optimal texture.
Why You’ll Love This Recipe
- One Bowl Mix: I toss the chicken in cornstarch and flour, dip it in egg, and fry—no fancy prep or extra dishes.
- Tangy Sweet Bite: That pineapple juice in the sauce gives it a bright, fruity punch that cuts through the crispy coating.
- Weeknight Hero: Between us, it’s my go-to when I need something the kids will actually eat without complaints.
- Stretches Far: A batch lasts us two nights with leftovers tasting just as good reheated in the air fryer.
Step-by-Step Instructions for Sweet and Sour Chicken
This method ensures ultra-crispy chicken that stays crunchy even after coating in the tangy sauce.
Step 1: Prep and Coat the Chicken
Cut the 1.5 lb Boneless Chicken Breast into 1-inch pieces and pat dry with paper towels. This removes excess moisture so the coating adheres properly. Season the chicken with the 1 tsp Salt—this enhances flavor in every bite.
Set up a breading station with three shallow bowls. In the first, whisk the 2 whole Large Eggs until smooth. In the second, combine the 0.5 cup All-Purpose Flour and 0.5 cup Cornstarch. The cornstarch is what creates that ultra-crispy texture we’re after.
Dip each piece of chicken into the beaten egg, letting excess drip off, then dredge in the flour-cornstarch mixture. Press gently to ensure an even coating. Place the coated pieces on a plate and let them rest for 10 minutes—this helps the coating set before frying.
Step 2: Fry to Golden Perfection
Heat the 2 cups Vegetable Oil in a deep skillet or Dutch oven over medium-high heat until it reaches 350°F. To test, drop in a pinch of the flour mixture—if it sizzles immediately, the oil is ready.
Working in batches to avoid crowding, carefully add the chicken pieces to the hot oil. Fry for 4-5 minutes per side until deep golden brown and crispy. The internal temperature should reach 165°F.
Use a slotted spoon to transfer the fried chicken to a wire rack set over a paper towel-lined baking sheet. This allows air to circulate, keeping the chicken crispy while you finish frying the remaining batches.
Step 3: Make the Sweet and Sour Sauce
In a separate saucepan, combine the 1 cup Pineapple Juice, 0.25 cup White Vinegar, 0.5 cup Brown Sugar, 0.25 cup Ketchup, and 2 tbsp Soy Sauce. Stir well and bring to a gentle simmer over medium heat.
Add the 3 cloves Garlic Cloves (minced) and 1 tbsp Fresh Ginger (grated). Simmer for 5 minutes until the sauce thickens slightly and the flavors meld. Stir in the diced Red Bell Pepper and Green Bell Pepper, then cook for another 2-3 minutes until the peppers soften slightly but retain a bit of crunch.
Step 4: Combine and Serve
Once all the chicken is fried, add it to the saucepan with the sweet and sour sauce. Gently toss to coat each piece evenly. The sauce should cling to the crispy chicken without making it soggy.
Transfer to a serving platter and let it sit for 2-3 minutes to allow the flavors to meld. Serve immediately while the chicken is still crispy. The contrast of the tangy, slightly sweet sauce with the crunchy chicken is what makes this dish irresistible.
Pro Tips For Making Sweet And Sour Chicken
- Velouté the Chicken: Cut the boneless chicken breast into 1-inch cubes and velvet them by marinating in a mix of 1 egg, 1 tbsp cornstarch, and 1 tbsp pineapple juice for 20 minutes—this keeps the meat impossibly tender during frying.
- Double Fry for Crisp: Fry the coated chicken once at 350°F for 3 minutes, rest it, then fry again at 375°F for 2 minutes. I learned this the hard way—single frying leaves the coating soggy under the sauce.
- Skip the Overcrowding: Fry in small batches with at least an inch between pieces. After burning three batches, I finally figured out that crowding drops the oil temp and turns the flour coating into a greasy sponge.
- Use Fresh Pineapple Juice: Bottled juice works, but fresh pineapple juice from the can of chunks you’re already using adds a brighter, more authentic sweetness—sounds small, but it actually changes the outcome.
Serving Suggestions for This sweet and sour chicken
Plating Ideas
Serve the crispy chicken over a bed of steamed jasmine rice in a shallow bowl so the sauce pools at the bottom. I use 2 cups cooked rice per serving for perfect proportion. The white rice makes the vibrant sauce colors pop beautifully. 🥗
Garnish Tips
Sprinkle thinly sliced green onions or toasted sesame seeds over the top for contrast. A few pineapple chunks add freshness and reinforce the flavor profile. Always garnish just before serving to maintain the chicken’s crispiness.
Side Pairings
Steamed broccoli florets or snap peas provide a light, crunchy counterpoint. For a heartier meal, add egg rolls or spring rolls. I prefer serving with cucumber salad for a refreshing contrast to the rich sauce.
Family Style
Present everything on a large platter with the chicken and sauce in the center, surrounded by rice and vegetables. This encourages sharing and lets everyone customize their plate. Warm fortune cookies make a fun dessert to complete the meal. 💛
Sauce Serving
For those who love extra sauce, serve additional sweet and sour in a small ramekin or gravy boat. I keep a 1:1 ratio of extra sauce to chicken for dipping. This satisfies both lightly coated and fully sauced preferences.
Nutrition Facts
Frequently Asked Questions
Can I bake the chicken instead of frying?
Yes, bake at 400°F for 20-25 minutes, flipping halfway. Toss in 1 tbsp oil first for crispiness. It won’t be as crispy as frying but still delicious.
How do I keep the chicken crispy after adding sauce?
Fry the chicken first, then toss in sauce right before serving. The two-step frying method helps maintain texture. Avoid letting it sit in sauce too long.
Can I use chicken thighs instead of breast?
Thighs stay juicier. Use 1.5 lb boneless thighs and follow the same steps. Their higher fat content adds extra flavor.
How long can I store leftovers?
Store in an airtight container in the fridge for up to 3 days. Reheat in a 400°F oven for 10-12 minutes to restore crispiness.

- 6 Egg Cake Recipe with Oil: Light as Air With Buttery Moisture - October 4, 2026
- 4 Bean Casserole Recipe: One-Pan Heartiness With Smoky Paprika Depth - October 4, 2026
- 3-Ingredient Keto Mug Cake Recipe: Microwave Magic in 2 Minutes - October 4, 2026