
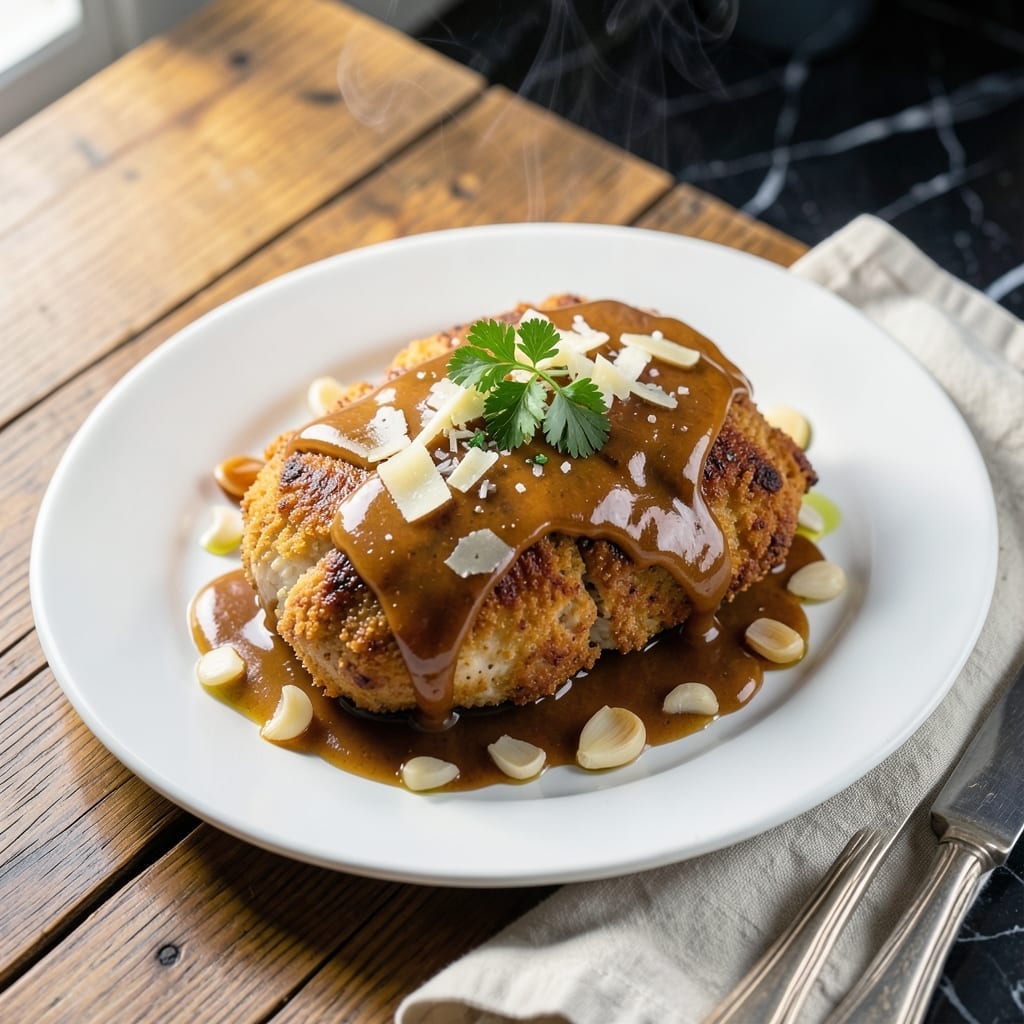
I’ve recreated that restaurant-quality garlic parmesan chicken you’ve come to love from Sweet Baby Ray’s—right in your own kitchen. This skillet version delivers the same bold flavors with minimal effort.
The secret lies in a simple pan sauce that combines creamy parmesan with aromatic garlic, then coats the chicken in a rich, golden glaze. It’s a foolproof method that guarantees tender, juicy meat every time.
You’ll end up with chicken so flavorful and satisfying that no one will believe it didn’t come from a pro. The sauce clings perfectly to each bite, making every mouthful a taste of comfort.
Ready in under 30 minutes, this dish brings the takeout experience home without the wait.
Ingredients for Sweet Baby Ray’s Garlic Parmesan Chicken
Pantry staples meet deli counter finds for this skillet classic with bold flavor.
| Ingredient | Amount | Notes |
|---|---|---|
| Boneless Skinless Chicken Breasts 🍗 | 1 ½ lb | Pounded to even thickness |
| All-Purpose Flour 🌾 | ½ cup | For dredging chicken |
| Salt 🧂 | 1 tsp | Divided, kosher preferred |
| Black Pepper 🌶️ | ½ tsp | Freshly ground, divided |
| Garlic Cloves 🧄 | 6 cloves | Minced, about 2 tbsp |
| Unsalted Butter 🧈 | 4 tbsp | Divided for cooking and sauce |
| Chicken Broth 💧 | ½ cup | Low-sodium preferred |
| Heavy Cream 🥛 | ½ cup | Full-fat for creaminess |
| Parmesan Cheese 🧀 | ¾ cup | Freshly grated, high-quality |
| Fresh Parsley 🌿 | 2 tbsp | Chopped, for garnish |
| Olive Oil 🫒 | 1 tbsp | For searing chicken |
| Dried Oregano 🍃 | ½ tsp | For depth in pan sauce |
The Parmesan is non-negotiable here—grab a wedge from the deli counter (the good stuff, not the pre-grated kind) and grate it fresh. It melts smoother and tastes infinitely better. For the chicken, uniform thickness is key to even cooking. I always pound mine to about 3/4-inch (worth the extra minute). Most grocery stores carry Sweet Baby Ray’s products, but you won’t need their sauce for this copycat.
No heavy cream? Whole milk with a pat of butter works in a pinch. Fresh out of parsley? Dried at half the amount is fine. The garlic can be from a jar if you’re in a real time crunch (but fresh is better). Want more depth? Add a pinch of red pepper flakes. The broth can be swapped for water, but the chicken stock adds richness you’ll notice.
Leftovers keep beautifully—actually taste better the next day. Store in an airtight container for up to 4 days in the fridge. Doesn’t freeze as well (the sauce separates), but you can prep the chicken and sauce separately ahead of time (don’t combine until serving).
Why You’ll Love This Recipe
- One Pan Wonder: I love that everything cooks together—just sear the chicken, toss in garlic, and let the Sweet Baby Ray’s sauce do the work.
- Garlic Lovers Dream: The fresh garlic cloves and parmesan create this rich, savory crust that’s honestly hard to resist.
- Weeknight Hero: Between us, this Recipe is my go-to for busy evenings when I need dinner fast but still crave restaurant-quality flavor.
- Budget Friendly: Boneless chicken breasts stretch far, and the simple pantry staples like flour and salt keep costs low without sacrificing taste.
Step-by-Step Instructions for Garlic Parmesan Chicken
This copycat method delivers that signature creamy, garlicky flavor with crispy chicken every time.
Step 1: Prep and Season the Chicken
Pound the 1.5 lb boneless skinless chicken breasts to an even ½-inch thickness using a meat mallet. This ensures even cooking and prevents dry spots. Season both sides generously with ½ tsp salt and ¼ tsp black pepper, pressing the seasoning into the meat so it adheres well.
Place the 0.5 cup all-purpose flour in a shallow dish and mix in the remaining ½ tsp salt and ¼ tsp black pepper. Dredge each breast in the flour, shaking off excess. Here’s the thing—this light coating creates the perfect crispy base for the sauce to cling to later.
Step 2: Sear the Chicken to Golden Perfection
Heat 1 tbsp olive oil and 2 tbsp unsalted butter in a large skillet over medium-high heat until the butter foams. Add the chicken and cook for 4-5 minutes per side until golden brown and crispy. You’ll know it’s ready to flip when it releases easily from the pan.
Don’t crowd the pan—cook in batches if necessary to avoid steaming the chicken. Transfer the cooked chicken to a plate and tent with foil to keep warm. The crispy coating you’ve created will soften slightly but still hold up to the rich sauce.
Step 3: Build the Garlic Parmesan Sauce
In the same skillet, reduce heat to medium and add the remaining 2 tbsp unsalted butter. Add the 6 cloves minced garlic cloves and cook for 30 seconds until fragrant—don’t let it brown. Stir in the 0.5 tsp dried oregano and pour in 0.5 cup chicken broth, scraping up all the browned bits from the bottom of the pan.
Let the broth simmer for 2-3 minutes until reduced by half. Then stir in the 0.5 cup heavy cream and 0.75 cup parmesan cheese. Cook for 2-3 minutes until the sauce thickens and the cheese melts completely. The sauce should coat the back of a spoon with a velvety texture.
Step 4: Finish and Garnish
Return the chicken to the skillet and spoon the sauce over each breast. Simmer for 2-3 minutes to heat through and allow the flavors to meld. The chicken should be fully cooked to an internal temperature of 165°F.
Transfer to serving plates and garnish with 2 tbsp chopped fresh parsley. The parsley adds a pop of color and freshness that balances the richness of the sauce. Serve immediately while the sauce is still creamy and the chicken is at its peak tenderness.
Pro Tips For Making Sweet Baby Ray’S Garlic Parmesan Chicken
- Pound the Chicken: Use a meat mallet to even out the thickness to ½ inch—this guarantees even cooking and prevents dry, overdone edges while the center finishes.
- Mince Garlic Fine: After burning garlic in this recipe twice, I now mince it almost to a paste so it distributes evenly in the sauce without bitter, charred bits.
- Skip Cold Chicken: Let the breasts sit at room temperature for 15-20 minutes before cooking—I learned this the hard way when my first batch stayed raw in the middle while the outside burned.
- Double Dredge Flour: Coat the chicken in flour, shake off the excess, then dip in egg wash and flour again for that extra-crispy crust that holds up to the garlic parmesan sauce.
Make-Ahead Tips for This Recipe
Prep Chicken Ahead
Pound and season the 1.5 lb chicken breasts up to 24 hours in advance. Store in an airtight container in the fridge. This saves time and lets the salt penetrate deeper for more flavorful meat. 💡
Sauce Pre-Mixing
Combine the 0.5 cup chicken broth and 0.5 cup heavy cream in a jar the night before. Shake well and refrigerate. The oregano will infuse into the liquid overnight, enhancing the sauce’s depth.
Day-Of Efficiency
Mince the 6 garlic cloves and chop the 2 tbsp parsley first thing in the morning. Store separately in small containers. This small step makes the final cooking process seamless and stress-free.
Partial Cooking
Sear the chicken completely, then cool and refrigerate for up to 24 hours. When ready to serve, simply reheat in the pan with the sauce for 5-7 minutes until bubbly and 165°F.
Sauce Storage Tip
Make the entire sauce ahead and store in the fridge for up to 2 days. Reheat gently over medium-low heat, stirring constantly. Add a splash of broth if it thickens too much during storage.
Final Assembly
For best results, combine cooked chicken with sauce just before serving. This prevents the coating from becoming soggy. The flavors will still meld beautifully during the brief reheating. 🔥
Nutrition Facts
Frequently Asked Questions
Can I use chicken thighs instead of breasts?
Yes, bone-in or boneless thighs work great. They stay juicier and can handle longer cooking. Reduce searing time to 3-4 minutes per side since they cook faster than breasts.
Why is my sauce too thin?
Simmer it longer over medium heat until it thickens. If needed, mix 1 tsp cornstarch with 1 tbsp cold water, stir into sauce, and cook for 1-2 minutes.
Can I make this dairy-free?
Substitute the butter with olive oil, heavy cream with coconut cream, and parmesan with nutritional yeast. The flavor will differ slightly but still be delicious.
How do I store leftovers?
Keep in an airtight container in the fridge for up to 4 days. Reheat gently on the stove with a splash of broth to restore creaminess.

- 6 Egg Cake Recipe with Oil: Light as Air With Buttery Moisture - October 4, 2026
- 4 Bean Casserole Recipe: One-Pan Heartiness With Smoky Paprika Depth - October 4, 2026
- 3-Ingredient Keto Mug Cake Recipe: Microwave Magic in 2 Minutes - October 4, 2026