
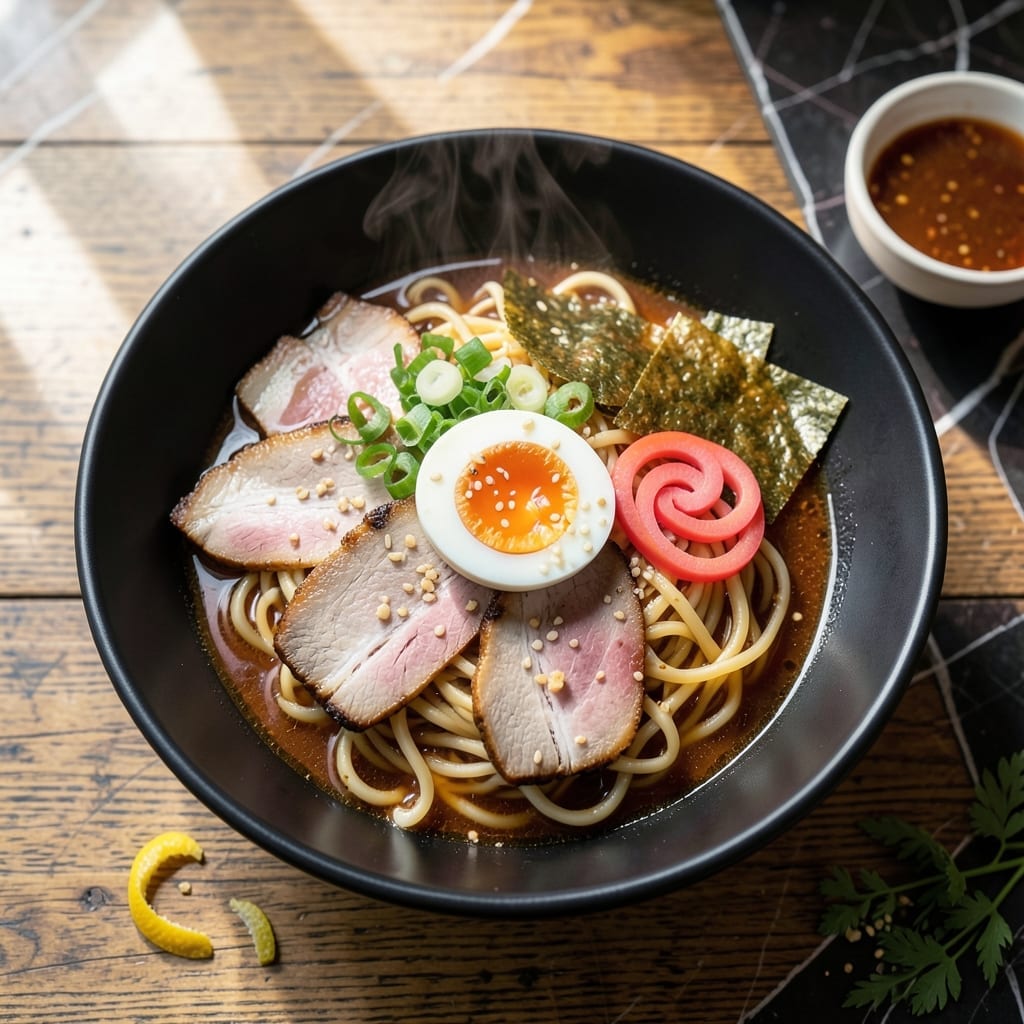
This tare is the soul of authentic ramen, delivering a concentrated umami punch that transforms simple broth into restaurant-quality bowls.
With just a handful of pantry staples and 10 minutes of simmering, you create a rich, balanced base that works with any ramen style. The key is layering soy sauce, mirin, and aromatics for depth.
What you get is a versatile seasoning paste that elevates instant noodles or homemade broths. Store in the fridge for up to 2 weeks.
Use 1 tablespoon per bowl of ramen, adjusting to taste for perfect seasoning every time.
Ingredients for Tare Recipe Ramen
Ten simple ingredients transform into a rich, umami-packed base for authentic ramen bowls.
| Ingredient | Amount | Notes |
|---|---|---|
| Soy Sauce 🫒 | ½ cup | Low-sodium preferred for control |
| Mirin 🍶 | ¼ cup | Authentic Japanese variety recommended |
| Sake 🍶 | ¼ cup | Dry cooking sake for best flavor |
| Brown Sugar 🍚 | 2 tbsp | Light or dark works |
| Garlic Cloves 🧄 | 4 cloves | Minced for maximum flavor release |
| Fresh Ginger 🌿 | 1 tbsp | Finely grated, peeled first |
| Scallions 🧅 | 3 whole | White and green parts separated |
| Sesame Oil 🫒 | 1 tbsp | Toasted for nutty depth |
| Dashi Stock 🍲 | ½ cup | Or substitute kombu dashi |
| White Miso Paste 🥣 | 2 tbsp | Fermented, smooth variety |
The soy sauce is non-negotiable—Kikkoman or Yamasa are solid choices at most grocery stores. Mirin and sake are often sold together in the international aisle (look near the rice vinegar). For dashi, instant granules work in a pinch, but homemade kombu dashi gives cleaner flavor. Miso paste keeps forever in the fridge, so grab a tub from Whole Foods or an Asian market.
No mirin? 1 tbsp sugar + 1 tbsp rice vinegar + 1 tbsp water mimics the sweetness and acidity. Swap sake for dry white wine (or skip entirely—just add 1 tbsp extra water). Fresh ginger is ideal, but ground ginger at half the amount works. The scallions can be subbed with shallots or red onion, though the flavor profile shifts slightly.
This paste keeps 2 weeks in the fridge (the oil may solidify—just warm briefly). Freeze in ice cube trays for up to 3 months. Always stir before using, as the miso settles. Pro tip: make a double batch and gift it to fellow ramen lovers.
Why You’ll Love This Recipe
- One Pot Wonder: I just toss soy sauce, mirin, sake, brown sugar, and garlic in a pan—no fancy steps, no stress.
- Umami Bomb: The garlic caramelizes in the brown sugar, and the sake-mirin mix hits that sweet-savory balance I crave.
- Meal Prep Hero: I make a big batch of tare on Sunday and it keeps all week—just add noodles and toppings whenever.
- Pantry Friendly: All five ingredients are cheap staples I already have, so I can whip this up without a last-minute grocery run.
Step-by-Step Instructions for Tare Ramen Base
This authentic method builds layers of umami with every simmered ingredient.
Step 1: Sauté Aromatics in Sesame Oil
Heat a medium saucepan over medium heat and add the 1 tablespoon Sesame Oil. Once it shimmers, add the 4 cloves Garlic Cloves (minced) and 1 tablespoon Fresh Ginger (finely grated). Sauté for 1-2 minutes until fragrant but not browned.
The white parts of the 3 whole Scallions (thinly sliced) go in next. Cook for another 1 minute, stirring constantly. You want the aromatics to soften and release their oils without burning—they’ll form the flavor foundation of your tare.
Step 2: Bloom the Miso and Build the Base
Reduce heat to low and add the 2 tbsp White Miso Paste to the pan. Stir constantly for 30 seconds to bloom the miso—this releases its fermented depth. The paste should dissolve slightly and coat the aromatics.
Now pour in the 0.5 cup Soy Sauce, 0.25 cup Mirin, and 0.25 cup Sake. Stir well to combine. The mixture will darken considerably as the soy sauce incorporates. This is where the magic starts happening.
Step 3: Simmer and Reduce to Concentrate Flavors
Add the 2 tbsp Brown Sugar and 0.5 cup Dashi Stock to the pan. Increase heat to medium-high and bring to a gentle boil. Once boiling, reduce heat to medium-low and let it simmer uncovered for 15-20 minutes.
You’ll notice the liquid reducing and thickening slightly. The tare should coat the back of a spoon but still be pourable. Stir occasionally to prevent sticking, especially as it thickens. The scallion greens can be added now if you want their freshness in the final product.
Step 4: Strain and Finish for Perfect Texture
Remove the saucepan from heat and let the tare cool for 5 minutes. For a smooth, restaurant-quality texture, strain the mixture through a fine-mesh sieve into a clean bowl. Press gently on the solids with a spoon to extract maximum flavor.
The finished tare should be glossy and rich, with a deep umami aroma. It will thicken slightly as it cools. Taste and adjust seasoning if needed, though the balance of sweet, salty, and umami should be perfect as is. This makes enough for 4 servings of ramen.
Pro Tips For Making Tare Recipe Ramen
- Simmer the Garlic: Cook the crushed garlic in the sake and mirin for at least 5 minutes on low heat—I learned this the hard way when my first batch tasted raw and harsh.
- Balance the Sweetness: Use dark brown sugar instead of light for deeper flavor, and measure it by weight (about 50g) for consistency—sounds fussy but it actually changes the outcome.
- Skip the Boil: Never let the tare reach a rolling boil or the soy sauce will turn bitter—keep it at a gentle simmer where tiny bubbles just break the surface.
- Strain the Solids: After cooking, strain out the garlic cloves for a smoother sauce—this isn’t the prettiest method, but it’s the tastiest.
Perfect Pairings for This tare recipe ramen
Beverage Pairings
This rich umami base pairs beautifully with a cold Asahi Super Dry beer—the crisp, clean finish cuts through the saltiness. For non-alcoholic options, try green tea with a squeeze of lemon to complement the savory notes.
Side Dish Ideas
Serve with gyoza for a classic ramen house combo, or add quick-pickled cucumbers for a refreshing crunch. I also love a simple seaweed salad to enhance the Japanese flavors without overpowering them.
Broth Variations
For a lighter bowl, use chicken or vegetable broth with this tare. For richer results, try tonkotsu or pork bone broth. The tare’s versatility means you can adapt it to any broth base you prefer.
Topping Suggestions
Classic toppings like soft-boiled eggs, chashu pork, and wood ear mushrooms work perfectly. For a veggie twist, add corn kernels or bok choy to balance the deep umami. 🔥
Dessert Pairings
End your meal with matcha ice cream or mochi to keep the Japanese theme going. The subtle sweetness of mochi complements the bold flavors of the tare beautifully.
Nutrition Facts
Frequently Asked Questions
Can I make this without mirin or sake?
Yes! Substitute 1 tbsp sugar + 1 tbsp rice vinegar + 1 tbsp water for mirin. Skip sake or replace with dry white wine. The flavor will be slightly different but still delicious.
How long does homemade tare last?
Store in an airtight container in the fridge for up to 2 weeks. For longer storage, freeze in ice cube trays for up to 3 months. Stir before using as miso may settle.
Can I adjust the sweetness?
Start with 1 tbsp brown sugar, taste, then add more to balance the saltiness. The ideal ratio is 1:1 sweet to salty, but adjust to your preference.
What broths work best?
Any broth works! Try chicken for light bowls or tonkotsu for rich ones. Even vegetable broth pairs well. Use 1 tbsp tare per cup of broth.

- 6 Egg Cake Recipe with Oil: Light as Air With Buttery Moisture - October 4, 2026
- 4 Bean Casserole Recipe: One-Pan Heartiness With Smoky Paprika Depth - October 4, 2026
- 3-Ingredient Keto Mug Cake Recipe: Microwave Magic in 2 Minutes - October 4, 2026