
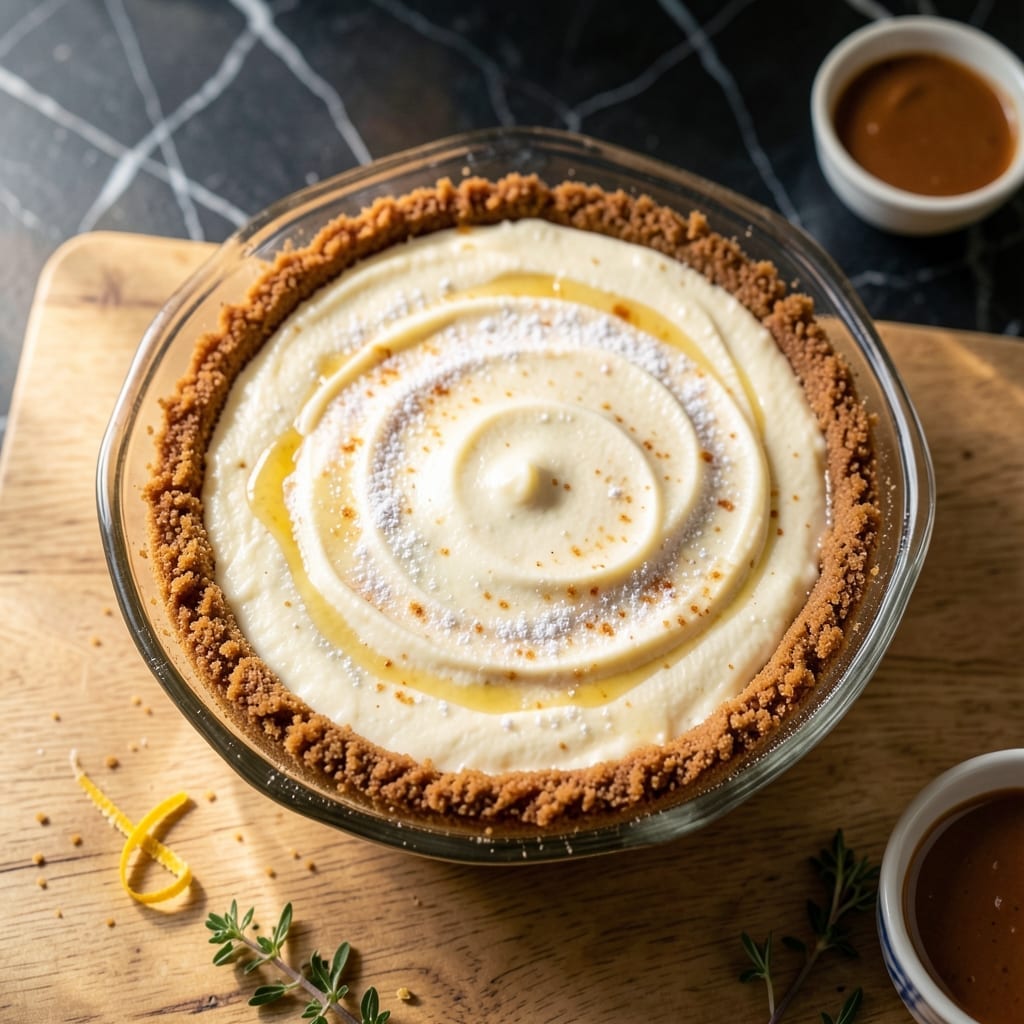
There’s nothing quite like a perfectly baked cheesecake—smooth, creamy, and rich with that signature velvety texture. This recipe delivers a classic experience without the guesswork.
I’ve refined this method to ensure a crack-free surface and a perfectly balanced sweetness that lets the cream cheese shine. The key is patience: slow baking and a gradual cool-down prevent unsightly cracks.
The result is a restaurant-quality dessert with a buttery graham cracker crust and a filling so silky it melts on the tongue. Every bite is pure indulgence, just like the name promises.
Serve it plain or top with fresh berries, chocolate ganache, or a drizzle of caramel. This is a recipe worth mastering.
Ingredients for Taste of Home Cheesecake
Classic ingredients create that signature velvety texture everyone expects from a perfect cheesecake.
| Ingredient | Amount | Notes |
|---|---|---|
| Graham Cracker Crumbs 🍪 | 2 cups | Finely crushed for crust |
| Granulated Sugar 🍚 | ¼ cup | Divided for crust and filling |
| Unsalted Butter 🧈 | ½ cup | Melted for crust binding |
| Cream Cheese 🧀 | 4 package | Full-fat, at room temperature |
| Granulated Sugar 🍚 | 1 ¼ cups | For filling sweetness |
| Sour Cream 🥛 | 1 cup | Full-fat for creaminess |
| Vanilla Extract 🌿 | 2 tsp | Pure extract for best flavor |
| Large Eggs 🥚 | 4 whole | Room temperature, lightly beaten |
| All-Purpose Flour 🌾 | 2 tbsp | For filling stability |
| Salt 🧂 | ¼ tsp | Fine sea salt preferred |
| Lemon Juice 🍋 | 1 tbsp | Freshly squeezed for balance |
| Heavy Cream 🥛 | ¼ cup | Optional for extra richness |
The cream cheese must be full-fat Philadelphia brand—lower fat versions won’t set properly and lack that luxurious mouthfeel. Room temperature is non-negotiable for smooth incorporation. For graham cracker crumbs, Honey Maid or store-brand both work, but avoid the low-fat versions as they don’t bind as well with the melted butter. Buy your cream cheese in blocks rather than tubs for better texture.
No graham crackers on hand? Digestive biscuits or vanilla wafers make fine substitutes—just pulse them into fine crumbs. The sour cream can be Greek yogurt at equal volume for a slightly tangier result. If you need to reduce sugar, don’t cut more than 25% or the texture will suffer. The vanilla should always be pure extract, not imitation. For those avoiding raw eggs, pasteurized eggs work identically.
Unbaked, the filling keeps 2 days refrigerated in a sealed container. Once baked and cooled, the cheesecake stays fresh for 5-7 days in the fridge or freezes beautifully for 2-3 months. Always bring it to room temperature before serving for the best texture and flavor.
Why You’ll Love This Recipe
- No-Fuss Base: That graham cracker crust comes together in 5 minutes—just crumbs, sugar, butter, and a quick press into the pan.
- Velvet Cream Filling: The cream cheese and sugar blend into this ridiculously smooth, rich filling that bakes up like a dream.
- Crowd-Pleaser Guaranteed: I bring this to every potluck and come home with an empty dish. Every. Single. Time.
- Make-Ahead Magic: Honestly, it tastes even better the next day, so I always bake it the night before.
Step-by-Step Instructions for Taste of Home Cheesecake
Master this technique for a creamy, crack-free cheesecake with a buttery graham cracker foundation.
Step 1: Create the Graham Cracker Crust
Preheat your oven to 325°F. In a medium bowl, combine the 2 cups Graham Cracker Crumbs with the 0.25 cup Granulated Sugar. Pour in the 0.5 cup Unsalted Butter (melted) and stir until the mixture resembles wet sand and holds together when pressed.
Press the crumb mixture firmly into the bottom of a 9-inch springform pan. Use a measuring cup to compact it evenly across the surface. Bake for 10 minutes, then remove and let cool while you prepare the filling. The crust should be light golden brown and set.
Step 2: Beat the Cream Cheese Base
In a large mixing bowl, beat the 4 package Cream Cheese (at room temperature) on medium speed until completely smooth and free of lumps, about 3 minutes. Scrape down the sides of the bowl as needed to ensure even mixing.
Gradually add the 1.25 cups Granulated Sugar, beating for another 2 minutes until light and creamy. Incorporate the 1 cup Sour Cream, 2 tsp Vanilla Extract, and 1 tbsp Lemon Juice, mixing just until combined. The mixture should be velvety and uniform.
Step 3: Incorporate Eggs and Dry Ingredients
Add the 4 whole Large Eggs one at a time, beating well after each addition on low speed. This prevents overmixing, which can incorporate too much air and lead to cracks. Scrape the bowl between additions to maintain consistency.
Sprinkle in the 2 tbsp All-Purpose Flour and 0.25 tsp Salt, then mix for 30 seconds until just combined. For an extra-rich texture, fold in the 0.25 cup Heavy Cream by hand using a spatula. The batter should be thick but pourable.
Step 4: Bake in a Water Bath
Pour the filling over the cooled crust and smooth the top with a spatula. Wrap the bottom of the springform pan tightly in heavy-duty aluminum foil to prevent water seepage. Place the pan in a large roasting pan and fill the outer pan with hot water until it reaches halfway up the sides of the springform pan.
Bake at 325°F for 55-65 minutes. The edges should be set, but the center should still have a slight wobble when gently shaken. Turn off the oven and crack the door open 1 inch, allowing the cheesecake to cool gradually for 1 hour to prevent cracking.
Step 5: Chill and Serve
Remove the cheesecake from the water bath and oven, then run a thin knife around the edge to loosen it from the pan. Cool completely at room temperature for 1 hour, then refrigerate uncovered for at least 4 hours (preferably overnight) until fully set.
Once chilled, remove the springform ring and slice with a hot, dry knife for clean cuts. Serve chilled, and store any leftovers covered in the refrigerator for up to 5 days. The texture should be silky, dense, and free of cracks.
Pro Tips For Making Taste Of Home Cheesecake
- Room Temp Cream Cheese: Pull your cream cheese out at least 2 hours before baking—cold blocks blend unevenly and leave lumps no matter how hard you mix. I learned this the hard way after three grainy cheesecakes in a row.
- Press the Crust Hard: Pack those graham cracker crumbs into the pan with the bottom of a glass, pressing firmly for a full 30 seconds. A loose crust falls apart when you slice it, and nobody wants a crumbly base.
- Skip the Overmixing: Once your batter is smooth, stop mixing. Overworking it incorporates too much air, which leads to cracks on the surface as it bakes.
- Water Bath Always: Wrap your springform pan in foil and bake it in a water bath—this gentle, even heat prevents the dreaded cracked top and ensures a creamy texture. Sounds like a hassle, but it actually changes the outcome.
Troubleshooting This Dish
Preventing Cracks
Cracks often happen from temperature shock. Always bring your 4 eggs and 4 packages cream cheese to room temperature first. Avoid overmixing after adding eggs—I beat on low speed just until combined. The gradual cooling method in the oven helps too. 💡
Sinking Center
If the center sinks, it usually means underbaking. Bake until the edges are set but the center still has a slight wobble. I check at 55 minutes and add 5-10 minutes if needed. A water bath helps regulate the temperature.
Soggy Crust
A soggy bottom often comes from skipping the pre-bake. Always bake your 2 cups graham cracker crumbs crust for 10 minutes at 325°F before adding filling. Also, wrap your springform pan tightly in foil to prevent water seepage during the water bath.
Lumpy Filling
Lumps usually mean cold cream cheese. Let your 4 packages sit out for at least 1 hour before starting. Beat the cream cheese alone first for 3 minutes until completely smooth. Scrape the bowl often to catch any stubborn bits.
Uneven Browning
If the top browns too quickly, tent the pan with foil after 45 minutes of baking. This protects the surface while allowing the center to finish cooking. I also rotate my pan halfway through for even exposure. ⚡
Sticking to Pan
Prevent sticking by running a thin knife around the edge immediately after removing from the oven. Grease your springform pan well before adding the crust, and use parchment paper on the bottom for extra insurance. This makes removal effortless.
Nutrition Facts
Frequently Asked Questions
Do I need a water bath for baking?
Yes, a water bath helps regulate temperature and prevents cracks. Wrap your springform pan tightly in foil to prevent leaks, then place it in a larger pan filled with hot water halfway up the sides.
Can I use low-fat cream cheese?
No, full-fat cream cheese is essential for the right texture and stability. Low-fat versions contain more moisture and won’t set properly, resulting in a softer, less creamy filling.
How do I prevent a soggy crust?
Pre-bake the crust for 10 minutes at 325°F before adding the filling. Also, ensure your pan is tightly wrapped in foil during the water bath to keep moisture out.
How long should it cool before refrigerating?
Let it cool in the turned-off oven with the door cracked for 1 hour, then cool completely at room temperature for another hour before refrigerating. This gradual cooling prevents cracks.

- 6 Egg Cake Recipe with Oil: Light as Air With Buttery Moisture - October 4, 2026
- 4 Bean Casserole Recipe: One-Pan Heartiness With Smoky Paprika Depth - October 4, 2026
- 3-Ingredient Keto Mug Cake Recipe: Microwave Magic in 2 Minutes - October 4, 2026