
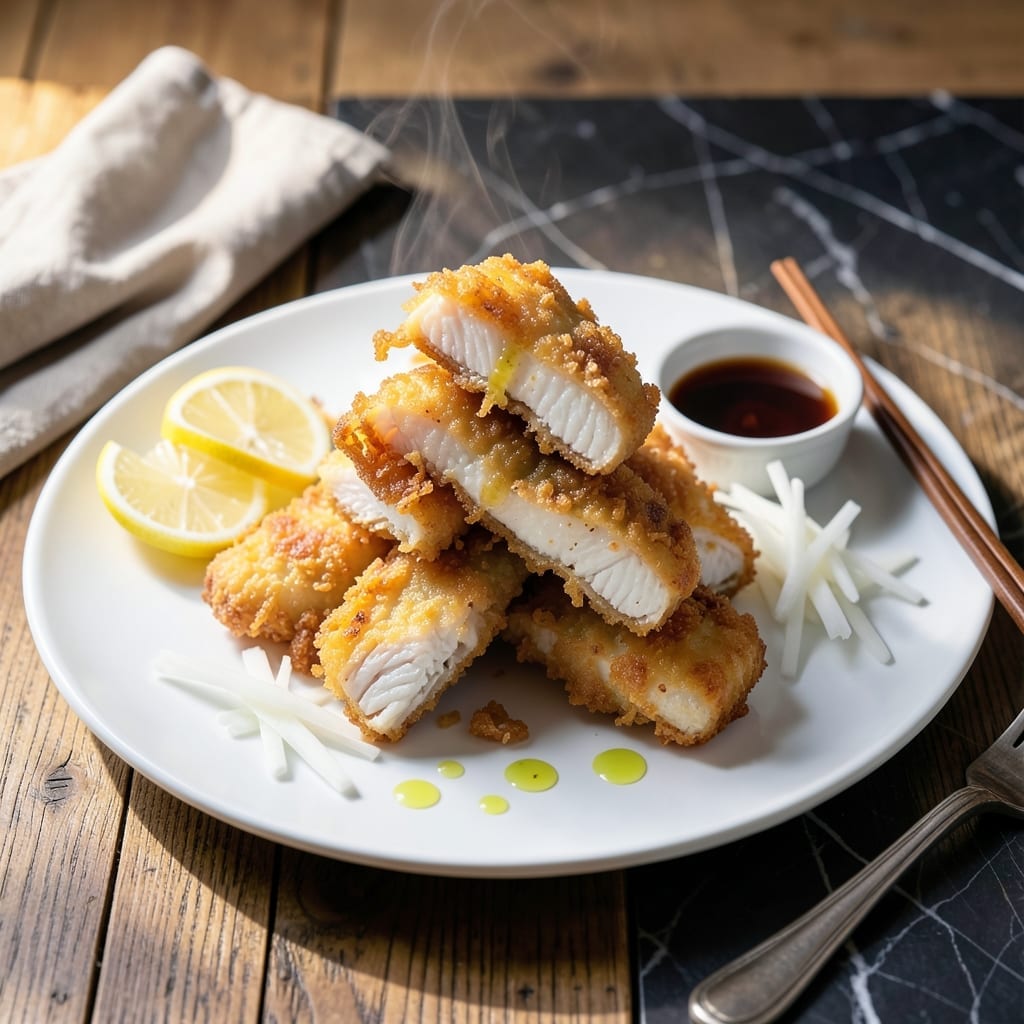
This tempura cod delivers the signature light, airy crunch that defines authentic Japanese tempura. The secret lies in ice-cold batter and a two-stage frying process that creates shatteringly crispy results without excess grease.
I’ve refined this method to ensure the cod stays tender inside while achieving that golden, lacy exterior. The batter uses just flour, water, and an egg—no baking powder or special ingredients, keeping it traditional and foolproof.
Frying at a precise 350°F and working in small batches prevents the oil temperature from dropping, which is critical for that perfect texture. Each piece emerges with a delicate, almost translucent crust.
Serve immediately with tentsuyu dipping sauce or over steamed rice for a restaurant-quality meal at home. This technique guarantees crispy, light tempura every time.
Ingredients for Tempura Cod
Ice-cold batter meets fresh cod for that signature light, airy crunch everyone loves.
| Ingredient | Amount | Notes |
|---|---|---|
| Cod Fillets 🐟 | 1 ½ lb | Skinless, cut into 1-inch strips |
| All-Purpose Flour 🌾 | 1 cup | Chilled for ice-cold batter |
| Ice Water ❄️ | 1 cup | Plus extra ice cubes for chilling |
| Large Egg 🥚 | 1 whole | Lightly beaten |
| Neutral Oil 🫒 | 4 cups | For deep frying, such as vegetable or canola |
| Kosher Salt 🧂 | 1 tsp | For seasoning cod and batter |
| Soy Sauce 🫙 | ¼ cup | For tentsuyu dipping sauce |
| Dashi Stock 🍲 | ¾ cup | For tentsuyu dipping sauce |
| Mirin 🍶 | 2 tbsp | Sweet rice wine for sauce |
| Granulated Sugar 🍚 | 1 tsp | For balancing tentsuyu sauce |
| Grated Daikon Radish 🥬 | ½ cup | For serving, optional |
| Shredded Cabbage 🥬 | 1 cup | For serving, optional |
| Steamed Rice 🍚 | 2 cups | Cooked, for serving |
The cod must be ultra-fresh—look for fillets with a sweet ocean scent and translucent flesh. Whole Foods or a trusted fishmonger will have the best selection. Ask for skinless cuts to save prep time. The flour needs to be chilled; I keep a bag in the freezer just for tempura. For the oil, peanut or canola have the highest smoke points, essential for maintaining that 350°F.
No cod? Shrimp or thinly sliced sweet potato work beautifully. The batter must stay ice-cold—use one-third the amount of vodka in place of water for an even crispier crust (the alcohol evaporates quickly). Mirin can be swapped with 1 tbsp sugar plus 1 tbsp rice vinegar. For gluten-free, replace the flour with rice flour—it’s actually traditional for some tempura styles.
Serve immediately—tempura loses its crispness fast. Leftovers? Reheat in a 400°F oven for 5-8 minutes to revive some crunch. The dipping sauce keeps in the fridge for 3 days. Never skip the ice water; it’s the secret to that lacy, delicate batter texture.
Why You’ll Love This Recipe
- 20-Minute Meal: I can go from fridge to table in the time it takes to watch a sitcom—just mix flour, egg, and ice water, then fry.
- Light and Crispy: That shatteringly crisp batter with the tender cod inside? It’s the kind of bite that makes you close your eyes.
- Weeknight Hero: Here’s what sold me—it works for a quick dinner or a fancy-ish date night at home.
- Budget Stretcher: Cod fillets are often cheaper than other fish, and a little goes a long way with this satisfying dish.
Step-by-Step Instructions for Tempura Cod
Here’s the method. Straightforward, tested, works every time.
Step 1: Prepare the Cod and Batter
Pat the 1.5 lb cod fillets completely dry with paper towels and season both sides with 1 tsp kosher salt. Cut the fillets into 1-inch strips—this size ensures even cooking and a perfect crunch-to-fillet ratio. Keep the cod chilled in the refrigerator while you prepare the batter.
In a mixing bowl, whisk together the 1 whole large egg and 1 cup ice water until frothy. The colder the liquid, the crispier your tempura will be, so keep this mixture over ice if possible. Gradually add the 1 cup all-purpose flour and stir just until combined—small lumps are fine. Overmixing develops gluten, resulting in a dense, chewy coating instead of a light, airy one.
Step 2: Heat the Oil to Optimal Temperature
Pour the 4 cups neutral oil into a deep, heavy-bottomed pot or Dutch oven. Use a thermometer to monitor the temperature, heating the oil to 340-350°F. This temperature range is critical—too low, and the cod will absorb oil and turn greasy; too high, and the exterior will burn before the interior cooks.
While the oil heats, place a wire rack over a baking sheet near your cooking station. This setup allows excess oil to drain from the cooked cod without steaming the bottom, preserving its crispness. If you don’t have a thermometer, test the oil by dropping in a pinch of batter—it should sizzle immediately and float to the surface within seconds.
Step 3: Fry the Cod to Golden Perfection
Dip each strip of cod into the batter, allowing any excess to drip off. Gently lower the coated strips into the hot oil, working in batches to avoid overcrowding the pot. Overcrowding lowers the oil temperature, leading to soggy tempura. Fry the cod for 3-4 minutes, turning occasionally, until the batter is golden brown and crispy.
Use a slotted spoon or spider strainer to transfer the cooked cod to the wire rack. The cod should be opaque throughout and flake easily with a fork. If the batter browns too quickly, reduce the heat slightly—consistent temperature is key to even cooking.
Step 4: Prepare the Tentsuyu Dipping Sauce
In a small saucepan, combine the 0.25 cup soy sauce, 0.75 cup dashi stock, 2 tbsp mirin, and 1 tsp granulated sugar. Bring the mixture to a gentle simmer over medium heat and cook for 2-3 minutes, stirring until the sugar dissolves completely.
Remove the sauce from the heat and let it cool slightly. The tentsuyu should have a balanced flavor—savory from the soy and dashi, with a touch of sweetness from the mirin and sugar. Pour the sauce into small individual dipping bowls for serving.
Step 5: Serve Immediately with Garnishes and Rice
Arrange the tempura cod on a platter lined with the 1 cup shredded cabbage and 0.5 cup grated daikon radish. These garnishes add freshness and crunch, complementing the crispy cod. Serve the tempura immediately while hot, as it loses its crispness quickly.
Provide the tentsuyu sauce on the side for dipping. Accompany the dish with 2 cups steamed rice to round out the meal. Each bite should deliver a satisfying crunch followed by tender, flaky cod, perfectly balanced by the savory-sweet dipping sauce.
Pro Tips For Making Tempura Cod
- Chill the Batter: Use ice-cold water and keep the batter bowl in an ice bath—this prevents the flour from developing gluten, keeping your tempura light and crispy.
- Pat Cod Dry: I learned this the hard way—blot the cod fillets with paper towels before dipping, or the batter won’t stick properly and will slide right off.
- Skip Overcrowding: Fry in small batches so the oil temperature doesn’t drop, which turns tempura soggy instead of golden and airy.
- Double Fry Crisp: Sounds weird, but it works: fry once for 2-3 minutes, drain, then fry again for 30 seconds to lock in that extra crunch.
Serving Suggestions for This Recipe
Traditional Presentation
Arrange the tempura on a bamboo tempura stand or wire rack to keep it crispy. Line the base with shredded cabbage to catch any oil drips and add freshness. The elevated presentation prevents sogginess while showcasing the delicate batter.
Dipping Sauce Style
Serve tentsuyu in small ceramic bowls for individual dipping. Add a side of grated daikon radish mixed with a pinch of salt and 1 tsp rice vinegar. The radish’s cool crunch contrasts beautifully with the hot, crispy cod. 💫
Rice Pairing
Place steamed rice in separate bowls for a classic combo. I prefer short-grain Japanese rice like Koshihikari—its sticky texture complements the tempura’s crunch. Offer chopsticks and a small spoon for the rice.
Garnish Ideas
Sprinkle with toasted sesame seeds or thinly sliced green onions for color. A wedge of lemon on the side adds brightness. The acidity cuts through the richness of the fried batter.
Beverage Pairings
Cold green tea or a crisp Japanese lager like Sapporo balances the meal. For non-alcoholic options, try calpico or sparkling water with yuzu. The carbonation cleanses your palate between bites.
Family Style
For gatherings, serve on a large platter with the sauce in the center. Let everyone grab pieces with their hands—it’s traditional! Just provide plenty of napkins and small plates for the sauce. 🥢
Nutrition Facts
Frequently Asked Questions
Why must the batter stay ice-cold?
Cold batter prevents gluten from forming, keeping the coating light and crispy. It also creates that signature lacy texture. Use ice water and keep everything chilled until frying.
Can I use a different type of fish?
Try shrimp, haddock, or halibut for similar results. Just ensure pieces are uniform in thickness for even cooking.
How do I keep it crispy after frying?
Place cooked pieces on a wire rack, not paper towels. This allows air circulation to prevent steam from making the batter soggy. Serve immediately for best texture.
What if I don’t have a deep fryer?
A heavy pot or Dutch oven works perfectly. Use a thermometer to maintain 350°F and fry in small batches to avoid temperature drops.

- 6 Egg Cake Recipe with Oil: Light as Air With Buttery Moisture - October 4, 2026
- 4 Bean Casserole Recipe: One-Pan Heartiness With Smoky Paprika Depth - October 4, 2026
- 3-Ingredient Keto Mug Cake Recipe: Microwave Magic in 2 Minutes - October 4, 2026