
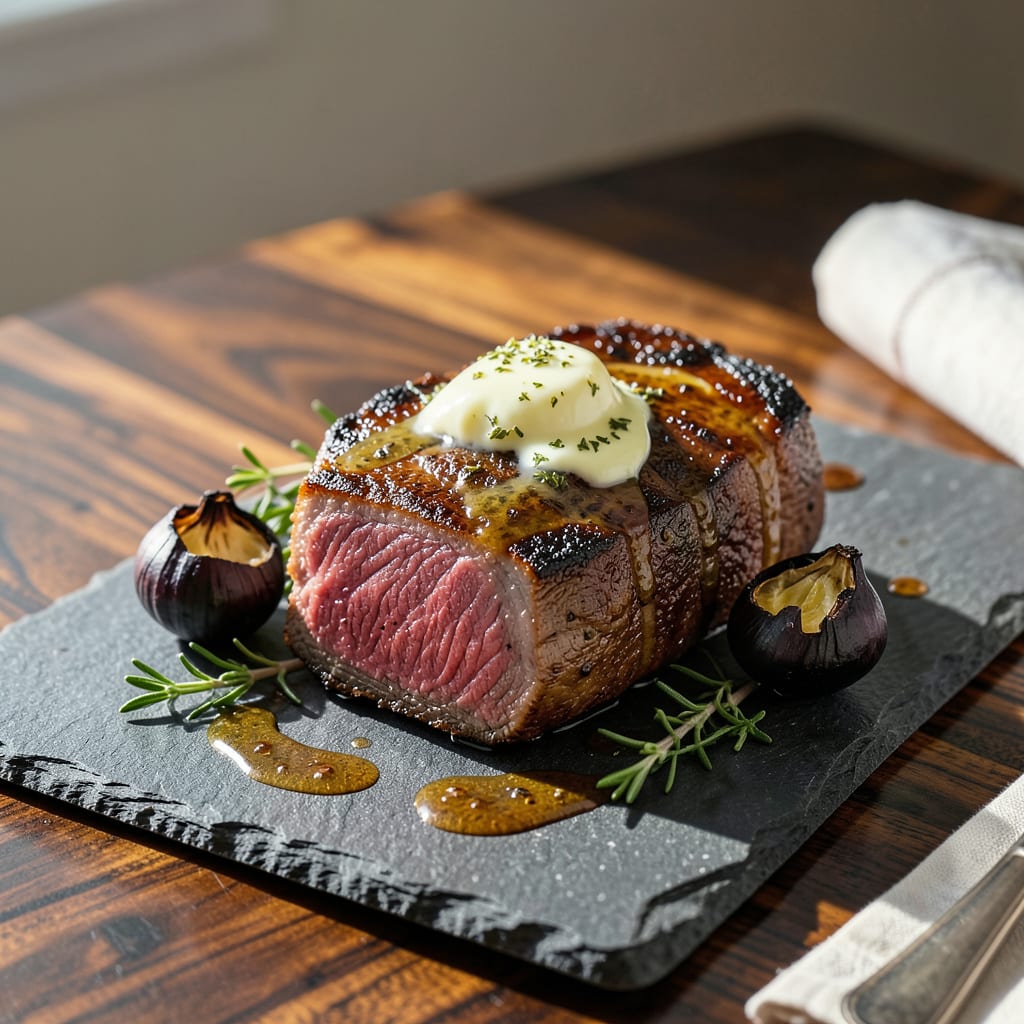
Let me tell you about the juiciest, most tender steak you’ll ever make at home. I’ve cooked more tenderloins than I can count, and this method never fails to deliver that buttery, melt-in-your-mouth texture we all crave. The secret? A hot pan, simple seasoning, and knowing exactly when to pull it off the heat.
You don’t need fancy equipment or hours of prep—just a good piece of meat, a cast iron skillet, and about 20 minutes. I’ll walk you through the perfect sear, the ideal internal temp (hint: it’s lower than you think), and why letting it rest makes all the difference. This is restaurant-quality steak made simple, right in your own kitchen.
Ingredients for Tenderloin Steak
Quality meat plus pantry staples—this is all you need for that perfect buttery steak experience at home.
| Ingredient | Amount | Notes |
|---|---|---|
| Beef Tenderloin Steaks 🥩 | 1 ½ lb | Center-cut, 1.5 inches thick |
| Kosher Salt 🧂 | 1 ½ tsp | Diamond Crystal preferred |
| Freshly Ground Black Pepper 🌶️ | 1 tsp | Coarse grind for best texture |
| Garlic Cloves 🧄 | 3 cloves | Lightly crushed, not minced |
| Fresh Thyme Sprigs 🌿 | 4 sprigs | Or 1 tsp dried thyme |
| Unsalted Butter 🧈 | 4 tbsp | European-style preferred |
| Extra-Virgin Olive Oil 🫒 | 2 tbsp | High smoke point variety |
| Fresh Rosemary Sprig 🌿 | 1 sprig | Optional for extra aroma |
| Shallot 🧅 | 1 whole | Sliced for butter basting |
| Flaky Sea Salt 🧂 | ½ tsp | For finishing (Maldon style) |
The tenderloin is everything here. Center-cut pieces (about 1.5 inches thick) cook most evenly. I get mine from Whole Foods or a local butcher—look for USDA Prime if you’re splurging, but Choice works great too. The fat should be creamy white, not yellowed. Ask them to trim the silver skin if it’s still on (worth the extra minute). Let it sit at room temp 30-45 minutes before cooking—cold steak won’t sear right.
No fresh herbs? Dried thyme at one-third the amount works fine, but skip the rosemary if it’s dried. The butter is non-negotiable—European-style has less water, so it browns better. Out of shallots? Half a small onion does the trick. For the olive oil, any high smoke point brand works (California Olive Ranch is my go-to). The garlic should be crushed just enough to release flavor but not so much it burns in the pan.
Cooked steak keeps 3-4 days in the fridge, but honestly? Eat it fresh. The butter can be prepped ahead—melt it with the herbs, then solidify and store 1 week in the fridge. Leftovers make killer steak sandwiches if you slice them thin. Pro tip: save the pan drippings for potatoes or eggs the next day (don’t wash that skillet!).
Why You’ll Love This Recipe
- Five-Ingredient Magic: Honestly, this is my kind of cooking—just beef, salt, pepper, garlic, and thyme. No measuring cups, no fuss, just a hot pan and ingredients I always have on hand.
- That Crust, Though: When the garlic and thyme hit the pan with the steak, the smell alone is worth it. But the first bite? Crispy, herby edges with a buttery center—it’s the kind of flavor that makes you pause mid-chew.
- Date Night or Tuesday: I’ve served this for anniversaries and also scarfed it down in sweatpants. The same recipe works for both, which is rare. (Yes, even on a Tuesday night.)
- Leftovers? Lucky You: Cold tenderloin slices on a salad the next day? Solid. Thinly cut for sandwiches? Even better. It reheats beautifully, so I always make extra—no waste, just another meal ready to go.
Step-by-Step Instructions for Tenderloin Steak
Here’s how to achieve that perfect crust and buttery interior every time.
Step 1: Season and Prepare the Steaks
Pat the beef tenderloin steaks completely dry with paper towels—this is crucial for getting that perfect sear. Season both sides generously with the 1.5 tsp kosher salt and 1 tsp freshly ground black pepper. I like to press the seasoning into the meat gently so it adheres well during cooking.
Let the seasoned steaks rest at room temperature for 20-30 minutes while you prepare the other ingredients. This resting time ensures more even cooking and helps the steaks develop that beautiful crust we’re after. You’ll notice the surface of the meat will become slightly tacky—that’s perfect for searing.
Step 2: Create the Aromatic Butter Mixture
In a small bowl, combine the 4 tbsp unsalted butter with the 3 cloves garlic cloves (lightly crushed), 4 sprigs fresh thyme sprigs, and 1 sprig fresh rosemary sprig. Slice the 1 whole shallot into thin rings and add it to the mixture. This combination will infuse the butter with incredible flavor as it melts.
I like to prepare this mixture while the steaks are resting. The garlic should be lightly crushed rather than minced—this prevents it from burning during the basting process. Keep this mixture close to your cooking station so it’s ready when you need it.
Step 3: Sear the Steaks to Perfection
Heat the 2 tbsp extra-virgin olive oil in a heavy skillet (cast iron works best) over medium-high heat until it begins to shimmer. Add the steaks and cook undisturbed for 3-4 minutes per side for medium-rare. You’ll know it’s time to flip when the edges start to brown and the steak releases easily from the pan.
During the last 2 minutes of cooking, add your aromatic butter mixture to the pan. Tilt the pan slightly and spoon the melted butter continuously over the steaks. This basting technique adds incredible flavor and helps achieve that beautiful, glossy crust. Watch for the butter to turn a light golden brown—that’s when it’s perfectly infused.
Step 4: Rest and Finish the Steaks
Transfer the steaks to a cutting board or warm plate and let them rest for 5-10 minutes before serving. This resting period allows the juices to redistribute throughout the meat, ensuring every bite is tender and juicy. Tent the steaks loosely with foil to keep them warm.
Just before serving, sprinkle each steak with a pinch of the 0.5 tsp flaky sea salt. This final touch adds a delicate crunch and enhances all the flavors you’ve built. The steaks should be warm to the touch but not piping hot when you serve them—this indicates they’ve rested properly.
Step 5: Slice and Serve Immediately
Slice the steaks against the grain into ½-inch thick pieces. You’ll see the perfect medium-rare center with that beautiful crust we worked so hard to create. The interior should be rosy pink and the exterior should have a rich, golden-brown color.
Arrange the slices on a warm platter and spoon any remaining butter from the pan over the top. Serve immediately while the steaks are still warm. Each bite should be tender enough to cut with a fork, with that rich, buttery flavor infused throughout the meat.
Common Mistakes When Making This Recipe
Skipping the Dry
I can’t stress this enough—pat those steaks completely dry before they hit the pan. Wet meat steams instead of sears, giving you a gray, sad crust instead of that gorgeous golden-brown finish. Use paper towels and press firmly on all surfaces. I’ve ruined more steaks by rushing this step than I’d like to admit. 💡
Cold Steak Syndrome
Never cook steak straight from the fridge. Cold meat cooks unevenly, with a burnt exterior and raw center. Let your tenderloins sit at room temperature for 20-30 minutes after seasoning. You’ll notice the surface becomes slightly tacky—that’s your signal it’s ready for the pan. Trust me, this makes all the difference in texture.
Overcrowding the Pan
Your steaks need space to develop that perfect crust. If you crowd the pan, the temperature drops and you end up steaming instead of searing. Cook in batches if needed—I never put more than 2 steaks in my 12-inch cast iron at once. The butter will brown better and your crust will be crispier.
Ignoring Internal Temp
Don’t rely on time alone—use a meat thermometer. Tenderloin cooks fast, and the difference between perfect medium-rare (130°F) and overdone (140°F+) is just minutes. I pull mine at 125°F because it rises 5 degrees while resting. No thermometer? Invest in a ThermoWorks Thermapen—it’s worth every penny.
Skipping the Rest
Cutting into your steak too soon lets all those precious juices escape, leaving you with dry meat. Let it rest 5-10 minutes under loose foil. The temperature will even out and the fibers will relax. I know it’s tempting to dig in, but patience here means juicier bites. The butter will also set slightly, creating that perfect glossy finish. 🔥
Over-Basting Butter
While butter basting adds incredible flavor, too much can make your crust soggy. Add the butter mixture only in the last 2 minutes of cooking, and spoon it gently—don’t drown the steak. Watch for the butter to turn light golden brown, then remove the steak immediately. Burnt butter tastes bitter and ruins that beautiful flavor you’ve built.
Nutrition Facts

- 6 Egg Cake Recipe with Oil: Light as Air With Buttery Moisture - October 4, 2026
- 4 Bean Casserole Recipe: One-Pan Heartiness With Smoky Paprika Depth - October 4, 2026
- 3-Ingredient Keto Mug Cake Recipe: Microwave Magic in 2 Minutes - October 4, 2026