
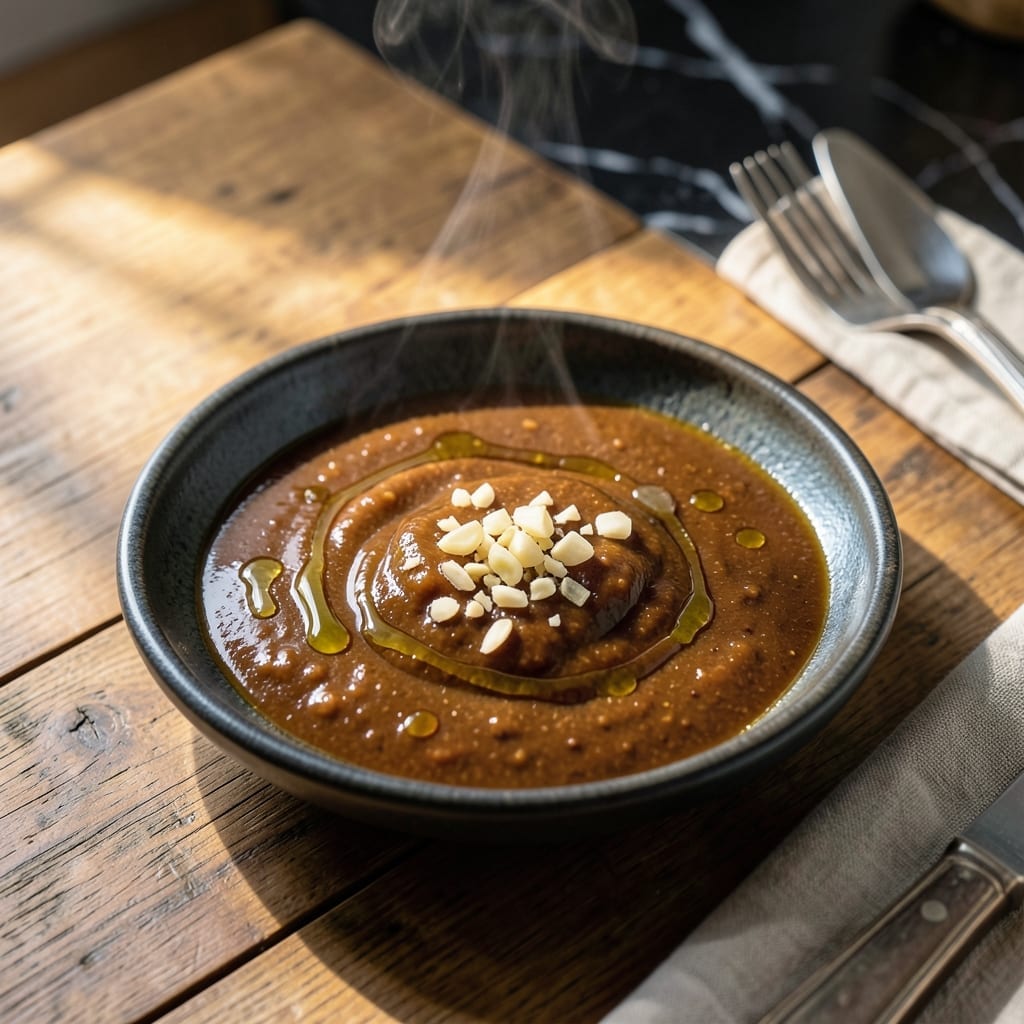
This Thai brown sauce brings authentic restaurant flavor to your home kitchen with its complex blend of savory, sweet, and slightly tangy notes. I developed this version after years of testing to capture the perfect balance of umami depth that elevates any stir-fry.
The secret lies in the careful combination of soy sauces, palm sugar, and aromatic spices that create layers of rich, caramelized flavor. Unlike lighter sauces, this one delivers a deep amber color and thick, glossy consistency that clings beautifully to proteins and vegetables.
What you’ll get is a versatile sauce that transforms simple ingredients into restaurant-quality dishes. It keeps well refrigerated, making it perfect for meal prep or last-minute cooking inspiration.
Use it for stir-fries, dipping, or as a marinade to add authentic Thai character to your meals.
Ingredients for Thai Brown Sauce
Nine carefully chosen ingredients create that signature deep, glossy, umami-rich Thai brown sauce.
| Ingredient | Amount | Notes |
|---|---|---|
| Dark Soy Sauce 🫒 | ½ cup | For deep color and richness |
| Light Soy Sauce 🫒 | ¼ cup | Balances saltiness and flavor |
| Oyster Sauce 🐚 | 3 tbsp | Adds umami depth (use vegetarian oyster sauce if needed) |
| Palm Sugar 🍚 | ½ cup | Substitute brown sugar if unavailable |
| Rice Vinegar 🍶 | 2 tbsp | Balances sweetness with tang |
| Garlic Cloves 🧄 | 6 cloves | Minced for aromatic base |
| Shallots 🧅 | 2 whole | Finely chopped for sweetness |
| Fresh Ginger 🌿 | 1 tbsp | Grated for spicy warmth |
| Star Anise Pods ✨ | 2 whole | Infuses aromatic complexity |
| Cinnamon Stick 🌰 | 1 whole | Adds warm spice depth |
The soy sauces are non-negotiable here. Dark soy sauce delivers that signature deep amber color, while light soy sauce keeps it from being too heavy. I grab mine from Asian markets—the flavor is superior to most grocery store brands. Palm sugar is ideal, but don’t stress if you can’t find it—brown sugar works in a pinch (just expect a slightly different caramel note).
No oyster sauce? Vegetarian oyster sauce at 1:1 ratio keeps it authentic without the seafood. Fresh ginger is best, but ground ginger in half the amount will do. Star anise and cinnamon can be swapped for ground versions if that’s all you’ve got—just use a pinch. The garlic and shallots? Don’t skip them—they’re the aromatic backbone.
This keeps beautifully in the fridge for up to 2 weeks, and the flavors only get better with time. Freeze portions in ice cube trays for up to 3 months. Always give it a stir before using—the spices settle and the sauce thickens slightly when chilled.
Why You’ll Love This Recipe
- 5-Minute Magic: I dump all five ingredients in a pan and it’s done before the rice finishes cooking.
- Umami Bomb: The dark soy sauce plus oyster sauce hit that deep, salty-sweet spot I crave every time.
- Stirs Into Anything: I drizzle it on noodles, veggies, even grilled chicken—never the same meal twice.
- Pantry Stretch: One batch lasts a week in the fridge, so I stop buying takeout sauces and save a few bucks.
Step-by-Step Instructions for Thai Brown Sauce
Here’s the method. Simple, tested, and packed with authentic flavor.
Step 1: Bloom the Aromatics in Oil
Heat a medium saucepan over medium heat with just enough neutral oil to coat the bottom. Add the 2 whole Shallots (finely chopped) and cook for 2-3 minutes until they soften and begin to turn translucent.
Add the 6 cloves Garlic Cloves (minced) and 1 tbsp Fresh Ginger (grated), stirring constantly for 30-45 seconds until fragrant. Watch closely—garlic burns quickly. The aroma should be intoxicating but not acrid.
Toss in the 2 whole Star Anise Pods and 1 whole Cinnamon Stick, toasting them for 20 seconds until their spices release into the oil. This builds the foundation of complexity that defines the sauce.
Step 2: Caramelize the Palm Sugar
Add the 0.5 cup Palm Sugar to the pan, breaking up any large chunks. Stir constantly as it begins to melt, which takes about 3-4 minutes. The sugar will bubble and turn from pale to a deep amber color.
Resist the urge to walk away—this is the most critical step. If it darkens too quickly, reduce the heat slightly. You’re aiming for a rich, caramelized base that will give the sauce its signature depth and glossy sheen.
Step 3: Build the Sauce Base with Liquids
Once the palm sugar is fully dissolved and caramelized, carefully pour in the 0.5 cup Dark Soy Sauce and 0.25 cup Light Soy Sauce. The mixture will bubble vigorously—stir well to combine.
Add the 3 tbsp Oyster Sauce and 2 tbsp Rice Vinegar, stirring to incorporate. The vinegar will cut through the sweetness, while the oyster sauce adds its signature umami punch. Bring the mixture to a gentle simmer.
Step 4: Simmer and Reduce to Perfection
Reduce the heat to low and let the sauce simmer gently for 10-12 minutes. Stir occasionally to prevent sticking and ensure even reduction. The sauce should thicken enough to coat the back of a spoon.
As it simmers, the flavors will meld together, and the star anise and cinnamon will infuse their warm, aromatic notes. Taste and adjust the balance if needed—though the measurements are precise, your palate might prefer a touch more tang or sweetness.
Once the sauce has reduced by about a third and has a glossy, syrupy consistency, it’s ready. Remove the star anise and cinnamon stick before using or storing.
Pro Tips For Making Thai Brown Sauce
- Simmer, Don’t Boil: Keep the heat at a gentle simmer—boiling the sauce hard will make the palm sugar separate and leave you with a grainy mess. I learned this the hard way after my first three attempts broke.
- Dissolve Palm Sugar: Melt the palm sugar in a splash of warm water before adding it to the sauce. It blends in faster and prevents those stubborn little clumps that refuse to break down.
- Skip the Substitutes: Use real palm sugar, not brown sugar—it has a deeper, more complex sweetness that brown sugar just can’t replicate. The flavor difference is noticeable, especially with the dark soy sauce.
- Balance Last: Taste and adjust the vinegar or sugar at the end, not while it’s reducing. The flavors concentrate as it cooks, and what seemed balanced early on can turn cloying or harsh.
Common Mistakes When Making Perfect Results
Overcooking the Aromatics
Burnt garlic or shallots will turn your sauce bitter. Cook them over medium heat just until fragrant and translucent—about 2-3 minutes. I pull the pan off heat if they start browning too quickly. 🔥
Rushing the Caramelization
Palm sugar needs 3-4 minutes of constant stirring to reach that perfect deep amber. Walking away risks burning, which ruins the entire batch. Patience here creates the sauce’s signature glossy depth.
Skipping the Simmer
Letting it reduce for 10-12 minutes on low heat is non-negotiable. This step allows the star anise and cinnamon to infuse fully. Shortcutting it leaves your sauce thin and underdeveloped.
Forgetting to Taste
Even with precise measurements, palates vary. Taste before finalizing—you might want an extra splash of rice vinegar for tang or palm sugar for sweetness. I always adjust mine mid-simmer. 💡
Leaving Whole Spices In
Those star anise pods and cinnamon stick served their purpose during cooking. Leaving them in the finished sauce makes it unpleasant to eat. Always remove them before storing or using.
Improper Storage
This sauce thickens when chilled. Store in an airtight container and stir well before each use. It keeps for 2 weeks refrigerated—but trust me, you’ll use it up faster than that.
Nutrition Facts
Frequently Asked Questions
Can I use regular sugar instead of palm sugar?
Yes, brown sugar works as a great substitute. Use the same 0.5 cup amount for similar caramel notes. Avoid white sugar—it lacks the depth palm sugar provides.
How do I adjust the thickness of the sauce?
Simmer longer for a thicker consistency, or thin with 1-2 tbsp water if too thick. The sauce naturally thickens as it cools.
Is this sauce gluten-free?
No, because of the soy sauces. For a gluten-free version, replace with tamari or coconut aminos. Always check labels.
What dishes pair best with this sauce?
It’s perfect for stir-fries, noodles, or as a dipping sauce for spring rolls. Also try it as a glaze for grilled meats.

- 6 Egg Cake Recipe with Oil: Light as Air With Buttery Moisture - October 4, 2026
- 4 Bean Casserole Recipe: One-Pan Heartiness With Smoky Paprika Depth - October 4, 2026
- 3-Ingredient Keto Mug Cake Recipe: Microwave Magic in 2 Minutes - October 4, 2026